
Three ways to reuse a template
MovePlnr keeps estimates, contracts, emails and texts per location. When you open a second branch, you have three ways to avoid starting from a blank page:
Company templates
Do this: one copy, many branches.
Migrate templates
Do this: a new branch, set up in one sitting.
Import notifications
Do this: emails from a template you trust.
Share one template with every location
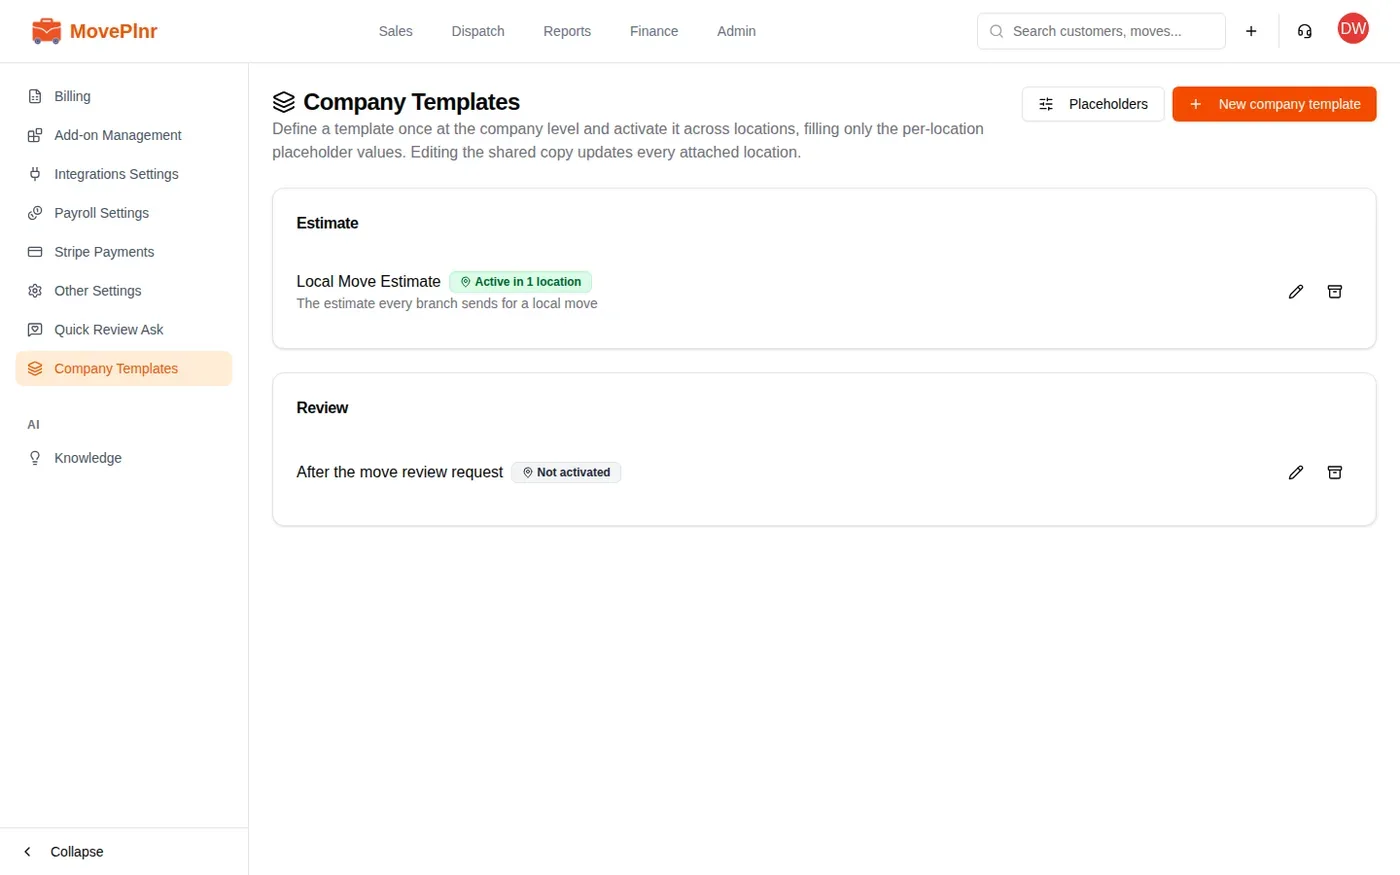
Open Company Templates in your company settings. Templates are grouped by kind. Each one shows where it is in use: Active in 1 location, or Not activated if no branch uses it yet.
Make a company template
A company template always starts from a template one of your locations already has.
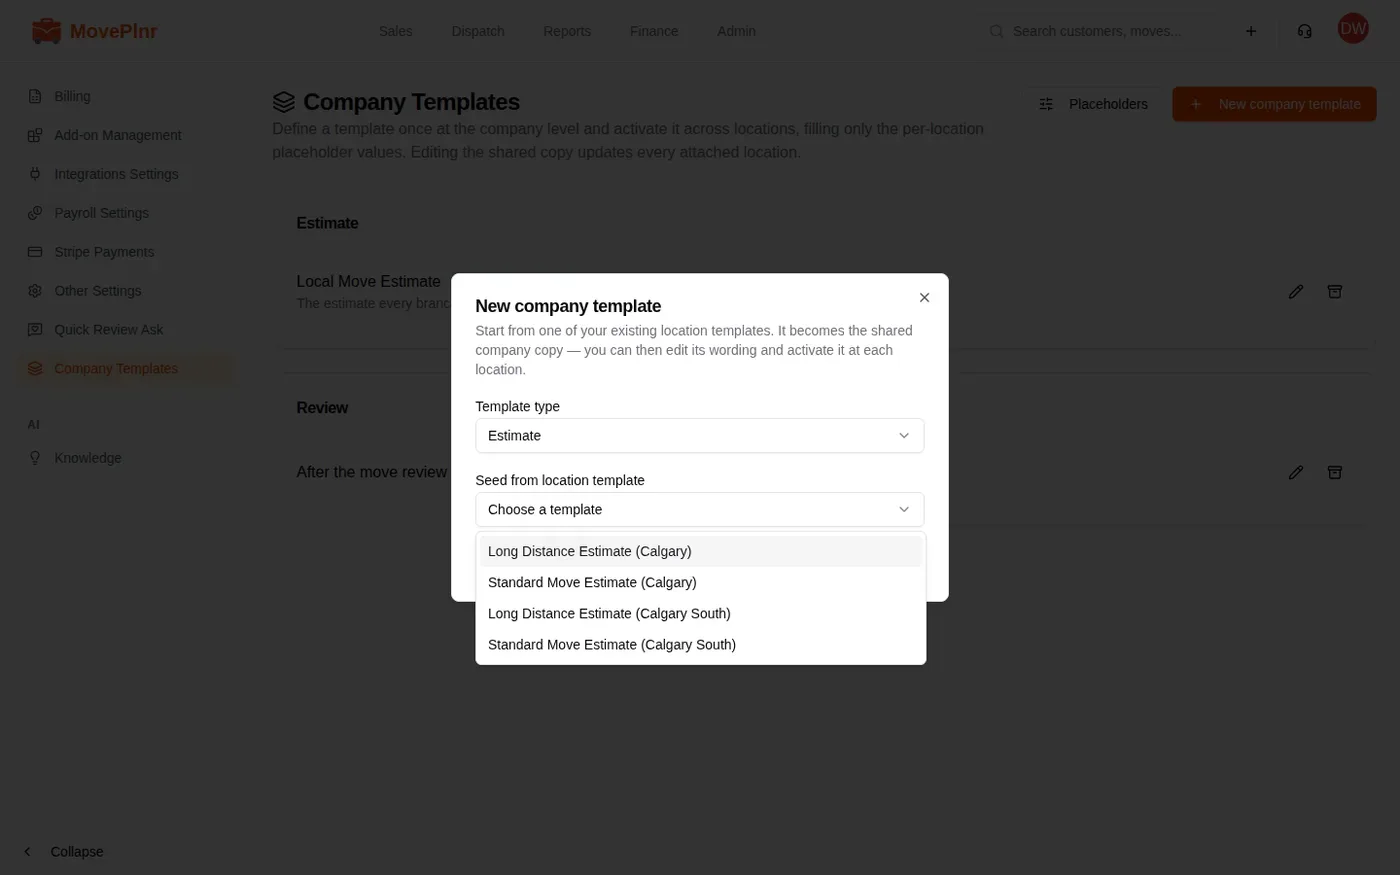
- Click New company template.
- Under Template type, pick the kind of template, such as Estimate.
- Under Seed from location template, pick the location template to start from. Each one shows its location in brackets.
- Click Create. The new company template opens.
The location template you started from stays where it is. The company template is a separate, shared copy.
Edit the shared wording
The Content tab holds the wording every branch sends: the name, the description your team sees, and the customer-facing text. For an estimate that is the document title, the opening and closing paragraphs, and the accept and decline pages. Click Save when you are done. The change reaches every location where the template is active.
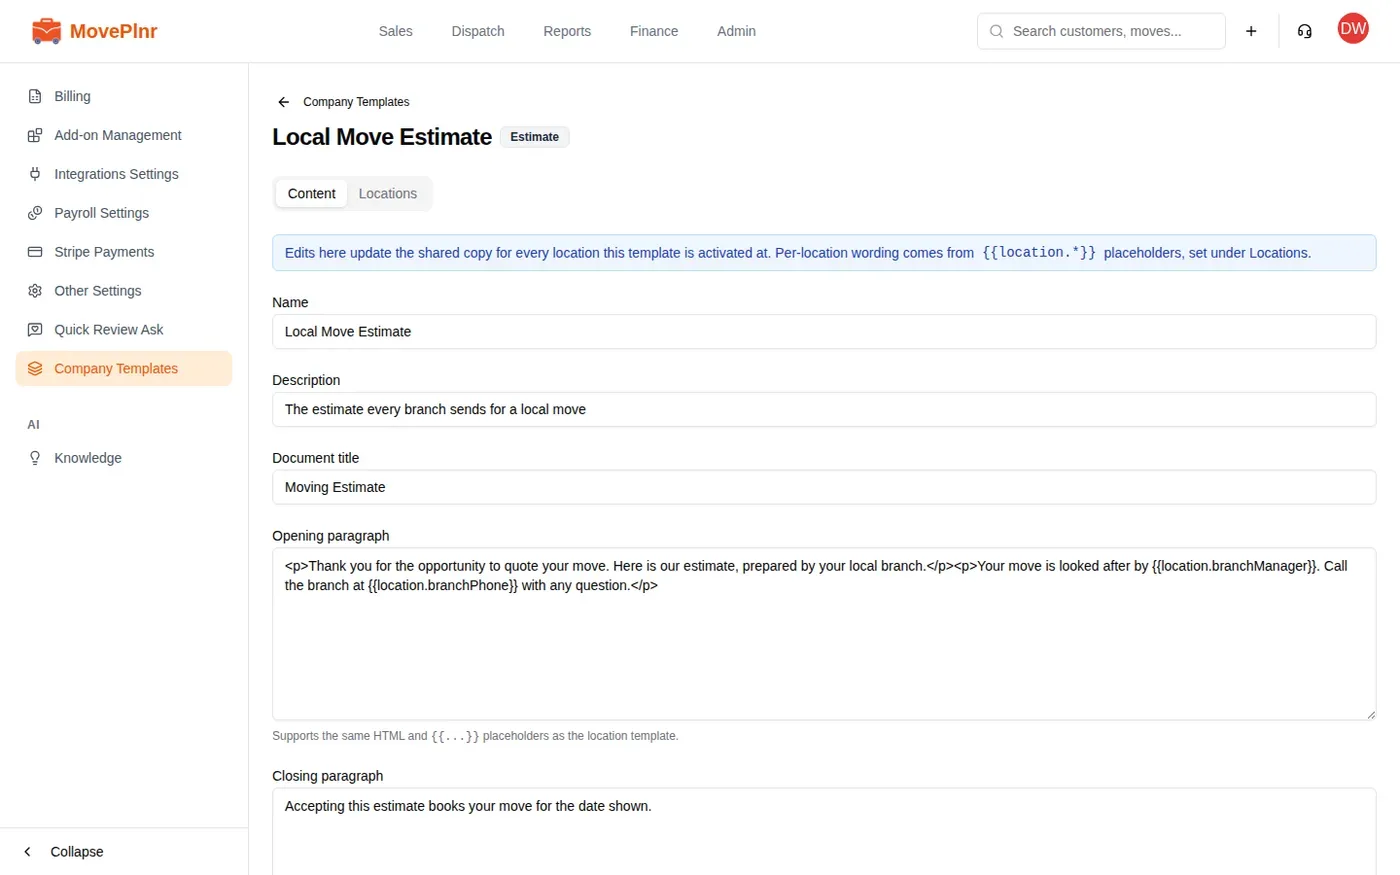
Where the wording should differ by branch, use a location placeholder, written like {{location.branchPhone}}. Each location fills in its own value, and the customer sees that value in place of the placeholder.
For contracts and waivers, the Content tab edits the title and instructions. The PDF and its signature fields come from the location template you started from. To use a different PDF, make a new company template from a location template that has it.
Set up placeholders
Click Placeholders on the Company Templates page to see the Location Placeholders. Click New placeholder to add one.
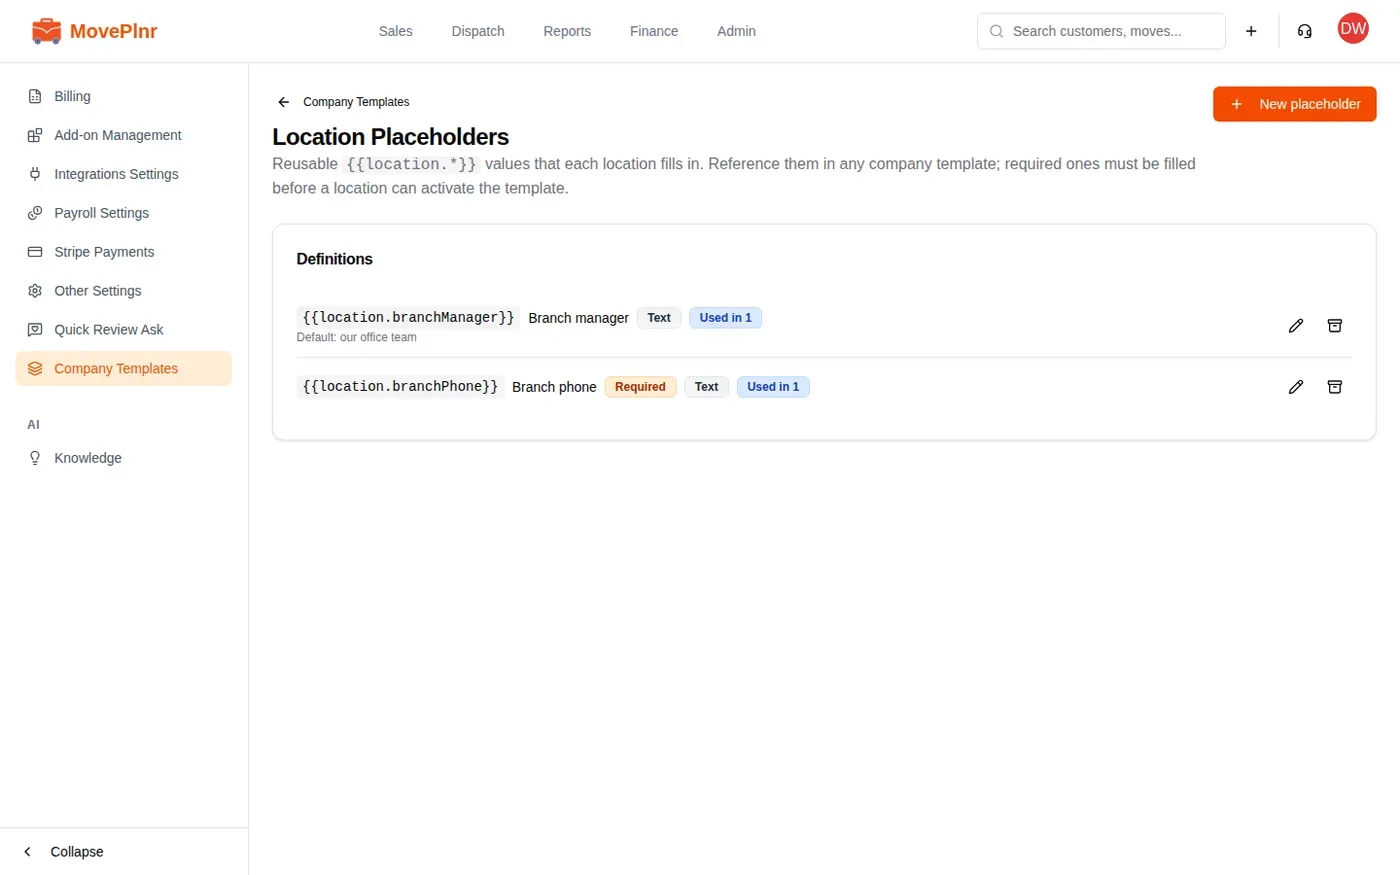
- The key is the name you type in the template, such as branchPhone. Once a template uses it, the key is locked; the label stays editable.
- The label is what admins see when they fill in each branch’s value.
- A placeholder marked Required must have a value at a location before that location can turn on a template that uses it.
- A placeholder can be text, a percent or a currency amount, and can have a default.
- Used in 1 tells you how many company templates use it.
Turn it on at each location
Open the template and click the Locations tab. Every active location has its own card, with a box for each placeholder the template uses.
- Fill in the branch’s values. Each one saves when you click out of the box.
- When the location shows Ready, flip Activate. It changes to Active.
- To make it the location’s first choice, flip Default. The switch appears once the template is active there.
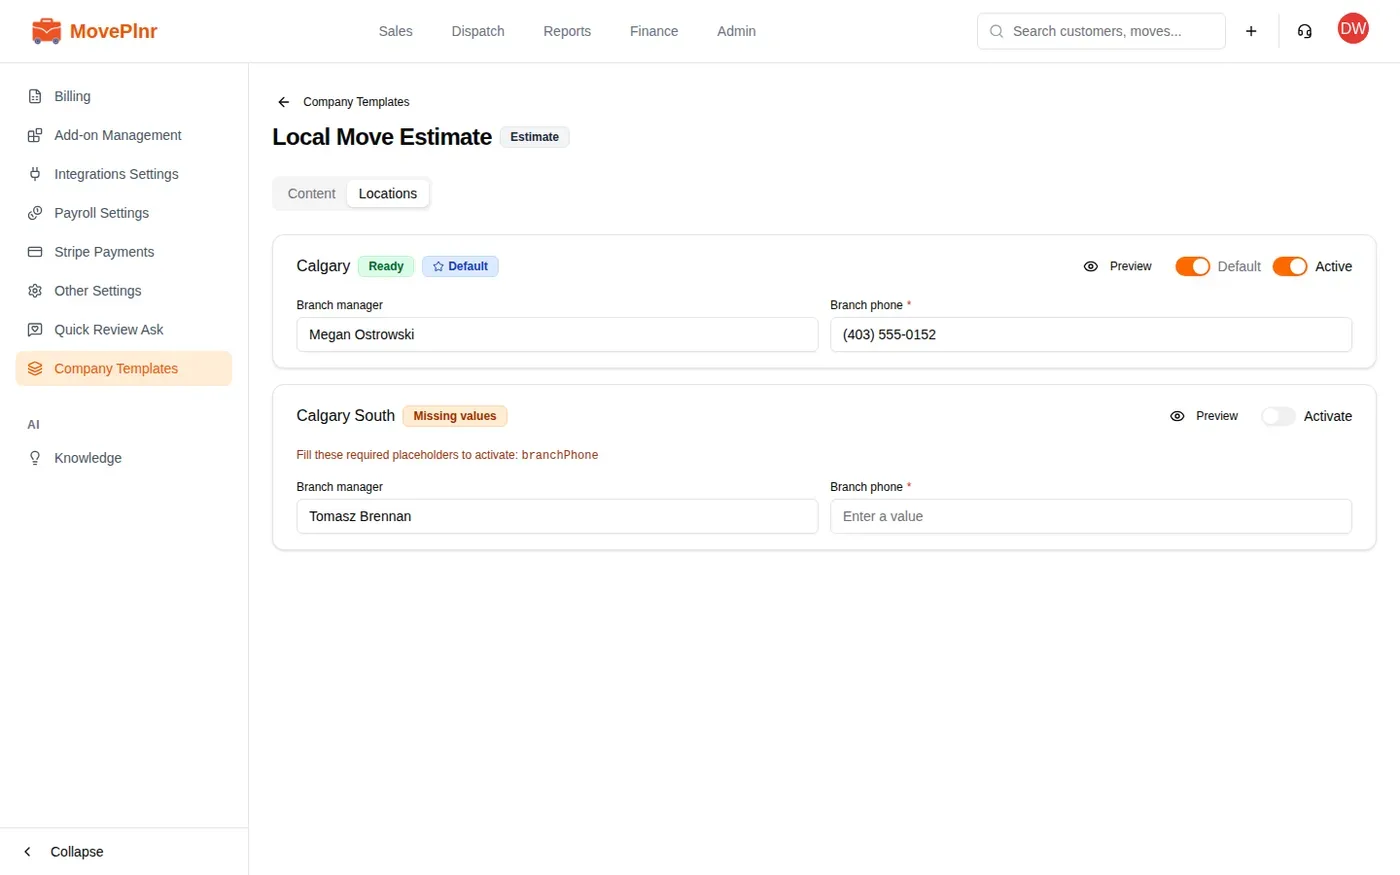
A location with a required placeholder still empty shows Missing values and names what is missing, and its switch stays off until you fill it in.
Check the result before customers see it
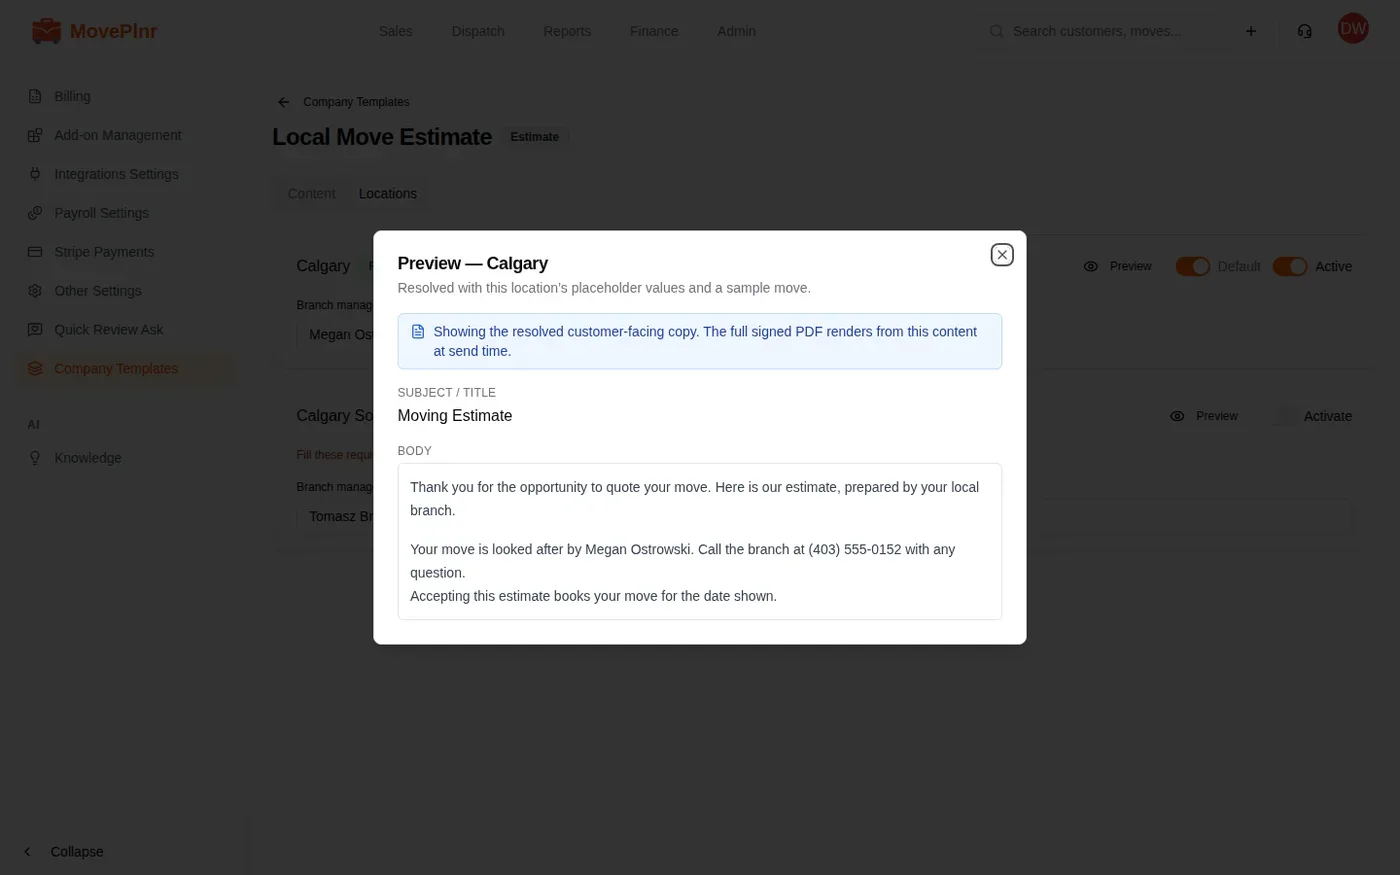
Click Preview on a location’s card. MovePlnr shows the wording with that branch’s values and a sample move filled in. If any placeholder has no value at that location, the preview lists it, so a blank never reaches a customer unnoticed.
Where your branches see it
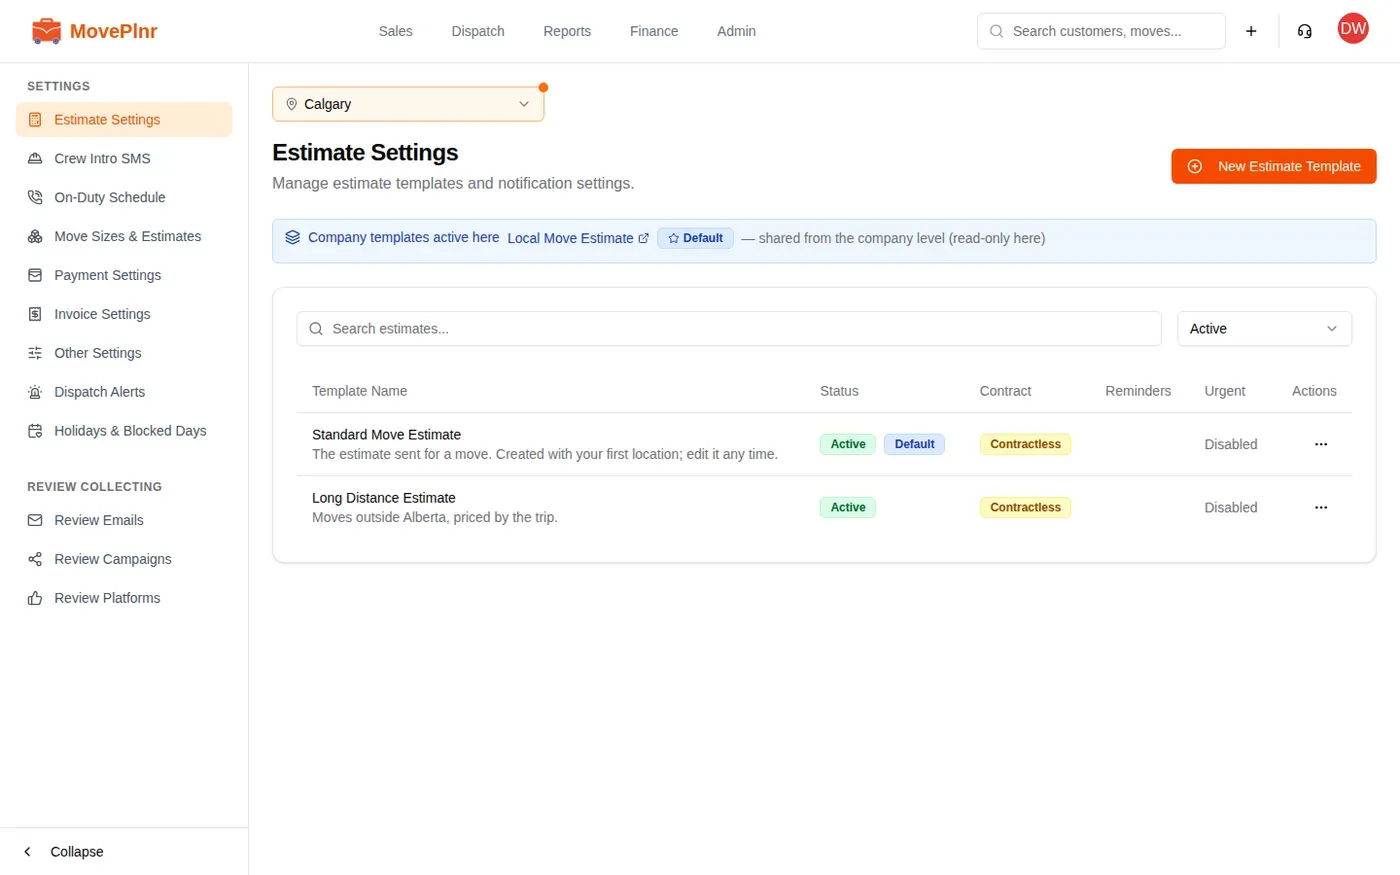
A location’s own settings page shows the company templates active there, under Company templates active here, with a link back. They are read-only on that page: change them from Company Templates.
To retire a company template, turn it off at every location, then click the archive icon on its row.
Copy a location’s templates to another
Use the Migrate Templates wizard when a new branch should start with what another branch already has.
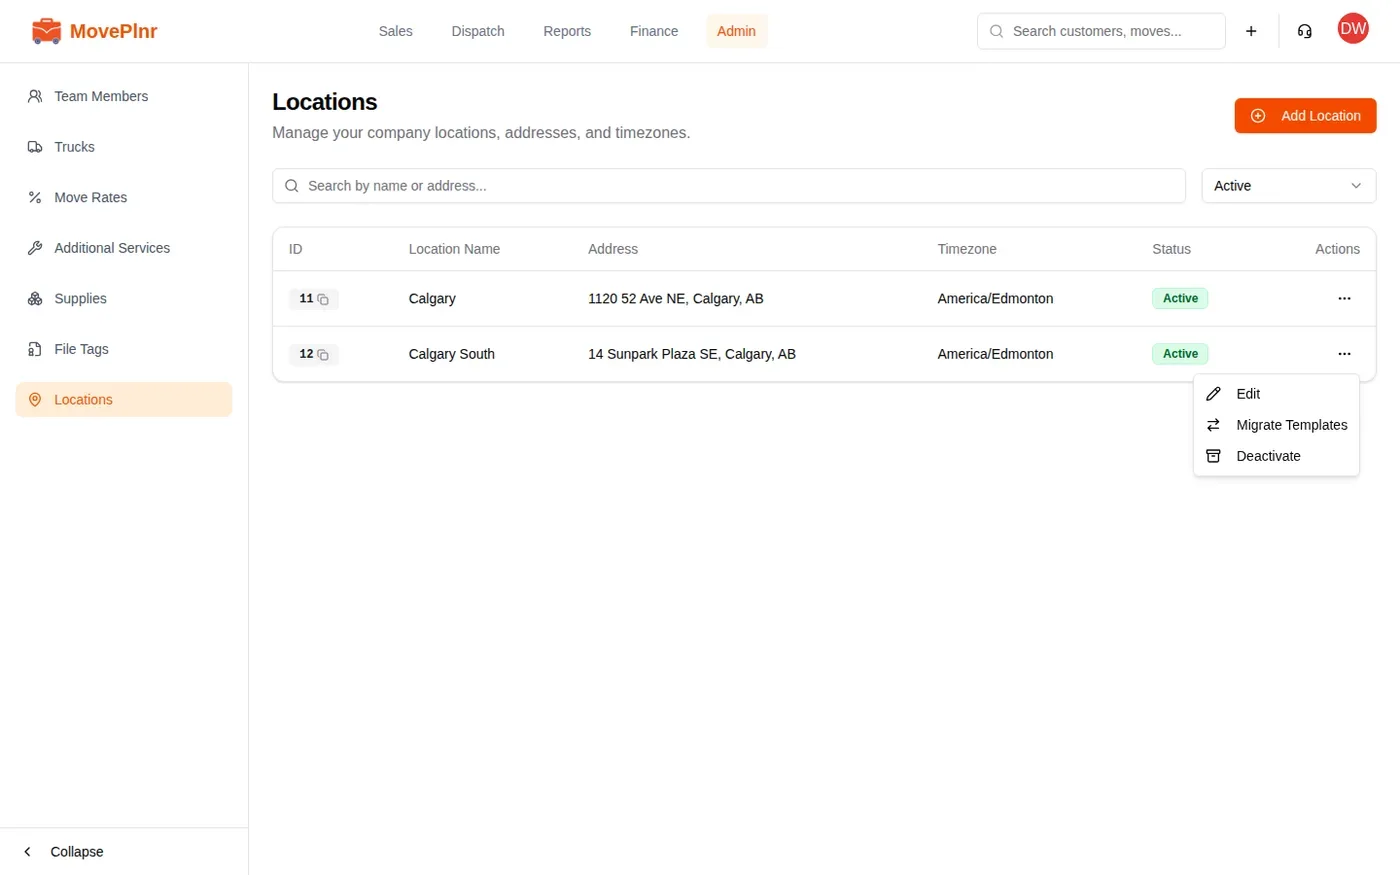
- Open Admin, then Locations.
- Click the three dots on the row of the location you are copying to, and choose Migrate Templates.
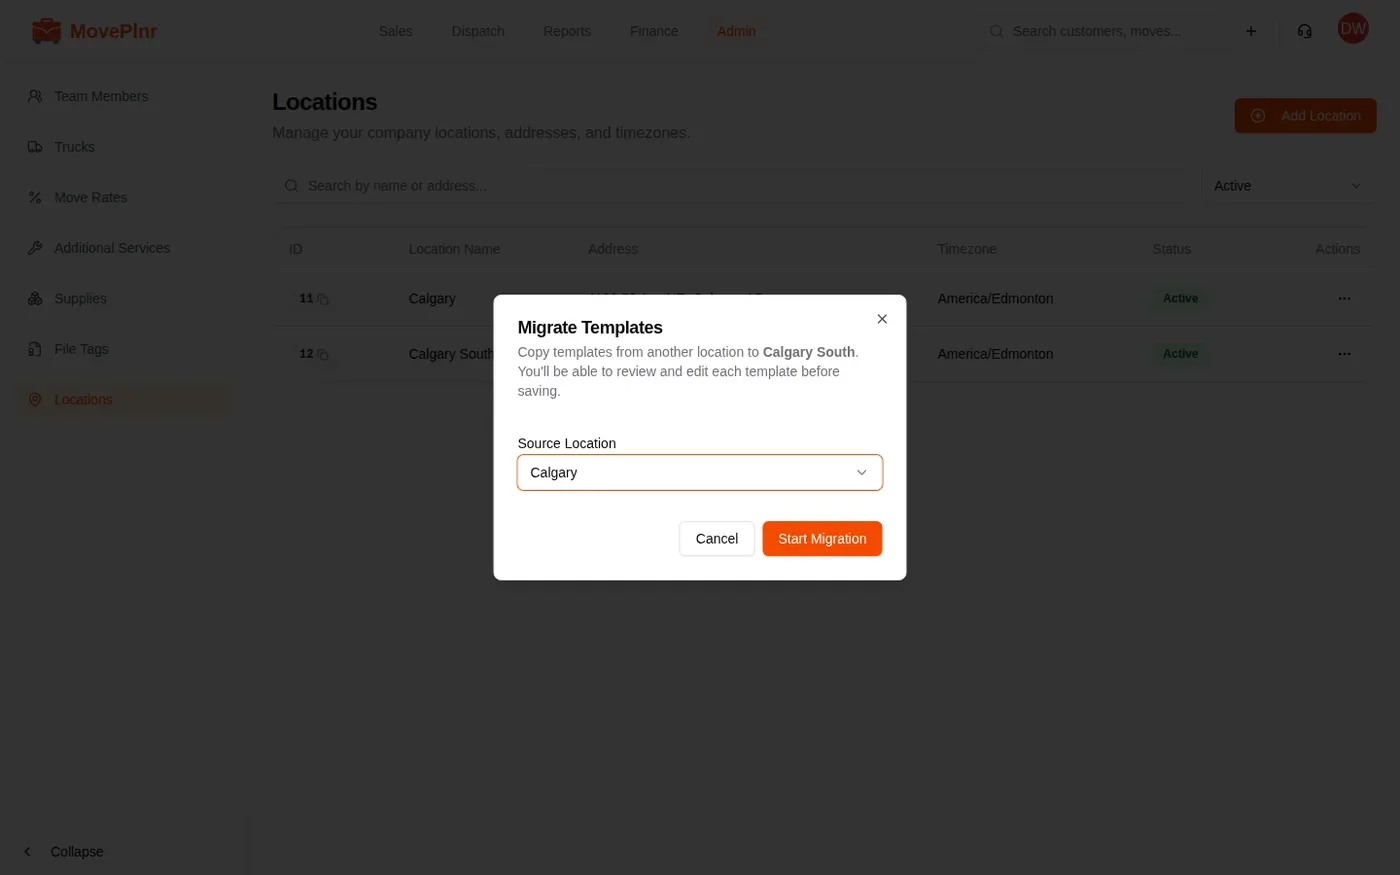
- Under Source Location, pick the branch to copy from, then click Start Migration.
Work through the wizard
The wizard lists everything the source branch has, in groups: contract templates, estimate settings, estimate emails, review emails, the system emails (such as reminders and schedules) and campaign emails. It opens on the first one.
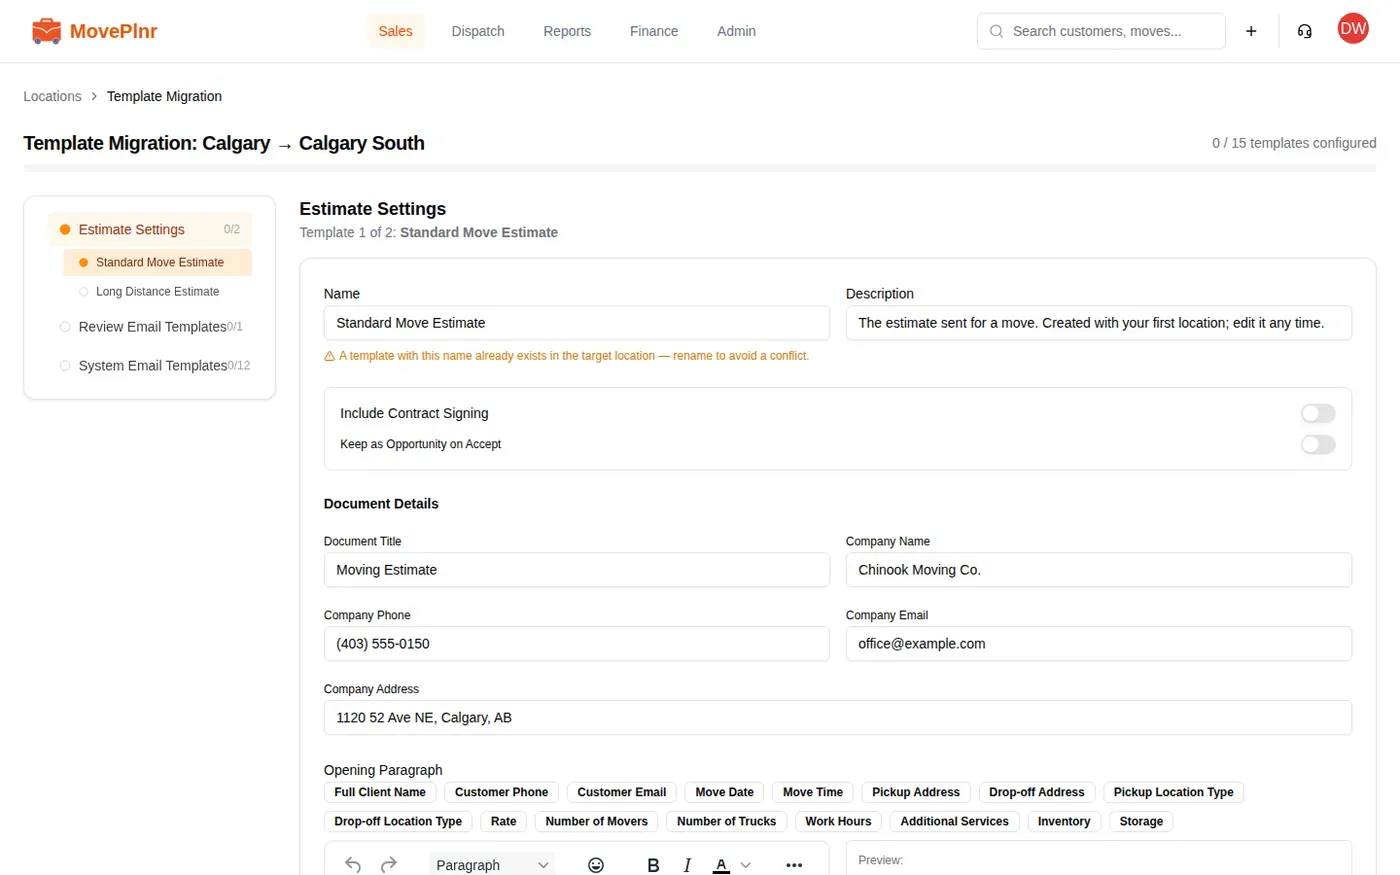
- Read the template. It is filled in from the source branch, so check anything that should be different here: the address, the phone number, the wording.
- Click Save & Next to save it to the new location, or Skip to leave it out.
- Repeat until the bar is full. Click any template in the list on the left to jump to it.
Estimate settings, emails and contract templates are added to the new location as new templates. System emails replace the new location’s own version. If the new location already has a template with the same name, the wizard warns you so you can rename it first.
When you finish, the wizard shows how many templates you saved and skipped. If you reload the page partway through, it keeps your place in that browser tab.
Import notifications from another template
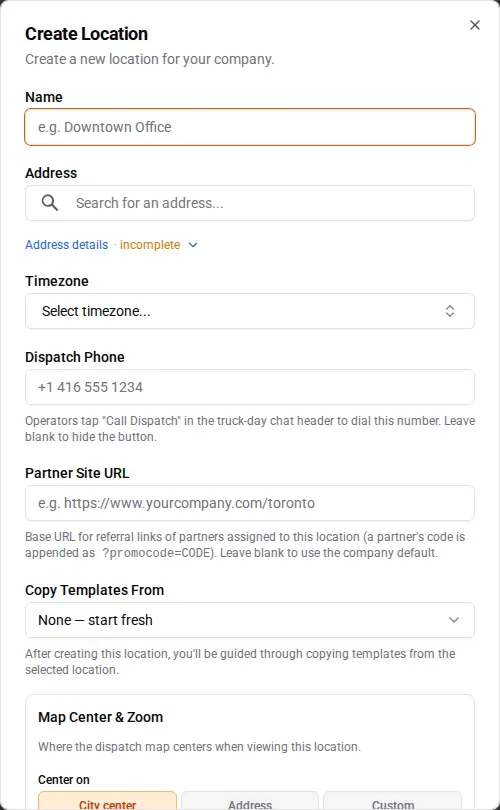
Every estimate template and contract template has its own emails: the one that sends the estimate, the reminders, the confirmation. If another location already has good ones, import them instead of writing them again.
- Open Estimate Settings (or Contract Settings for a contract) at the location you are importing into.
- Click the three dots on the template’s row and choose Import Notifications.
- Pick the Source Location, then the template there to import from, and click Start Import.
- For each email, the source is on the left and this template’s version on the right. Click Copy Over to bring the source wording across, then adjust it if you need to.
- Click Save & Next to keep it, or Skip to keep this template’s own version. The last one saves and finishes.
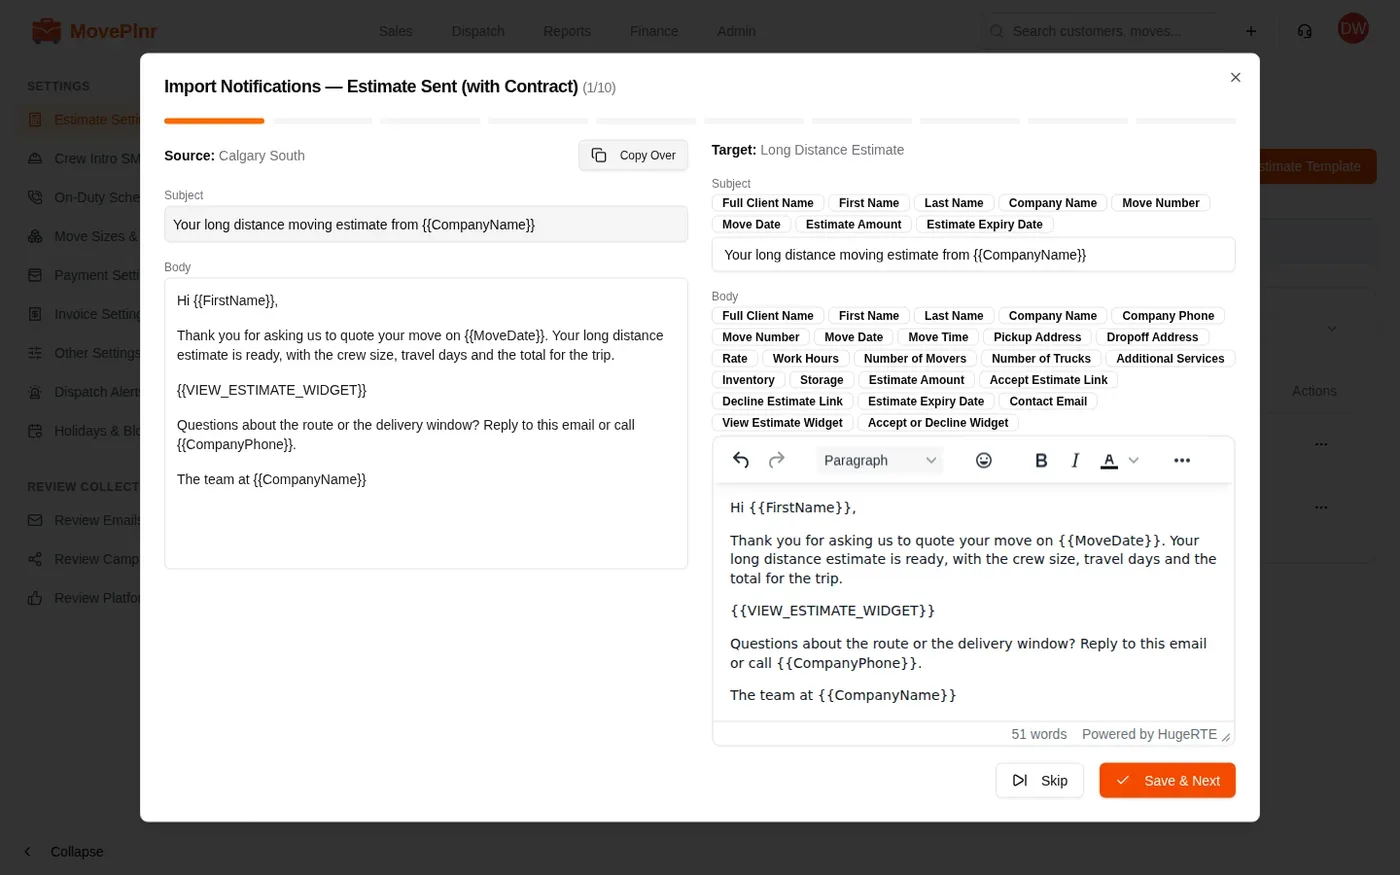
When the import is done, MovePlnr shows how many emails were saved and how many were skipped.