
Open Compass
Compass lives in the help panel. Click the headset at the top of any page, beside the phone and the bell. The panel opens on the right, so you can follow its steps while you work on the page beside it. On a phone it opens as a sheet from the bottom of the screen.
While your company is still setting up, a company admin lands in the setup chat. Everyone else lands on the panel’s start page.
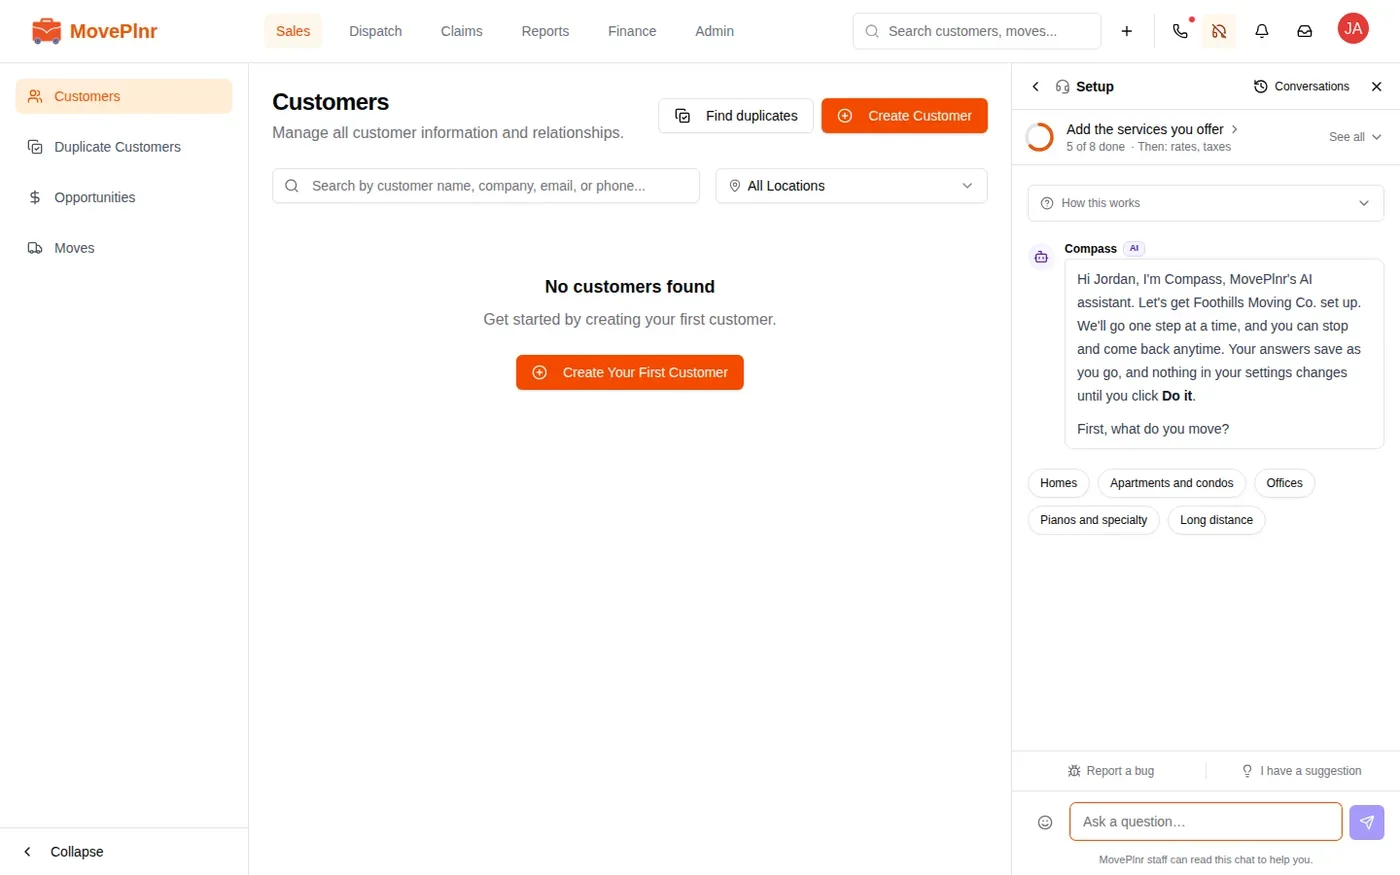
Finish your setup
The setup chat goes one step at a time: your first location, a few questions about your business, then the rest of the setup checklist. Compass asks one question per message, with buttons for the common answers.
A brand new company starts with its location, because the rest of the app opens once it exists. Compass asks for the street address you work from. Type it in, or use the Fill in the location form button just above the box if you’d rather fill in a form.
Once you’ve answered the questions about your business, Compass lays out your setup plan in the chat. It splits the checklist into three parts: getting set up, connecting your tools, and your first move. Each part says how many of its steps are done, and each step carries a short note from your answers, such as how you price. Steps that don’t fit your business are listed as left out, with the reason.
- Click the headset. The panel opens on Setup.
- Read the top line: it names the step you are on and how many are done.
- Answer Compass’s question with a button, or type your own answer in the box at the bottom.
- When Compass offers to make a change, it shows it on a card. Check it, then click Do it. Nothing in your settings changes until you do.
- Rather do a step yourself? Click its name at the top of the panel to open its page. When you are finished, type done in the chat and Compass moves on.
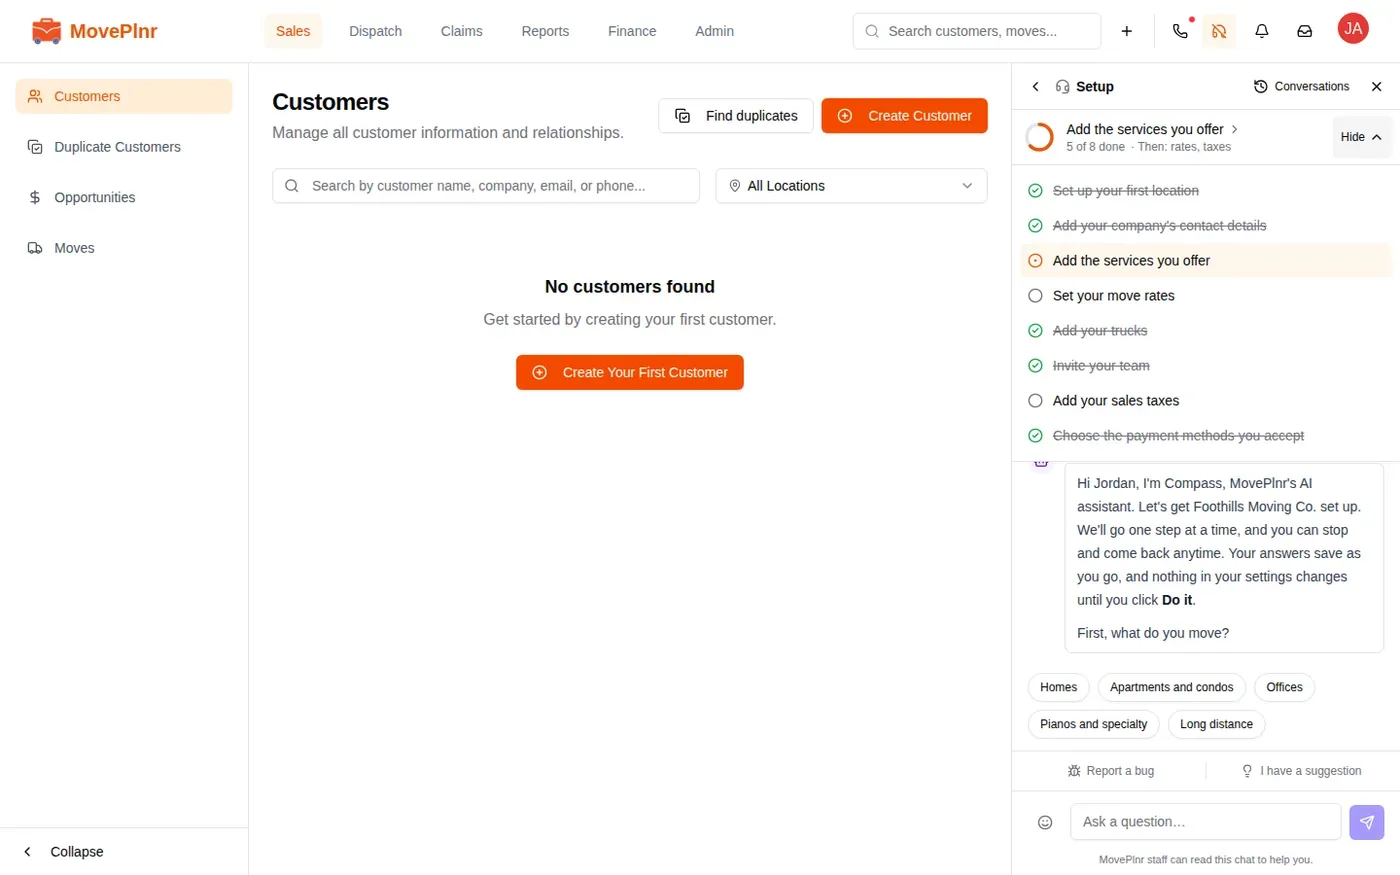
Click See all to list every step. Done steps are ticked and crossed out, and the current one is highlighted. Click Hide to fold the list away again. The checklist ticks a step off by itself, however you did it: in the chat, on the step’s own page, or in another tab.
Watch a step before you do it
For most steps, Compass can show a short clip from the matching Help Centre guide, right in the chat. Click the clip to play just that part of the guide.
- Show me in the app opens the step’s page and rings the button to press, with a one line tip beside it. From there you can replay the clip, or click Got it to close the tip.
- Expand plays the same clip in a bigger window.
- Full guide opens the whole guide on the Help Centre, at that section, in a new tab.
If you step away before setup is done, the reminder emails carry the clip for the step you are on, so you can watch it and pick up where you left off.
Ask Compass a question
Click the arrow at the top left of the panel to reach its start page, How can we help?. From any page, this is where everything in the panel starts.
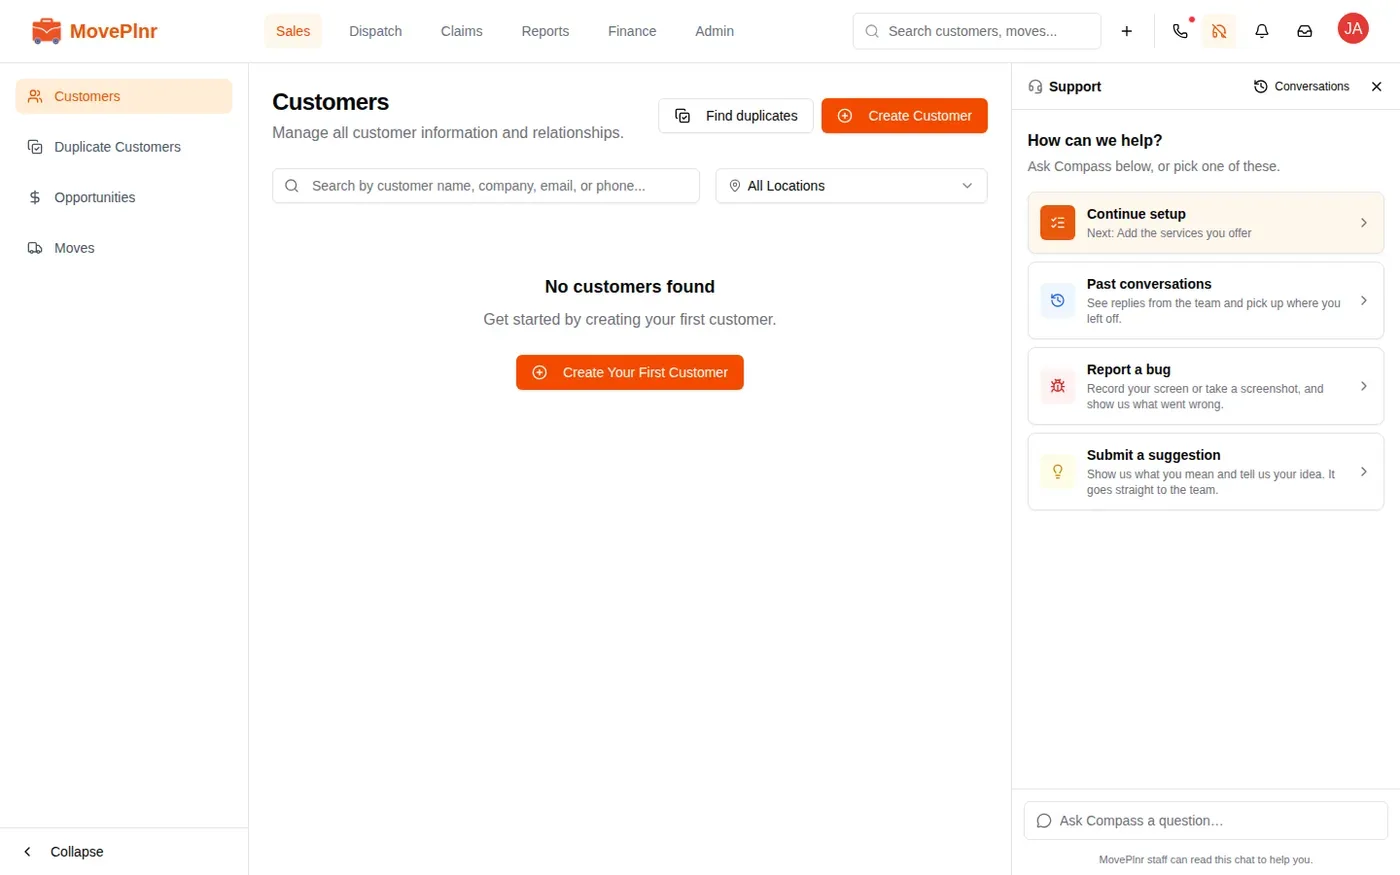
To ask something, click the box at the bottom of the start page and type it in your own words. Compass answers how-to questions about MovePlnr, and it can make some changes for you: it asks first whether you want it done in the chat or want to be shown where to do it in the app. Every change comes as a card that waits for your Do it.
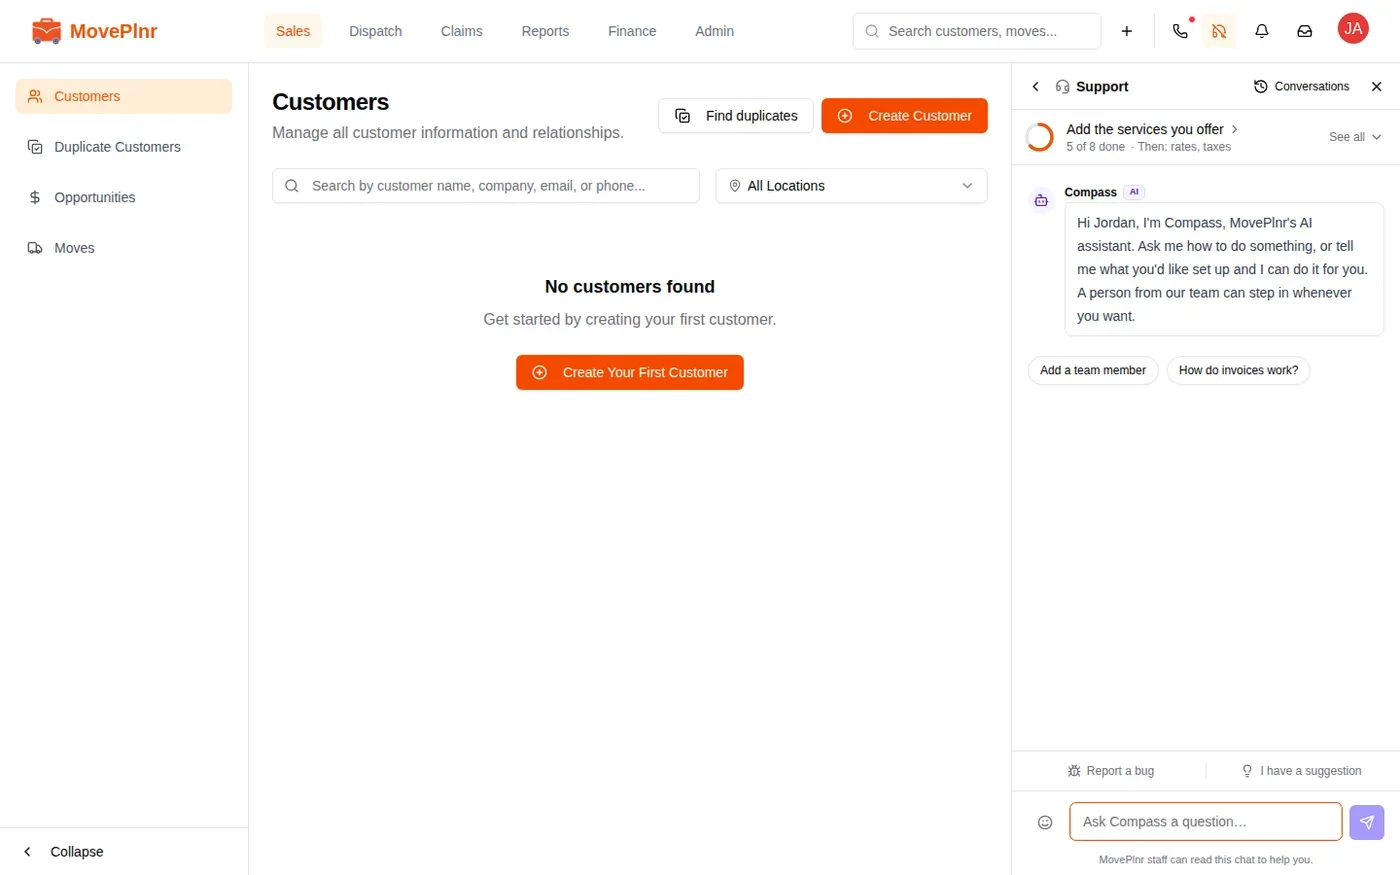
Compass does more of the setup in the chat, each time through a card you confirm:
- It turns on an add-on you need, and says what the add-on adds before you click.
- It adds your first customer and starts their move. You fill in the addresses and the estimate on the move’s page, and nothing is sent to the customer.
- It invites a team member on one of your access presets, such as Dispatcher or Crew member. Admins are still added on the team members page.
Compass also knows your day. Ask which move and claim chats are waiting on you, and it can draft a reply or send one after you confirm. Ask about your schedule, or who is available on a given day.
Need a person instead? Say so in the chat. Someone from the MovePlnr team replies in the same conversation. MovePlnr staff can read your chats so they can help you, as the line under the box says.
Compass remembers how you work
Tell Compass how you like your answers (“keep it short”) or how you work (“I do the Monday payroll run”) and it remembers, so you don’t repeat yourself. It saves only what you tell it, and never passwords, card numbers or details about customers. Your memories are yours: your teammates, company admins included, never see them. To check what it remembers, ask it. To make it forget something, ask it to forget it.
Report a problem
Something not working the way it should? Show the team. A screenshot or a short screen recording tells them more than a paragraph.
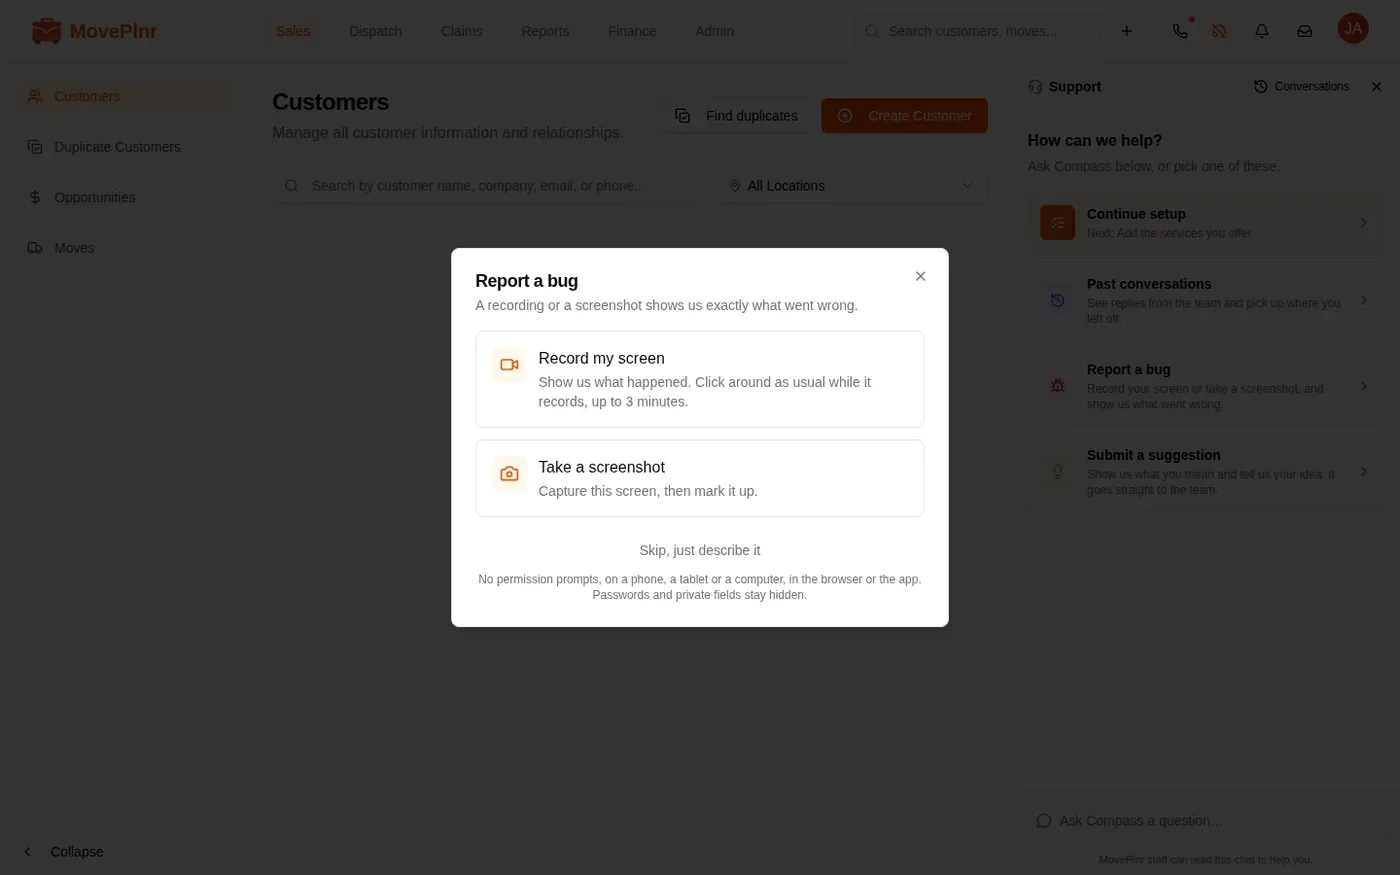
- On the panel’s start page, click the red card that says Record your screen or take a screenshot, and show us what went wrong. In a chat, use the first link above the box at the bottom.
- Pick Record my screen and do what went wrong while it records, up to three minutes. Or pick Take a screenshot to capture the page as it is now. Skip, just describe it goes straight to the text box.
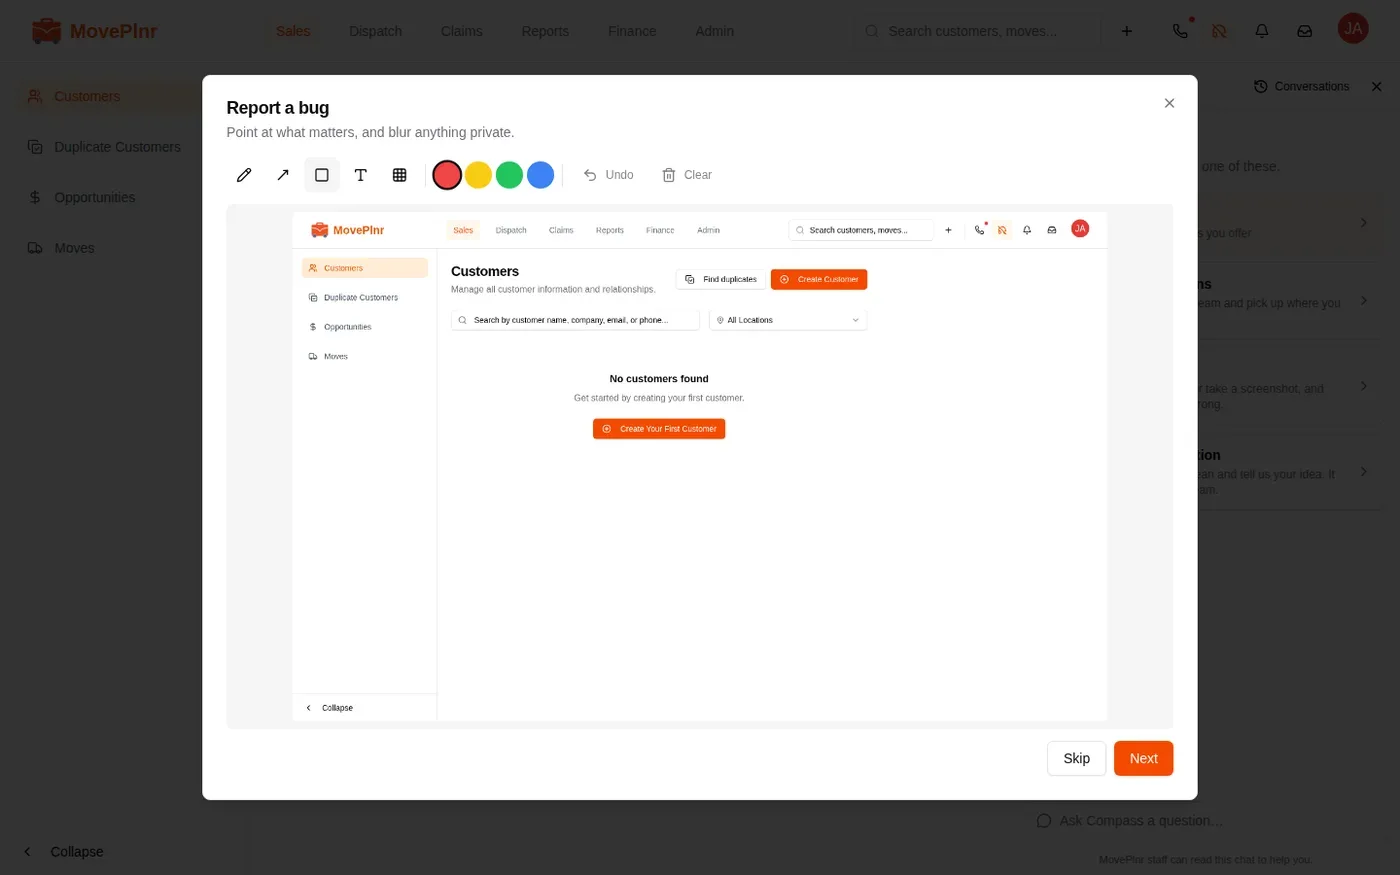
- Mark up the screenshot: draw, add an arrow, a box or a line of text, or blur anything private. Undo and Clear take marks back off. Click Next, or Skip to send the screenshot as it is.
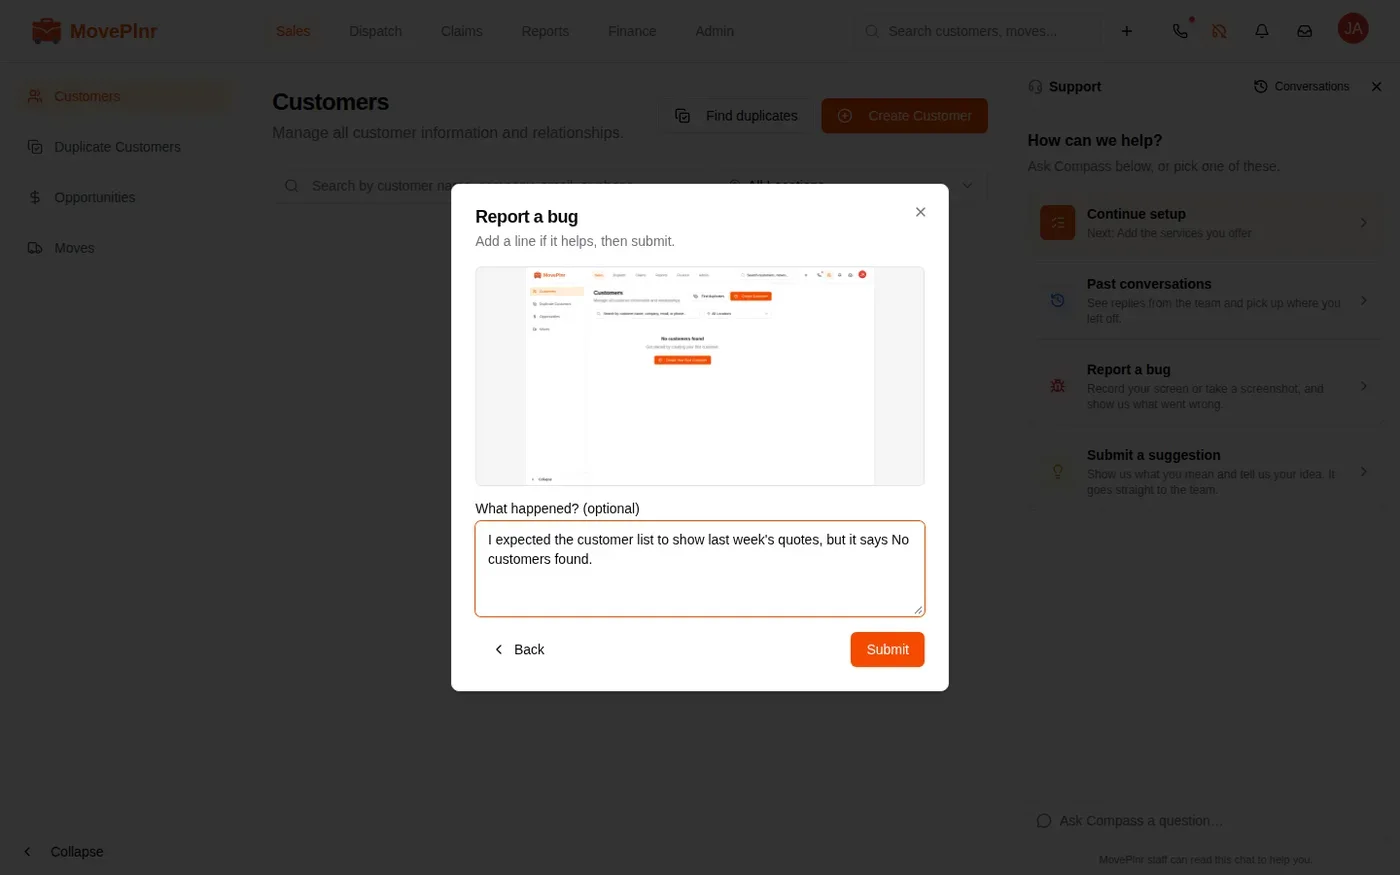
- Add a line about what you expected and what happened instead. It is optional.
- Click Submit.
The report goes to the team straight away, and the panel opens on it as a new conversation. Compass confirms it and then adds a short note about what it saw. Your recent errors go along with it. When the problem is fixed, you get one message saying the fix ships in the next release, and the conversation moves to the top of your list.
Share an idea
Click Submit a suggestion on the start page, or I have a suggestion above the box in a chat. The same window opens: show what you mean with a recording or a screenshot, add a line about your idea, and submit. It goes straight to the team, and the conversation shows when they start on it and when it ships.
Open Compass from a guide or an email
Help Centre guides and the setup reminder emails link straight into MovePlnr. Follow one and sign in if you are asked to: MovePlnr opens the page that part of the guide is about, and the help panel opens beside it with Compass’s note on where you were reading and the clip for that part.
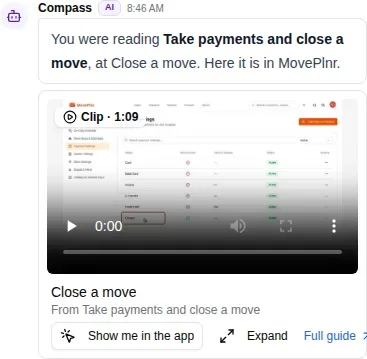
When the page needs an add-on your company hasn’t turned on, Compass says so. A company admin gets a card that turns it on; anyone else is told who can. When the page isn’t part of your access, you still get the clip, and Compass says who can change what you can open.
Find past conversations
Click Conversations at the top of the panel, or Past conversations on the start page. Your conversations lists every conversation you’ve had, newest first, with any unread replies. While setup is unfinished, the setup chat stays pinned at the top with a Setup badge. Click New conversation to start fresh.
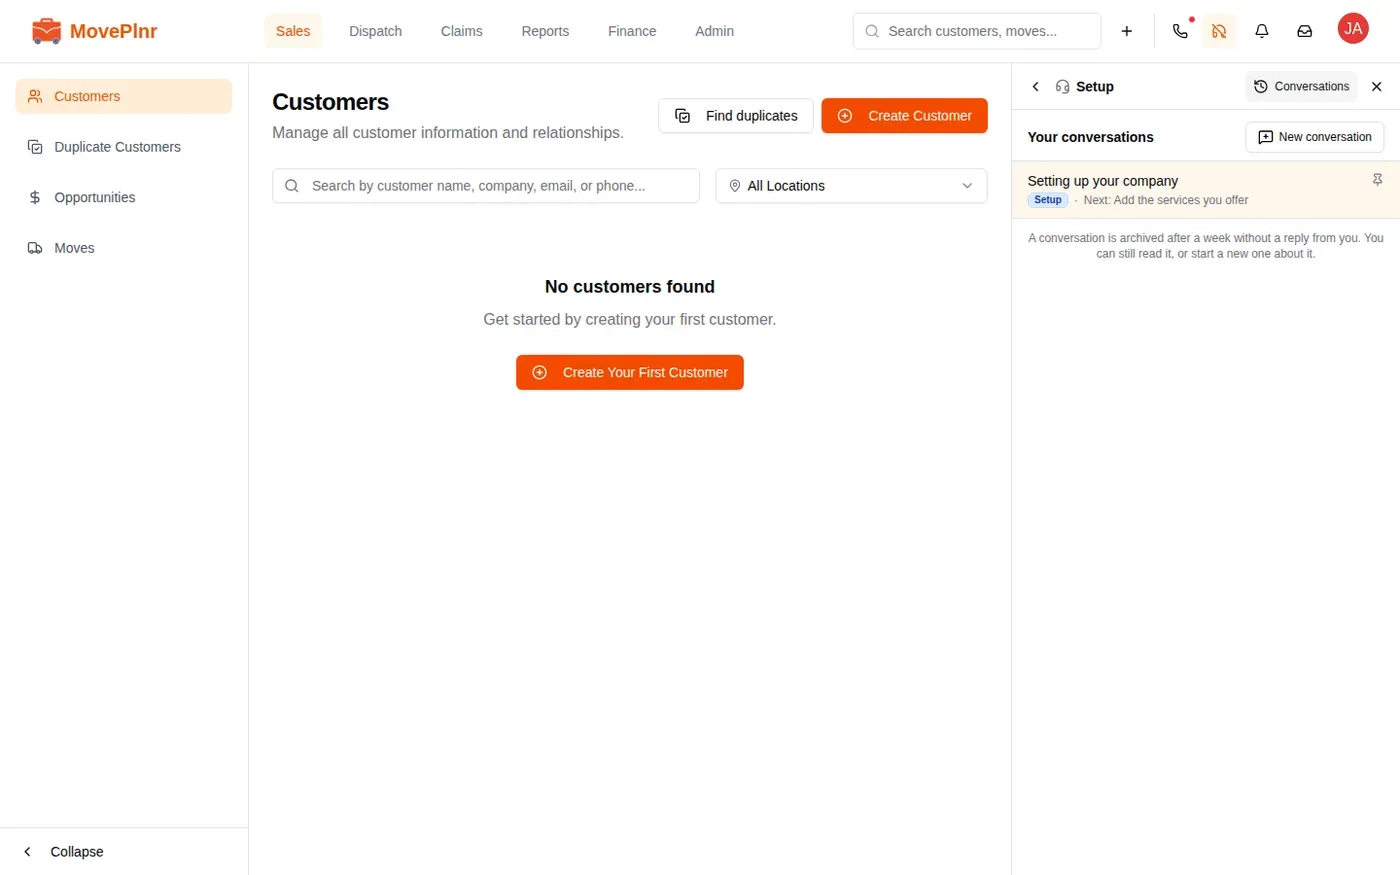
A conversation is archived after a week without a reply from you. You can still read it, and you can start a new conversation about it, which carries a short summary over so you don’t have to explain it again.
Teach Compass your company’s rules
Compass knows MovePlnr. The Company knowledge page is where you tell it how your company works: your deposit rule, which pianos you take, where the truck keys go after hours. It is in the company settings, under Knowledge, and company admins see it. The AI Agent always reads it; Compass reads it once company knowledge is turned on for your company.
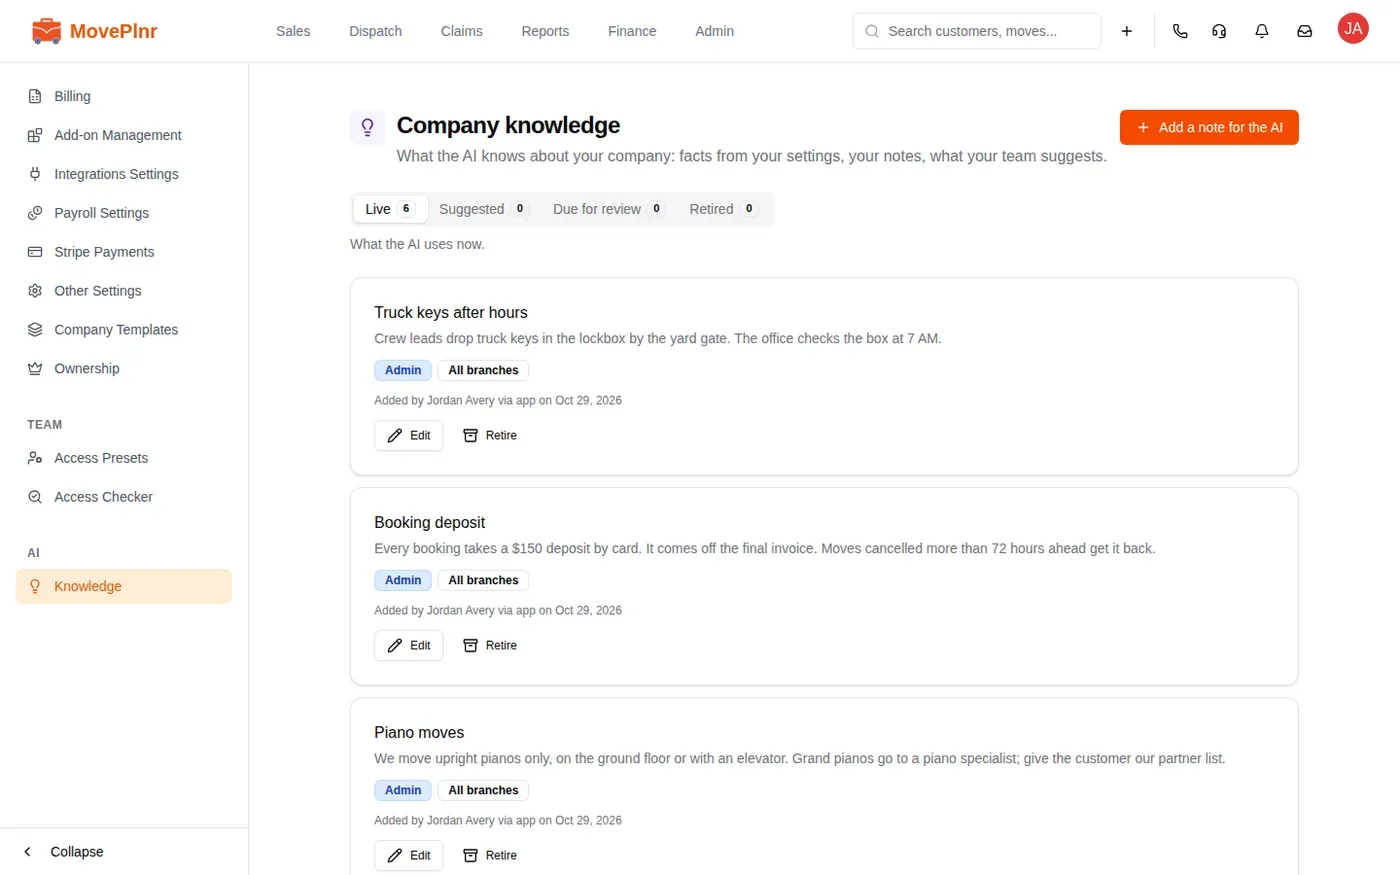
The page has four tabs:
- Live is what the AI uses now. It includes facts from your settings, such as office hours, and notes your admins wrote.
- Suggested holds what your team proposes. Anyone on staff can tell Compass how something works, and it waits here until an admin approves it.
- Due for review holds items past their review date. Confirm what still holds, edit what changed, retire the rest.
- Retired holds items no longer used.
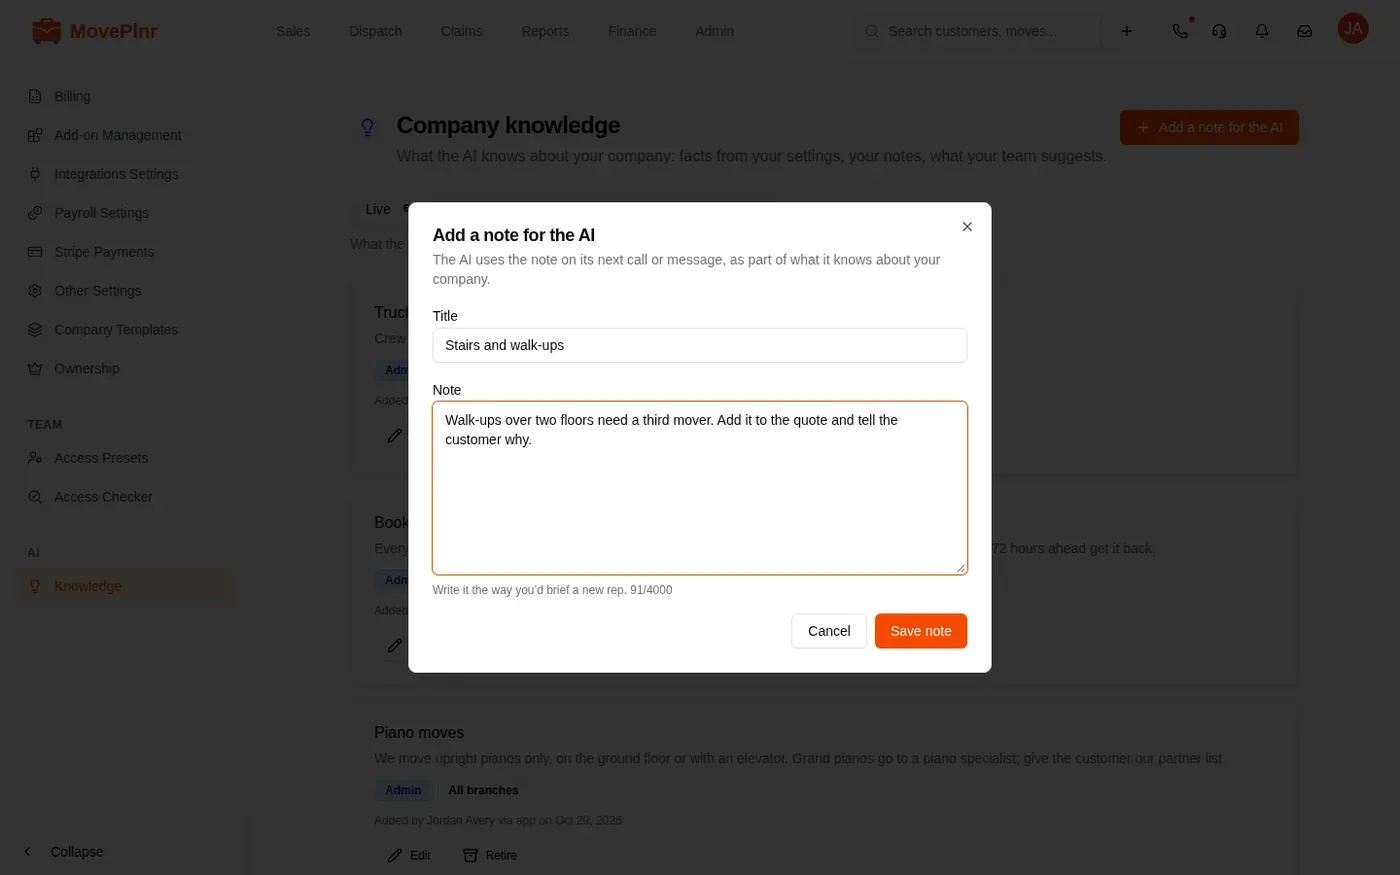
To add a rule of your own:
- Click Add a note for the AI.
- Give it a Title and write the Note the way you would brief a new person in the office.
- Click Save note. The AI uses it from its next message.
To change a note later, click Edit on it. To stop using one, click Retire.