
Before you start
You need to be a company admin to change these settings. Turning add-ons on or off is for the company owner only.
The setup checklist at the top of the setup chat lists every required step. Each step on this page ticks itself off as soon as the page holds what it needs, so there is no button to mark it done. Work through them in order: the first location comes first because everything else belongs to it.
Set up your first location
Your first location is the branch your moves run from. It needs a name, an address and a time zone. Until it exists, the app opens on the setup screen instead of the usual pages, and the first step of the checklist opens the location form: give it a name, pick the address from the list, choose a time zone and save. As soon as it is saved, the app opens and the step is ticked.
Every new location starts with five payment methods (cash, credit card, debit card, invoice and e-transfer) and one estimate template. Rates, services, trucks and taxes are not created for you: they are the next steps.
Add another location
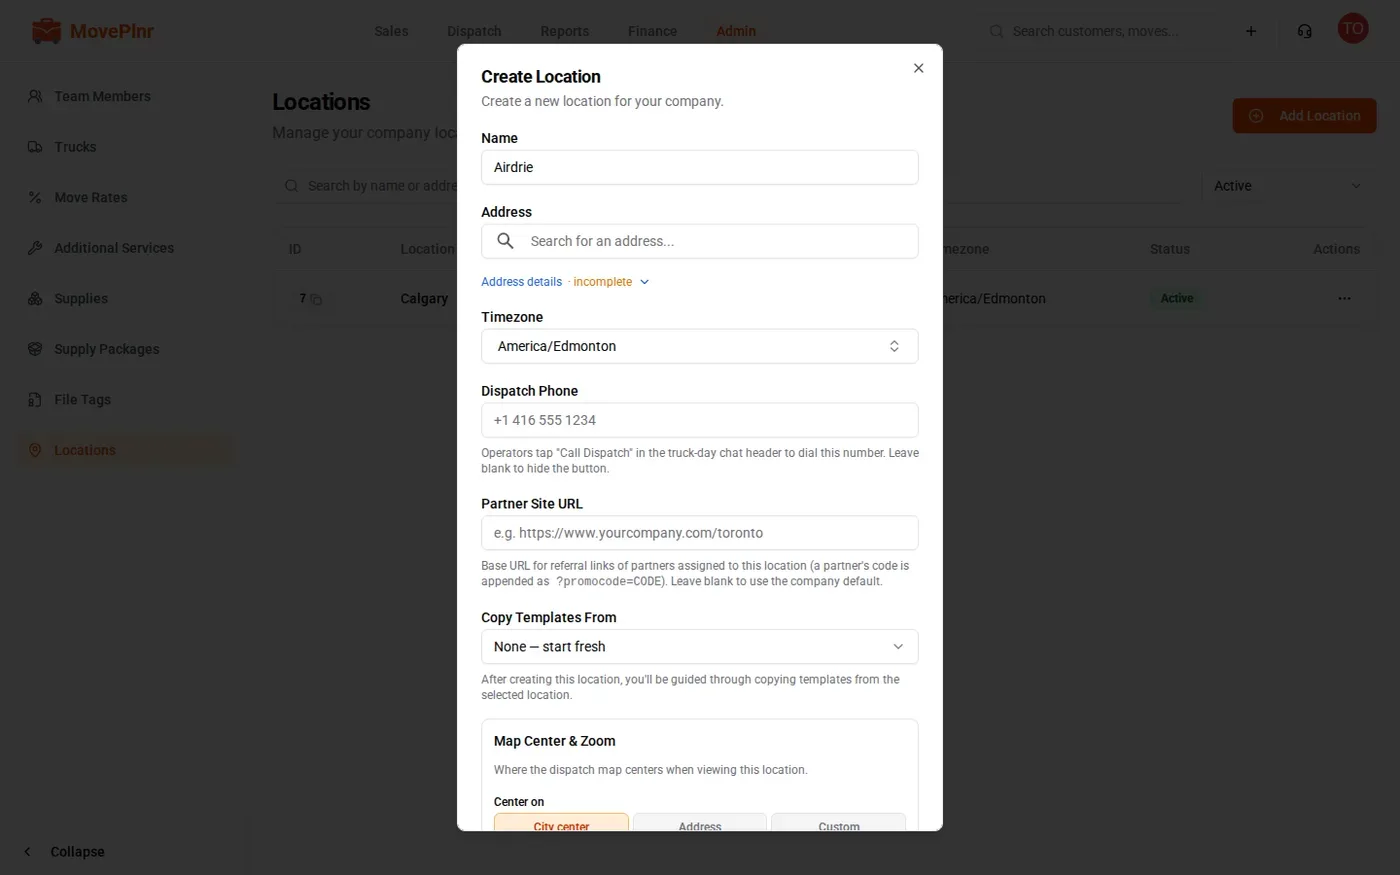
A company with the Multi-Location add-on adds its other branches from the same form:
- Click Admin at the top, then Locations in the sidebar.
- Click Add Location.
- Fill in the Name, pick the Address from the list and choose the Timezone.
- Click Save changes at the bottom of the form.
Check the time zone
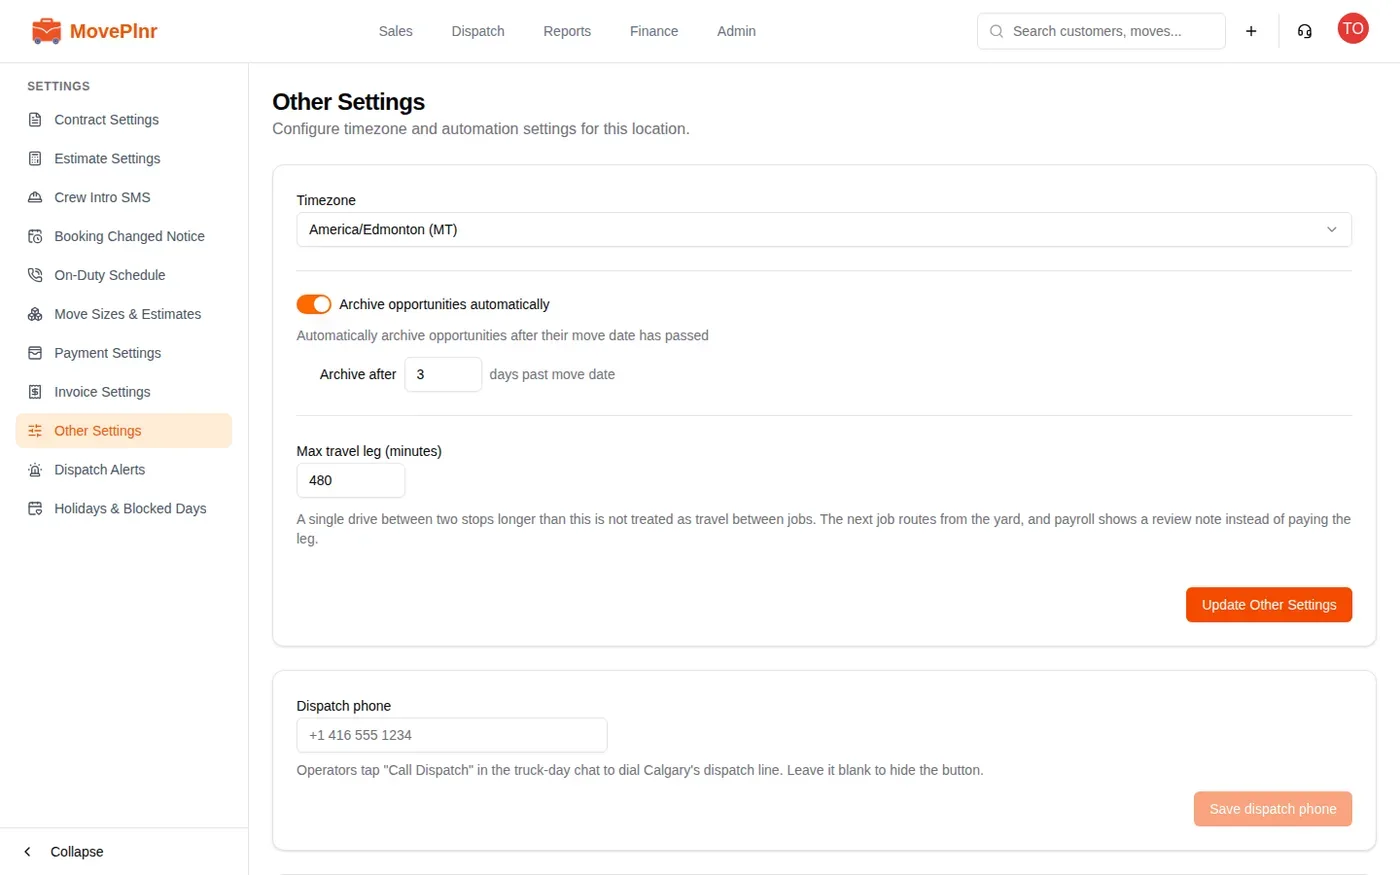
To check a location’s time zone later:
- Open the menu under your profile picture at the top right and choose Location Settings.
- In the sidebar, click Other Settings.
- Check Timezone. Every move time, reminder and report for this location uses it.
- Click Update Other Settings if you changed it.
Add your contact details
This step makes sure customers can reach you. It needs your company name, main phone number and main email, and a street address on your default location (the location form already asked for it, so that part is usually done).
- Open the menu under your profile picture and choose Company Settings.
- In the sidebar, click Other Settings.
- In Company Information, fill in Company Name, Reply-to Email and Company Phone.
- Check that Default Location is the location your moves run from.
- Click Update Company Settings.
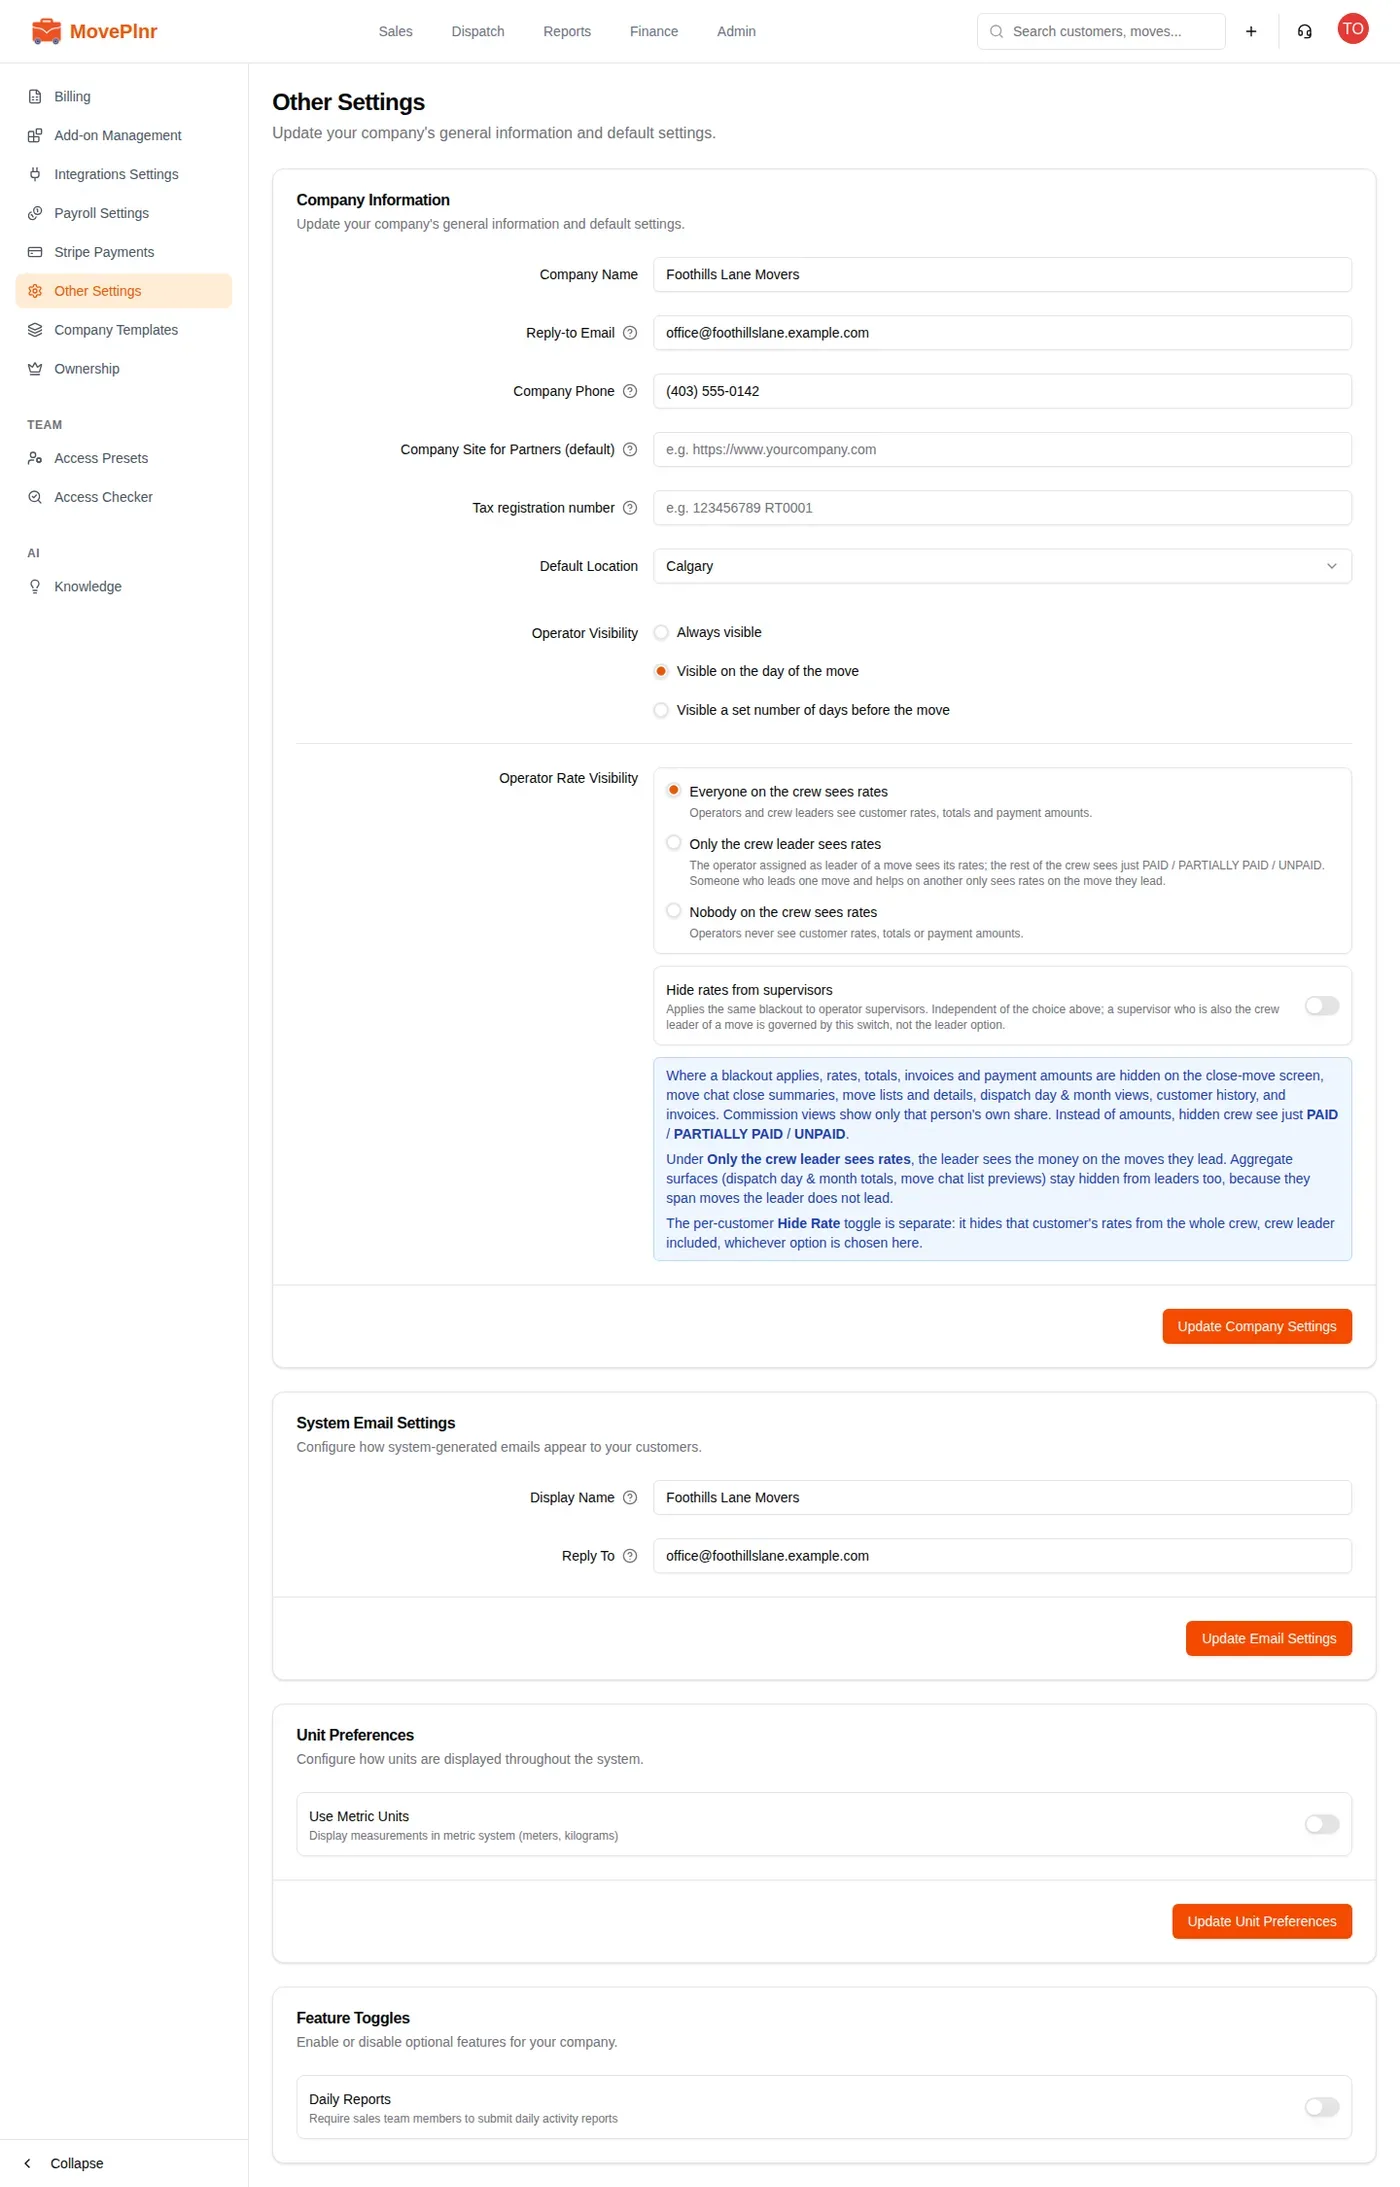
Reply-to Email and Company Phone also fill the company email and phone placeholders in your templates. Further down the same page, System Email Settings sets the name your system emails come from and where replies go. It has its own Update Email Settings button.
Add the services you offer
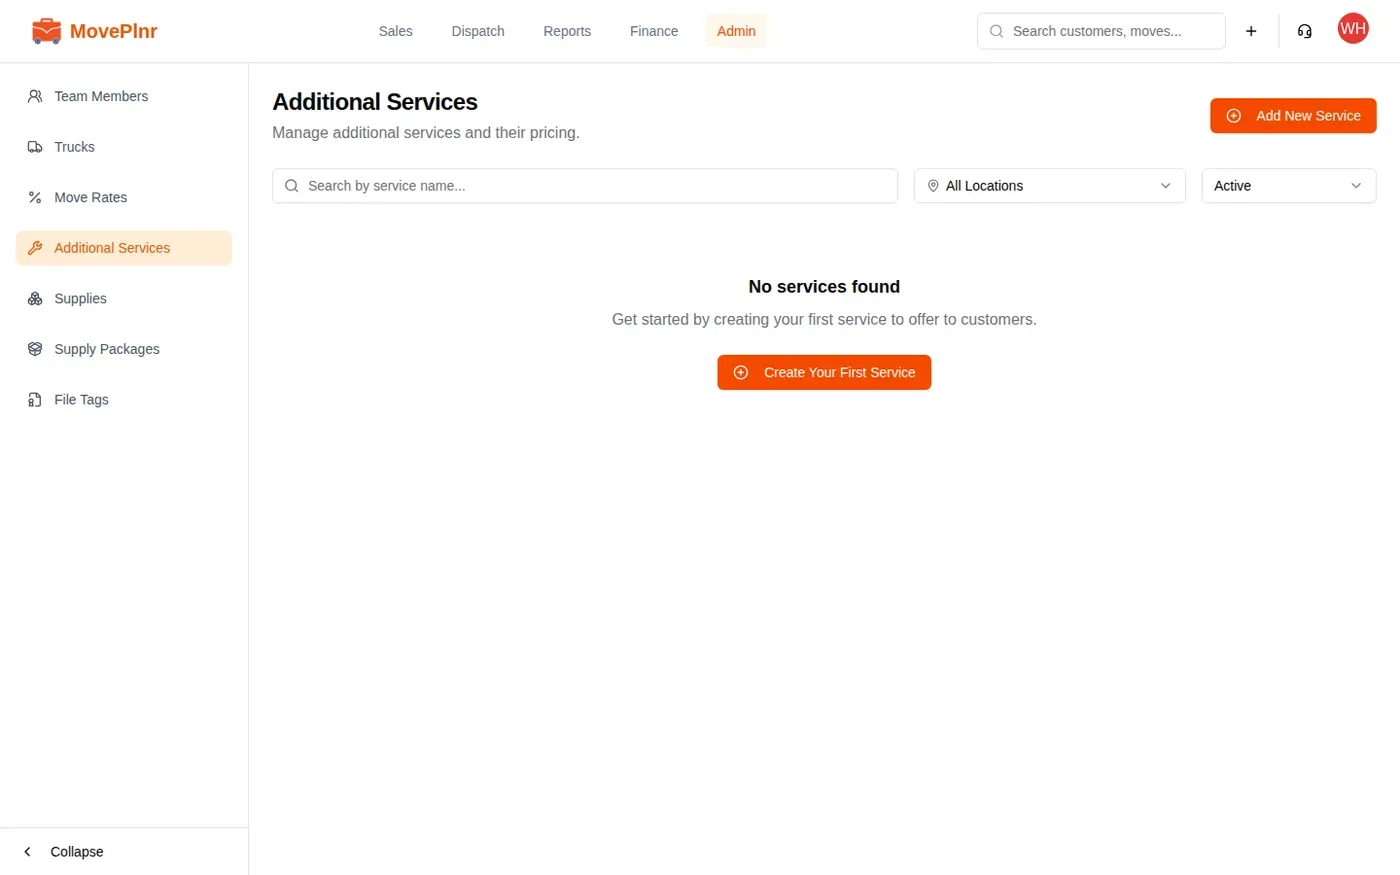
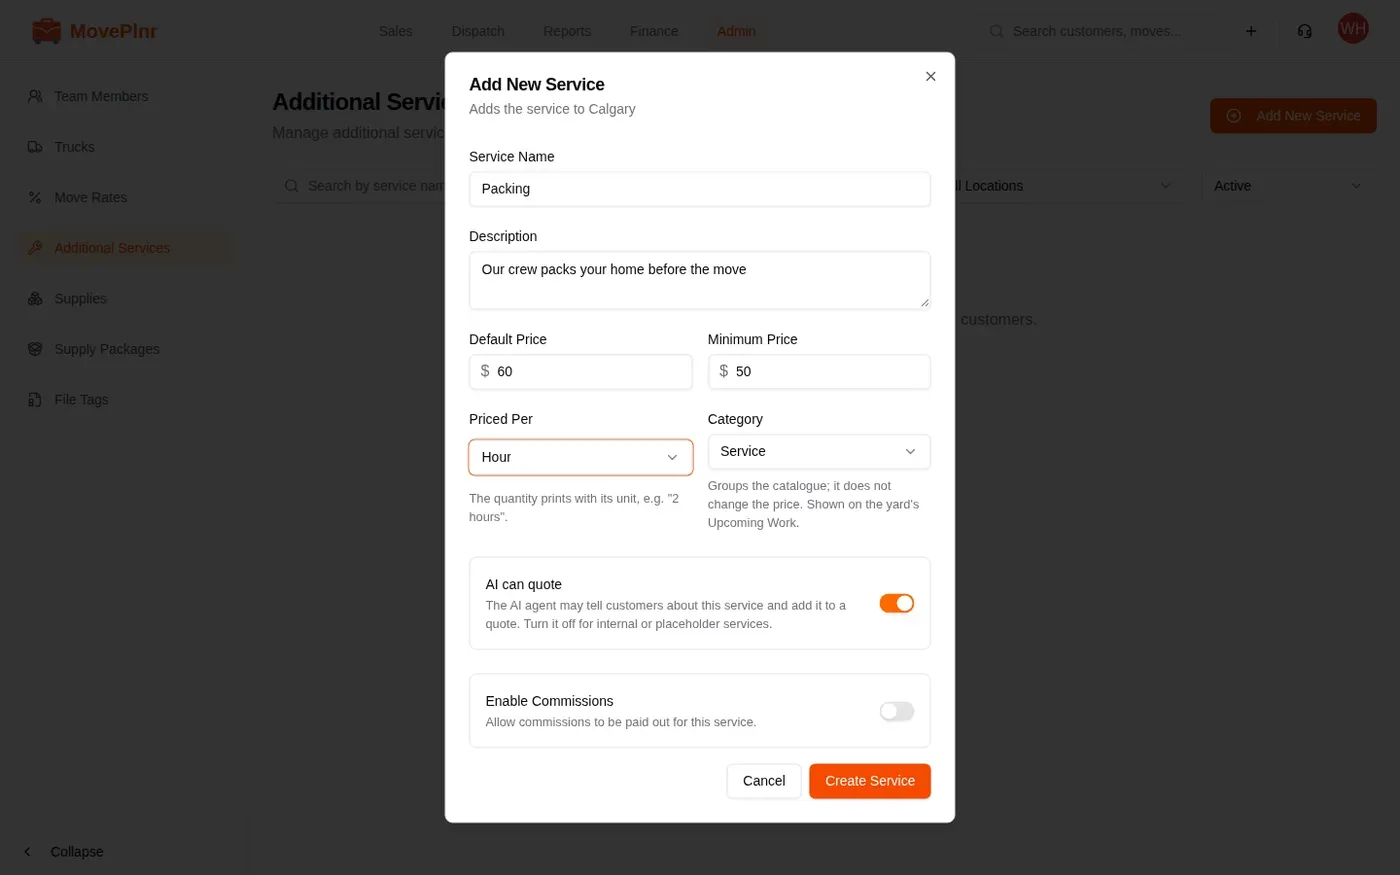
Services are the extras you charge for on top of the move rate: packing, a piano, a stairs fee. A new company has none, so the page says so.
- Click Admin at the top, then Additional Services in the sidebar.
- Click Add New Service.
- Fill in Service Name and, if you like, a Description.
- Set the Default Price and the Minimum Price. The minimum is the lowest price your staff can charge.
- Under Priced Per, choose each, Hour or day.
- Pick a Category. It groups the list and doesn’t change the price.
- Click Create Service.
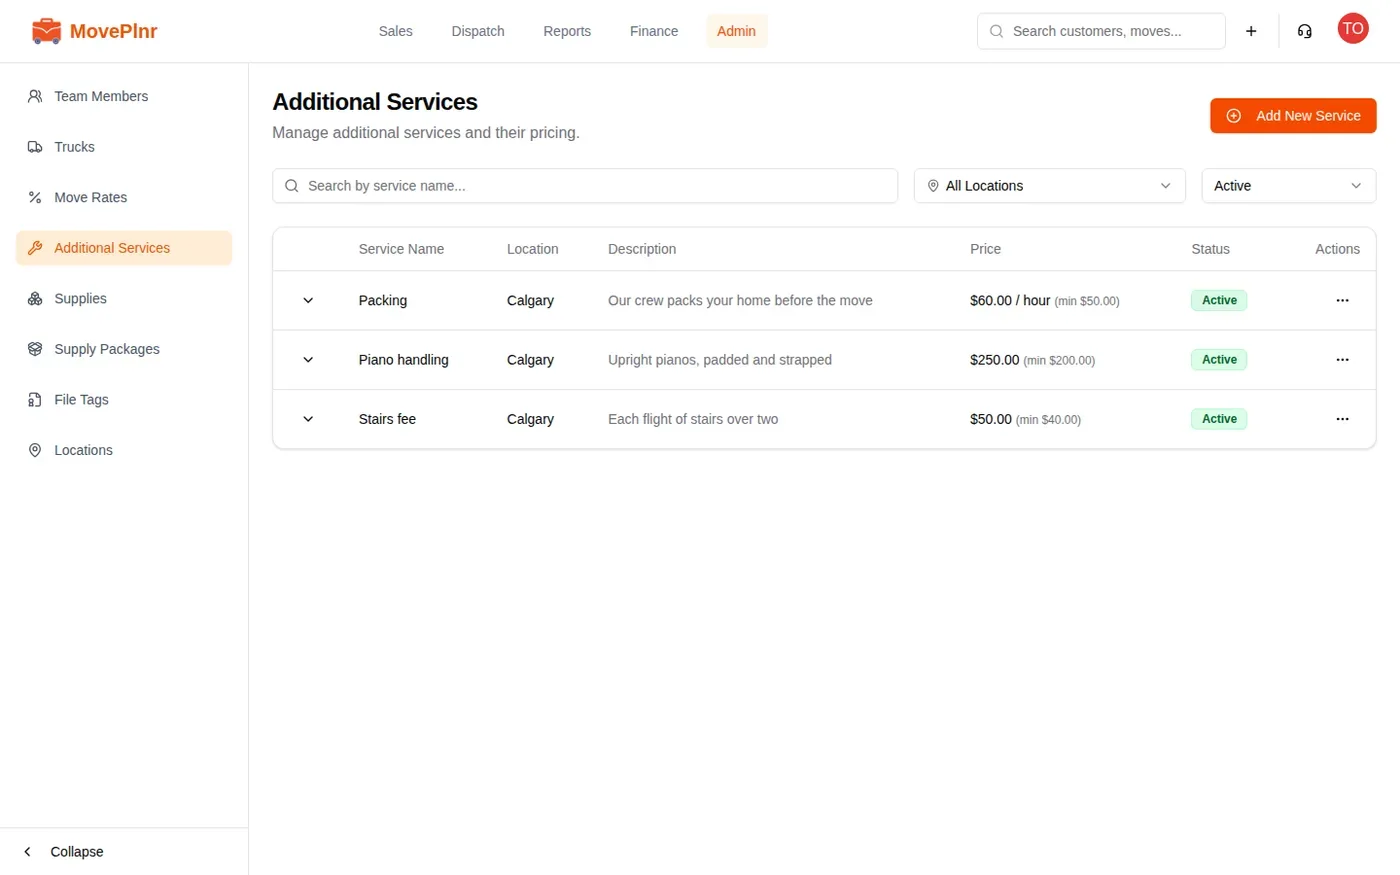
The step ticks off with your first service. Supplies you sell by the piece, like boxes and tape, live on the Supplies page and don’t count toward it.
Set your move rates
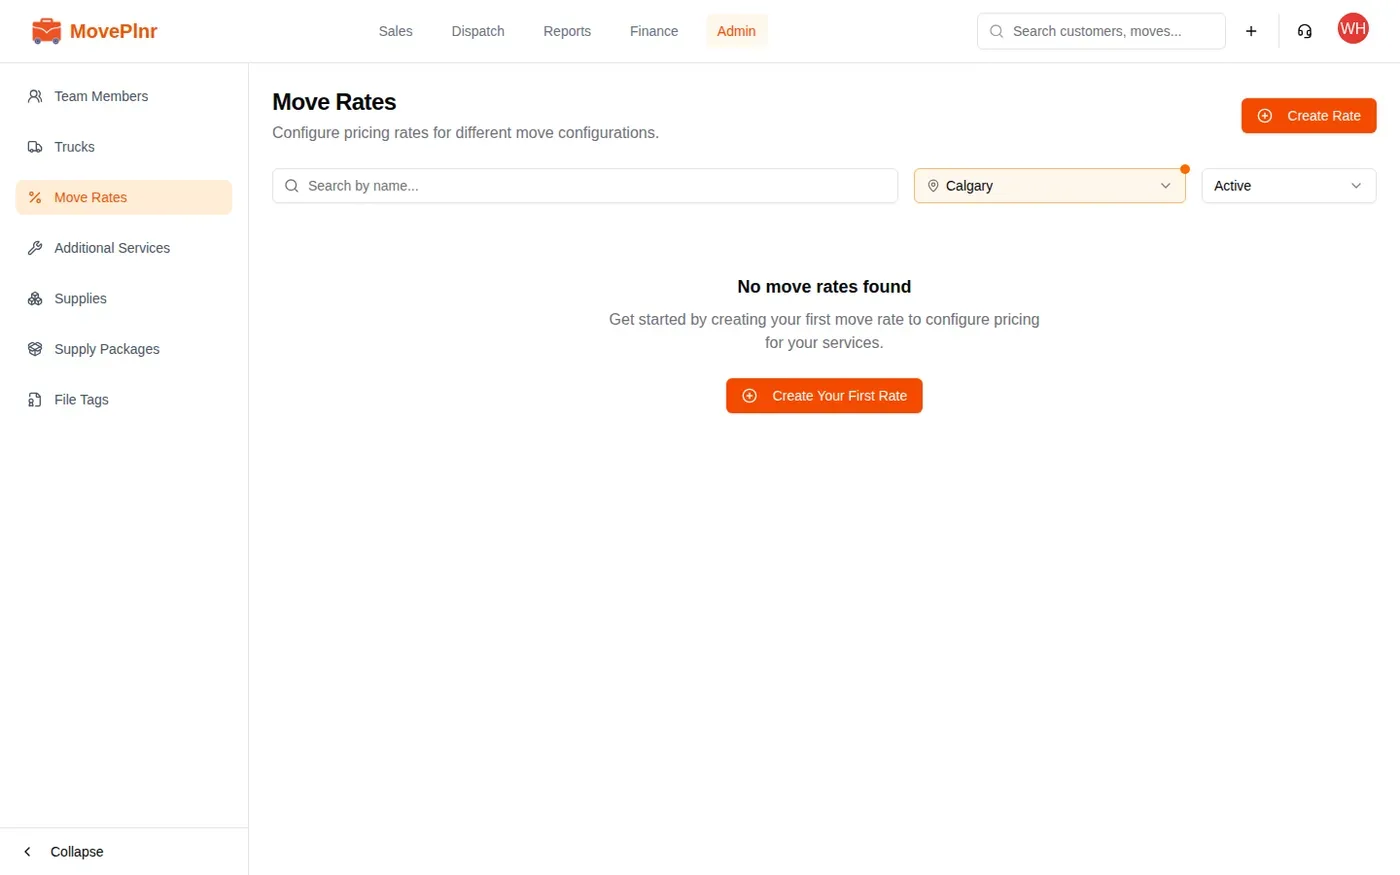
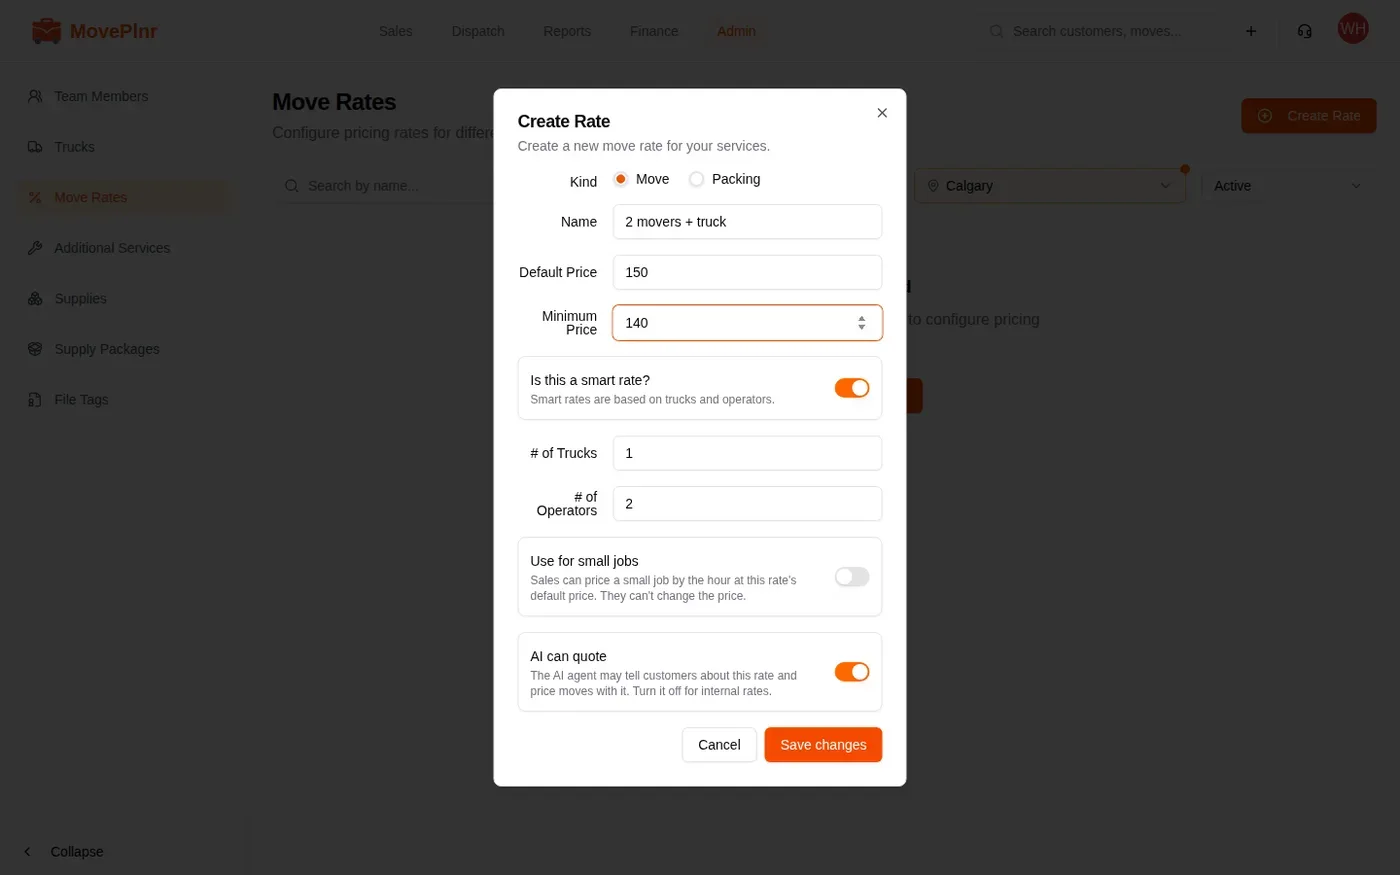
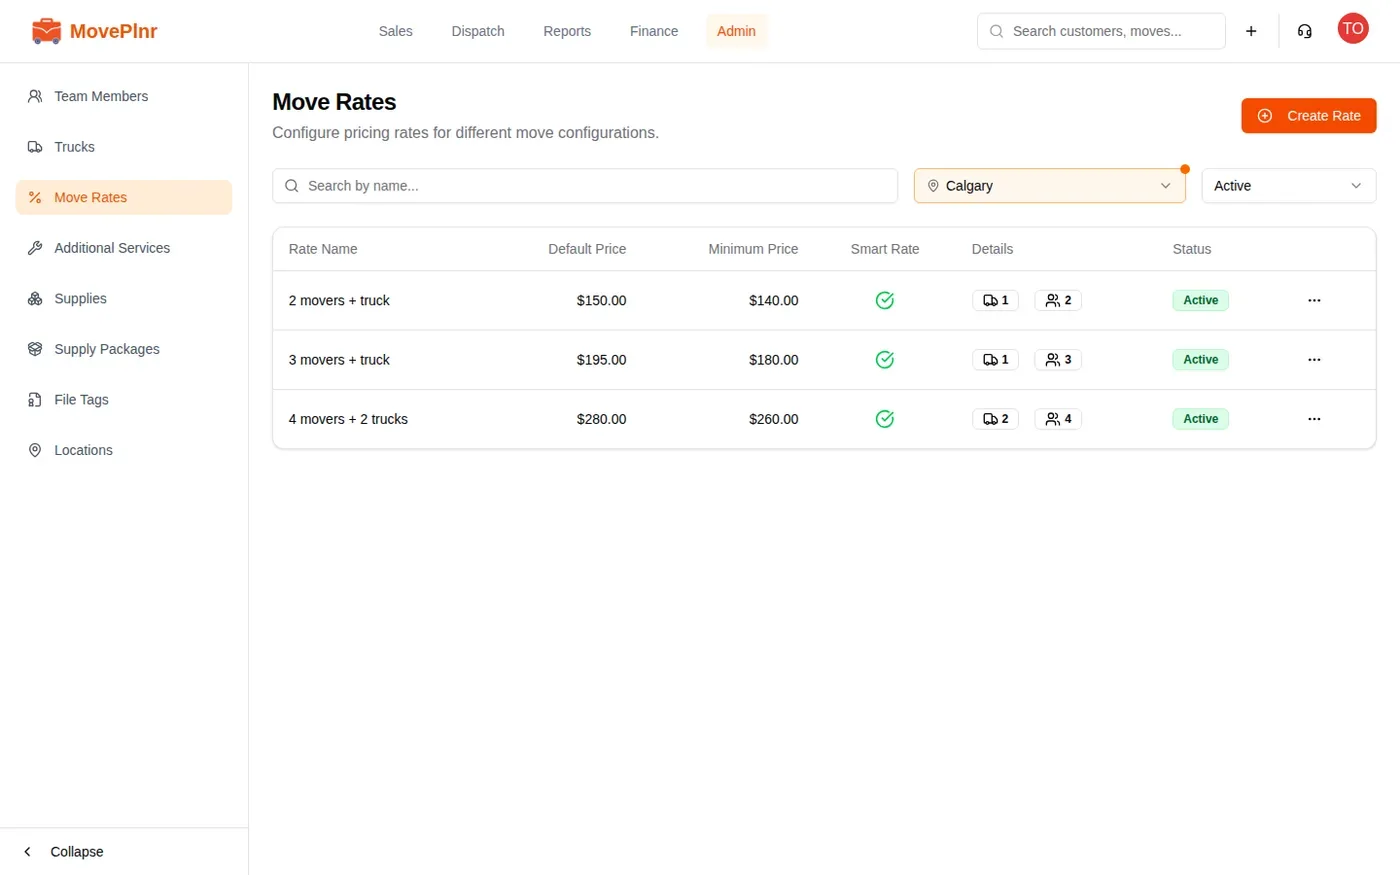
Move rates are the hourly prices your salespeople pick from when they quote, such as “2 movers + truck”. Each has a default price and a minimum.
- Click Admin, then Move Rates in the sidebar.
- Click Create Rate.
- Leave Kind on Move. Choose Packing for a rate used on packing days.
- Type a Name, then set the Default Price and Minimum Price per hour. The minimum can’t be higher than the default.
- Optional: switch on Is this a smart rate? and enter the trucks and movers the rate includes. A quote then starts on the smart rate that matches its crew.
- Click Save changes.
Hourly or flat
A quote is priced one of two ways. Hourly Rate uses one of these move rates, and its price becomes the price per hour. Flat Rate is one price for the whole job and doesn’t use a move rate. If you only quote flat, you still need one active rate to finish this step.
Move sizes
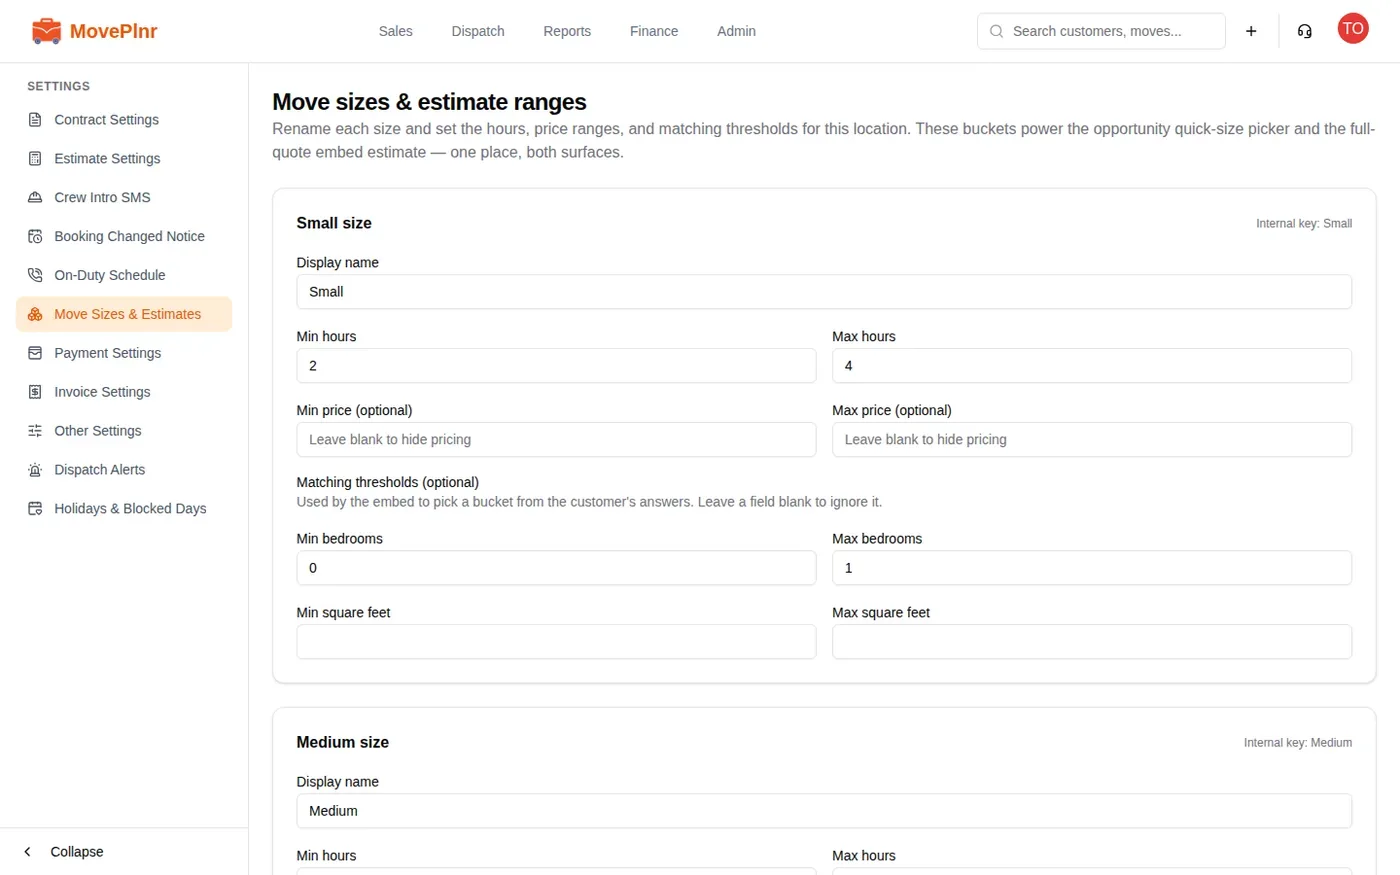
How long a small, medium or large move takes, and what it costs, lives on its own page: Location Settings, then Move Sizes & Estimates. Each size has a name, minimum and maximum hours, an optional price range, and the bedrooms or square feet that match it. These feed the quick size picker on an opportunity and the estimate on your website quote form. A new location starts with sensible hours, so you can come back to it later.
Add your trucks
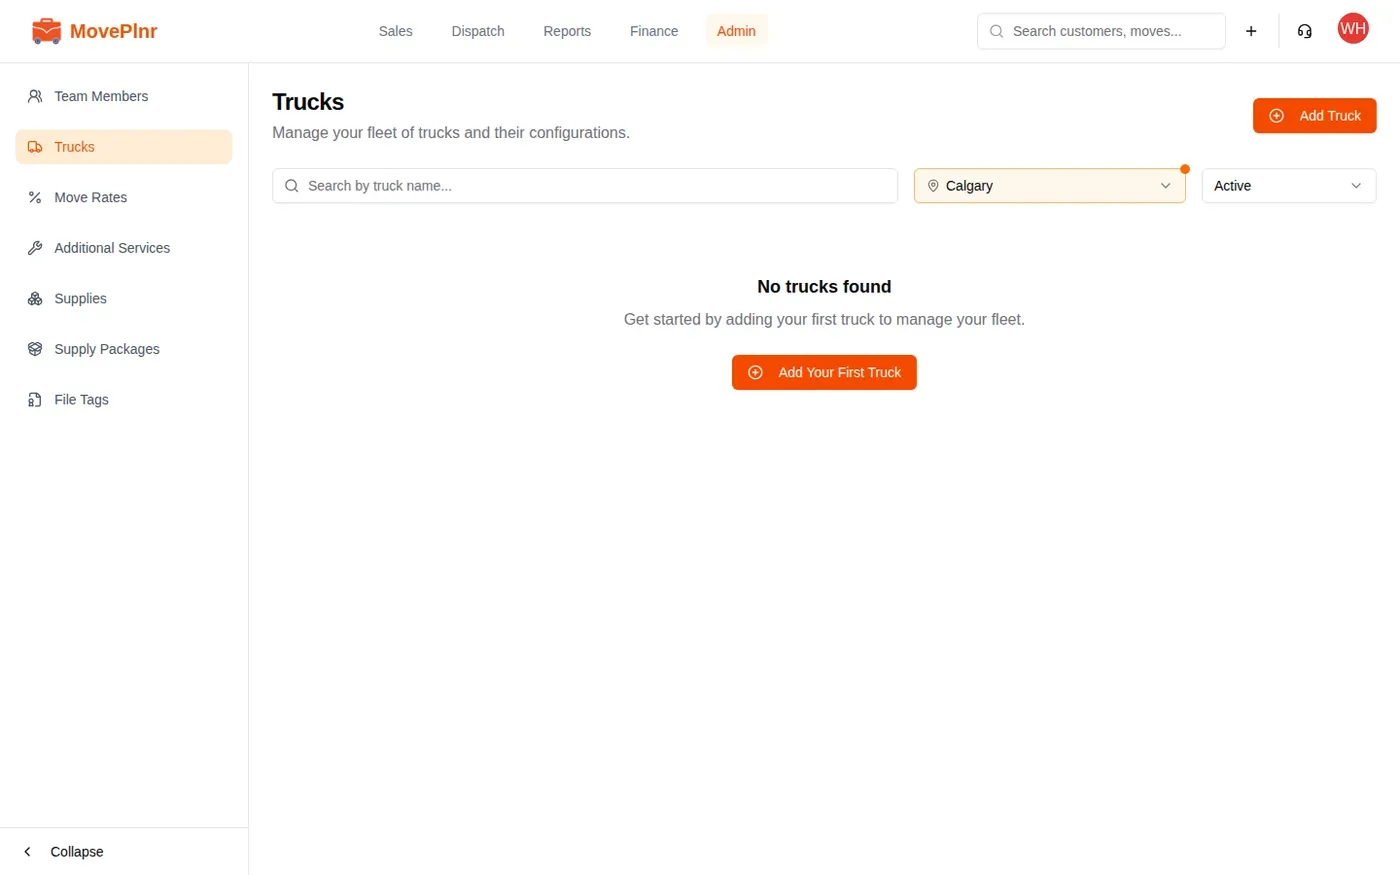
Add each truck you dispatch so it can be put on moves.
- Click Admin, then Trucks in the sidebar.
- Click Add Truck.
- Type the Truck Name your crew uses and its Capacity, such as 26 ft. The form won’t save without a capacity.
- Under Locations, tick each location the truck works from.
- Pick a Color. It is the truck’s colour on the dispatch board.
- Click Save.
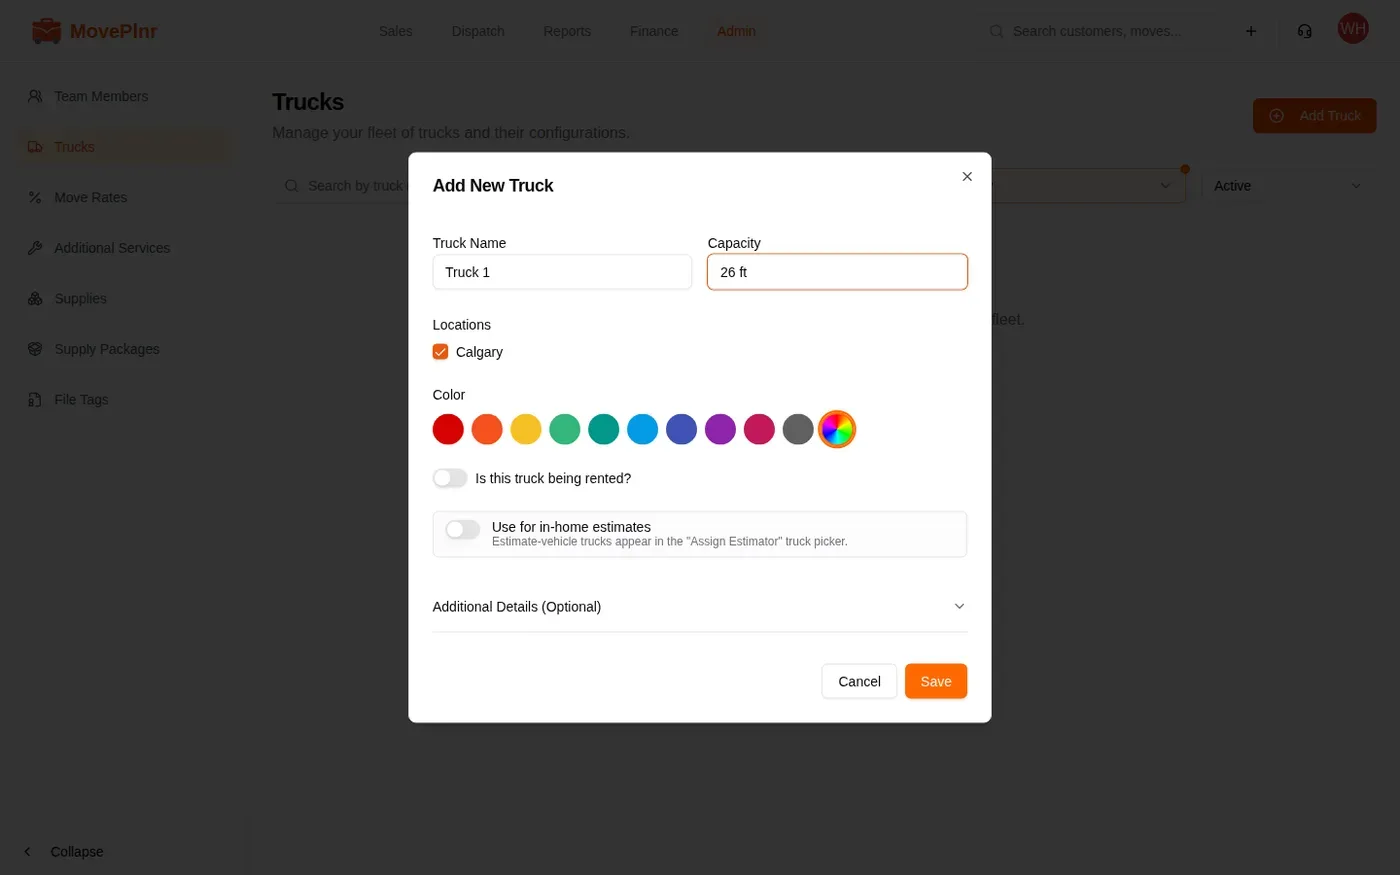
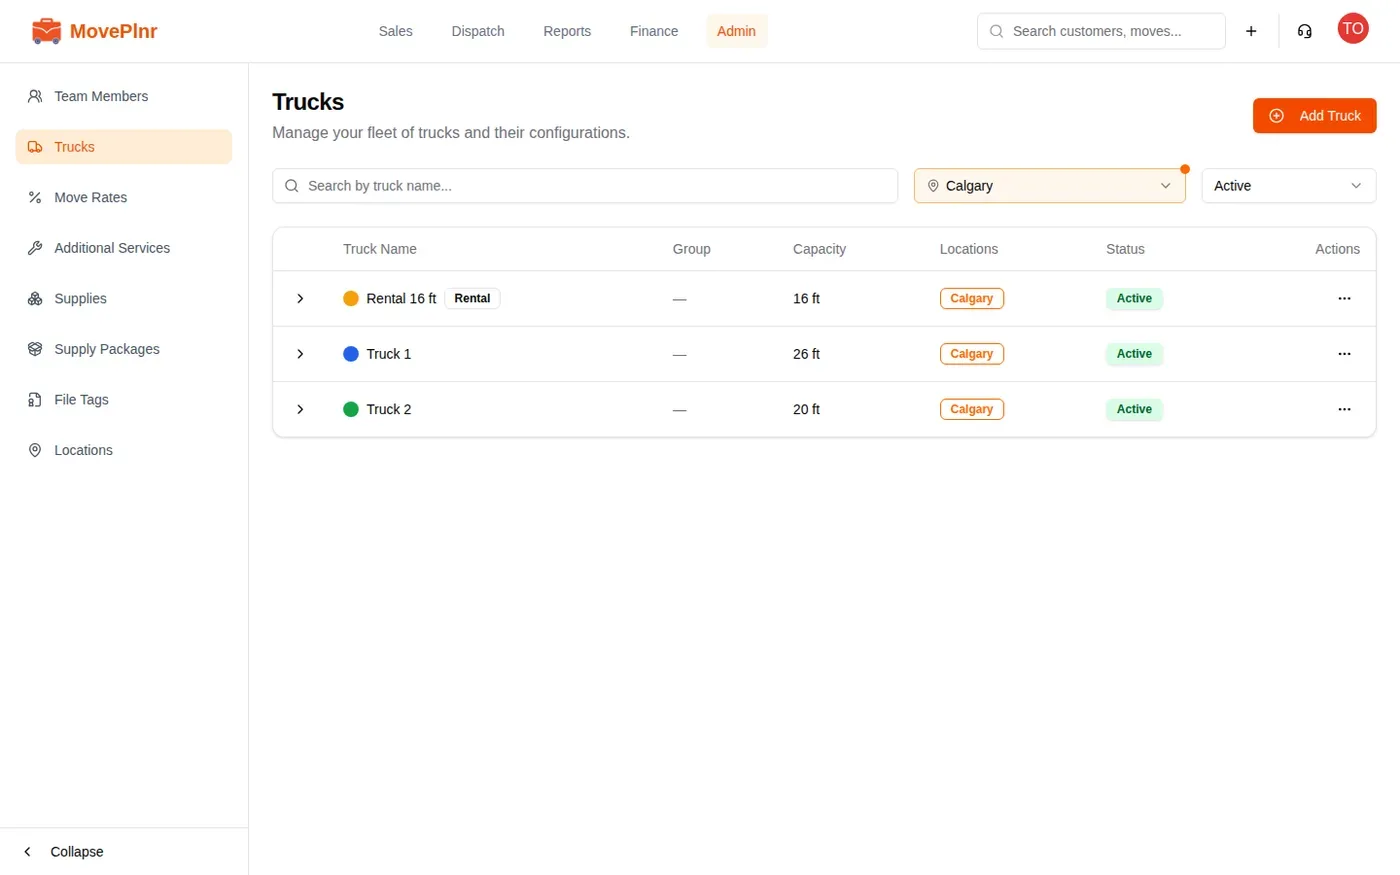
A truck saved with Is this truck being rented? switched on shows a Rental tag. Rentals don’t count toward the step, because they aren’t part of your own fleet: you need at least one truck of your own, not archived, at an active location.
Add your sales taxes
Sales taxes, such as GST, PST or HST, are set per location and print on invoices in the order you set.
- Open the menu under your profile picture and choose Location Settings.
- In the sidebar, click Invoice Settings.
- In the Taxes card, click Add Tax.
- Type a Name, such as GST, and the Rate (%), such as 5.
- Under Applies To, choose All charges, or only the work (the hourly rate), additional services or supplies.
- Check Effective From. Leave Effective To empty for a tax that is ongoing.
- Click Create. The tax saves straight away.
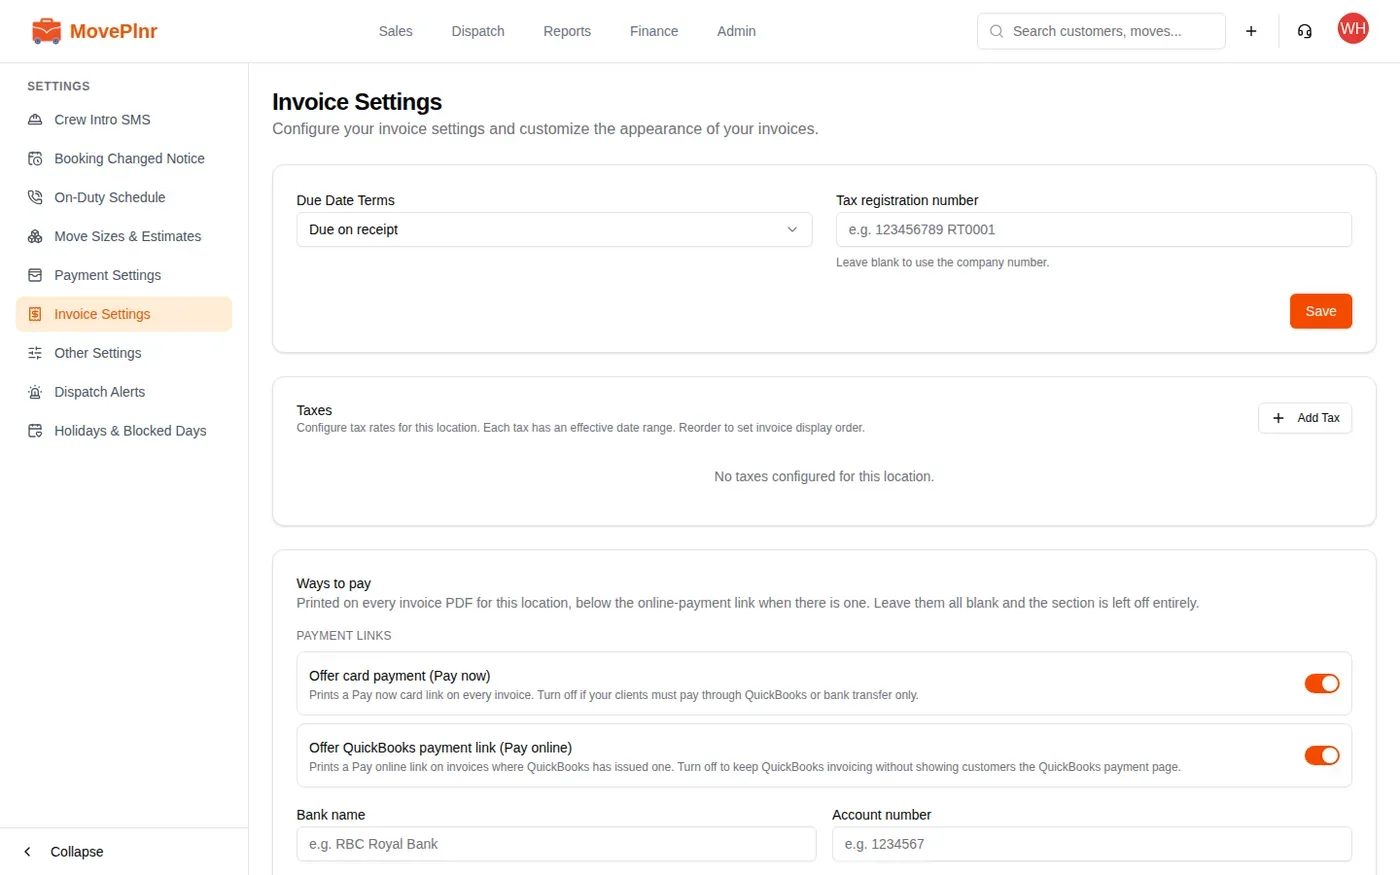
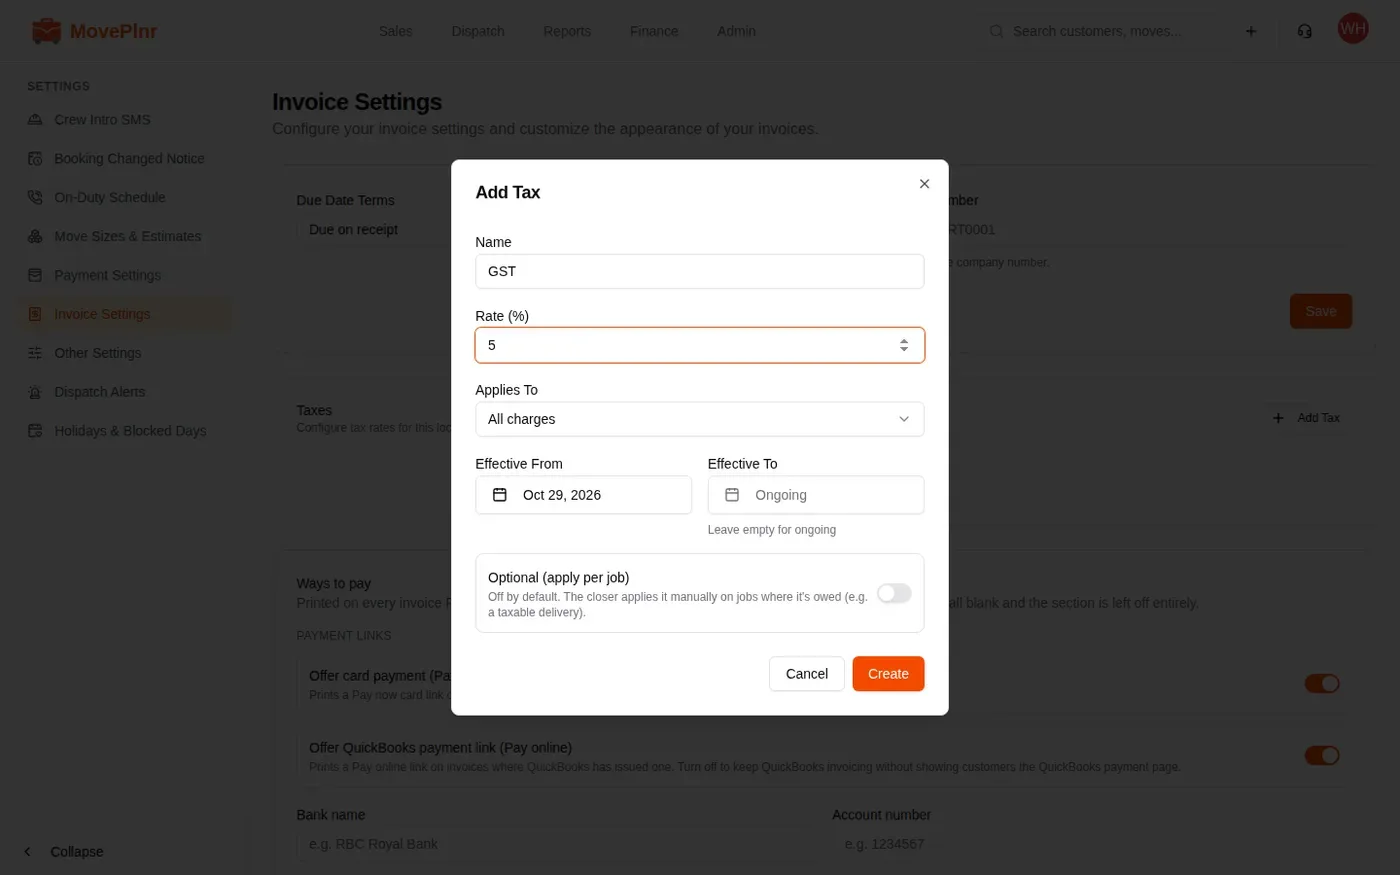
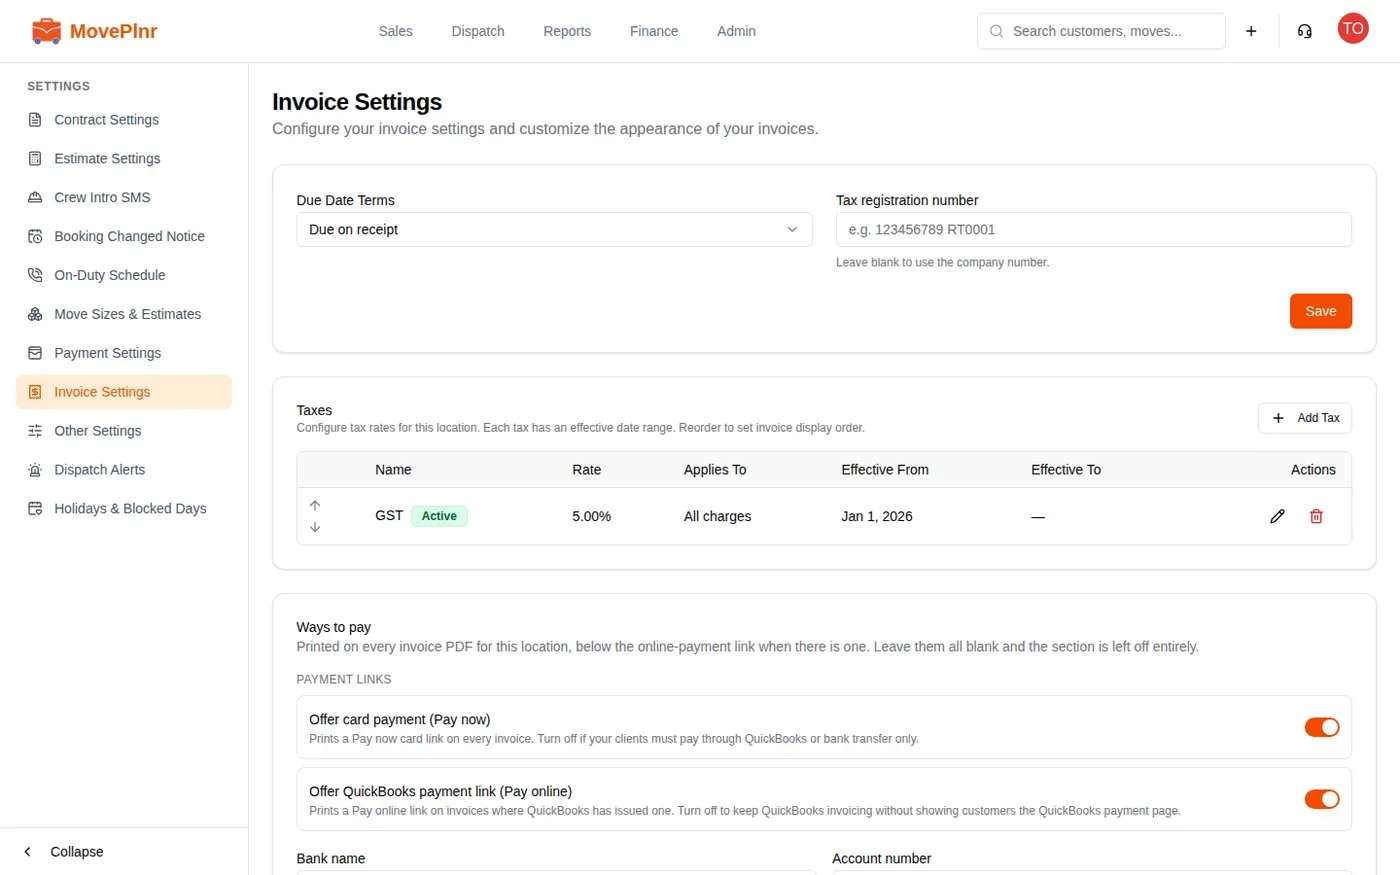
Switch on Optional (apply per job) for a tax owed only on some jobs. Whoever closes the move then applies it where it is owed. Your tax registration number goes in Tax registration number on the same page, or once for the whole company on its Other Settings page.
Turn on the add-ons you’ll use first
A new company starts with every add-on off. Two matter before your first quote: Estimates sends a customer a quote they can accept online, and Contracts lets them sign the contract online. Only the owner can switch add-ons.
- Open the menu under your profile picture and choose Company Settings.
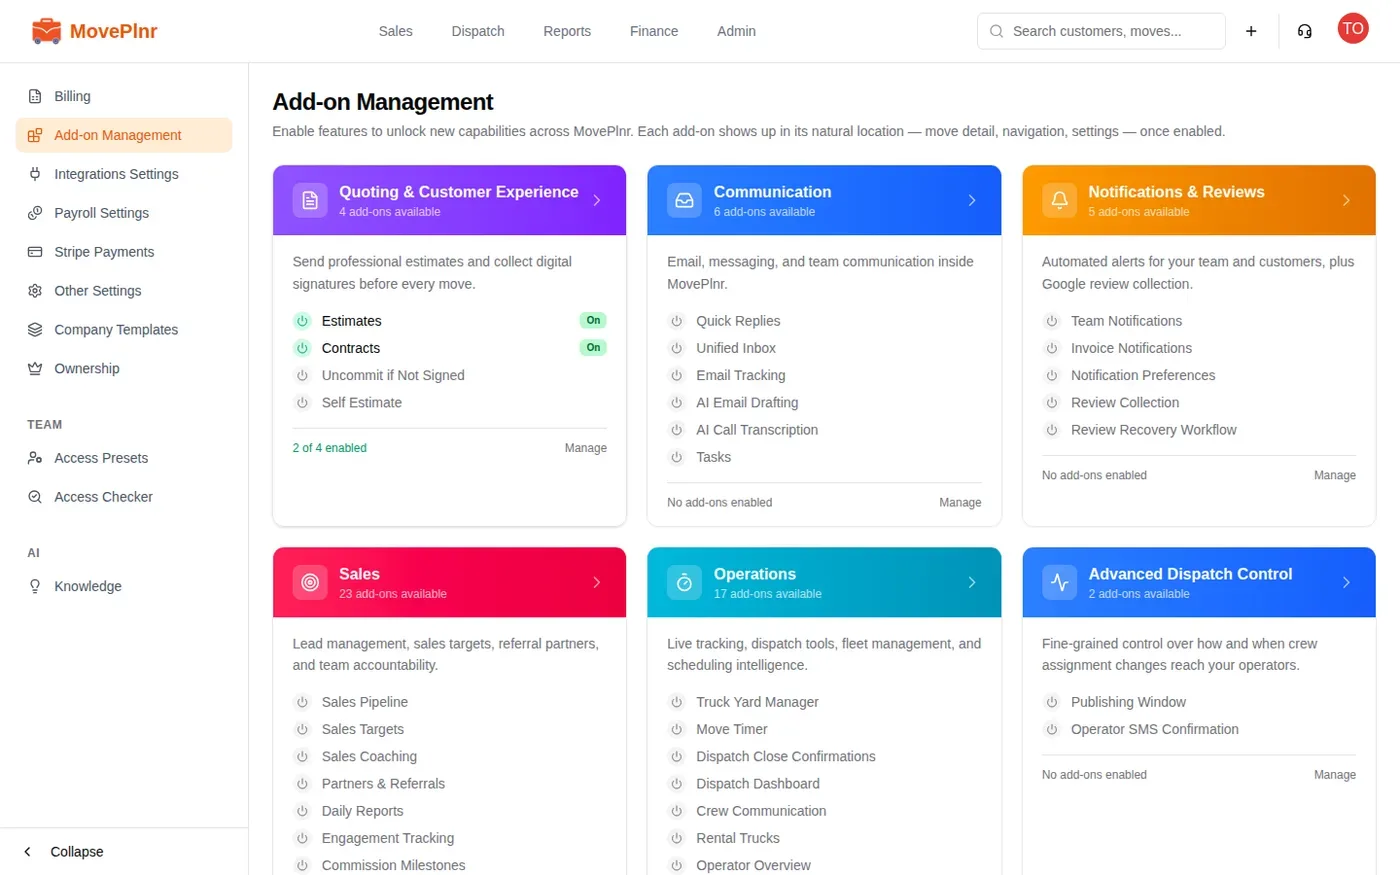
- In the sidebar, click Add-on Management.
- Click Quoting & Customer Experience.
- Switch on Estimates, then Contracts.
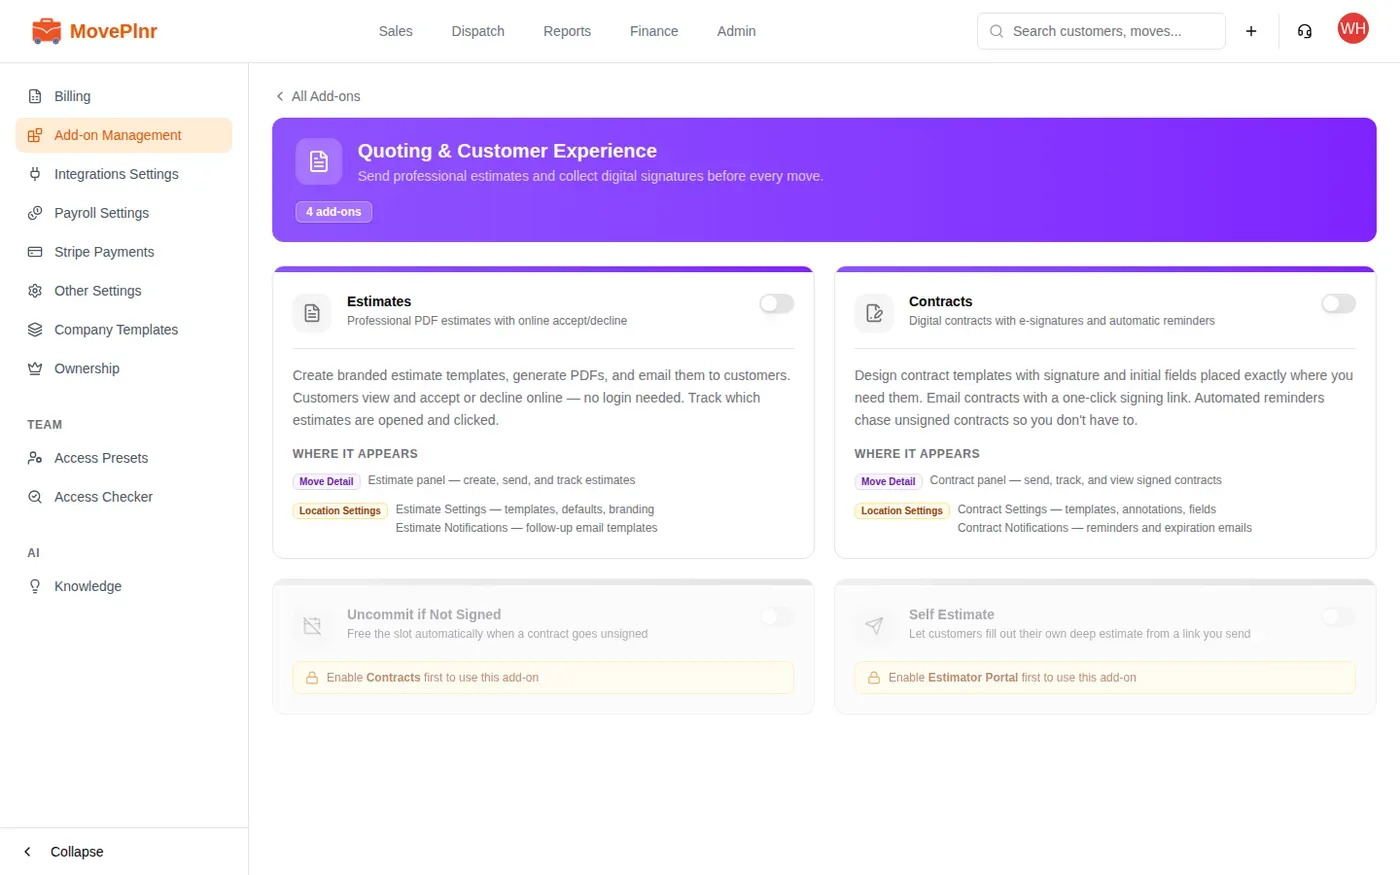
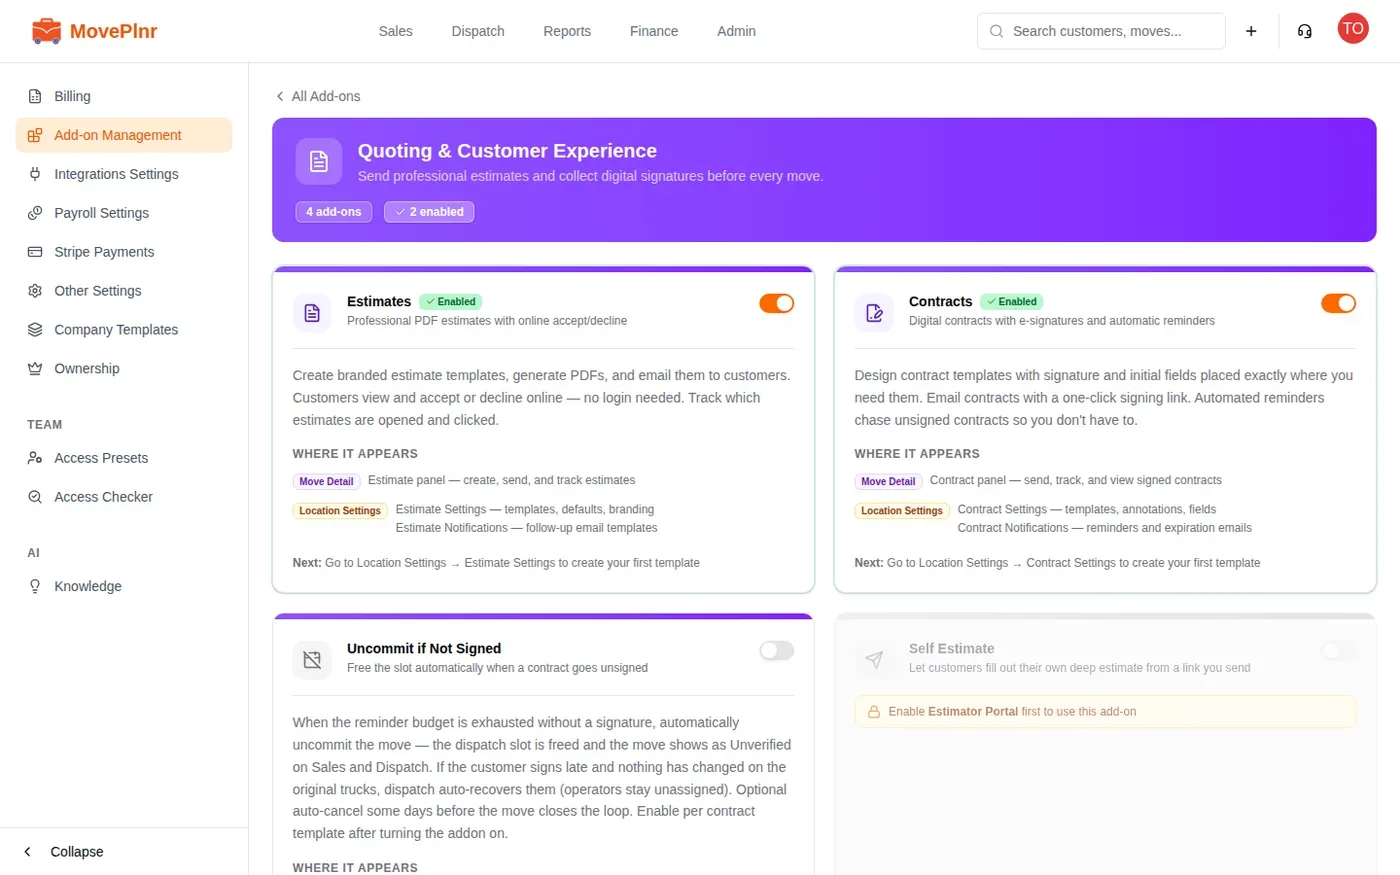
An add-on that needs another one says so on its card. Uncommit if Not Signed waits for Contracts, for example. Each add-on lists where it appears once it is on: a panel on the move, a page under Location Settings, an item in the menu. The other sections hold the rest, from dispatch to reviews, and you can turn them on when you need them.
The estimates and contracts guides take it from there.