
Before you start
Sending estimates needs the Estimates add-on. The pipeline on New Business comes with the sales pipeline add-on, and booking an estimator to visit the home needs the estimator portal. An admin turns add-ons on for the company.
Plan the stops
Every estimate starts from the opportunity. Open it from Opportunities in the Sales menu.
A move can have more than one pickup and more than one drop-off. Plan them all here, so the estimate counts the driving between every stop.
- Open the opportunity and click Pickup & Dropoff Locations.
- Enter the first pickup address.
- Click Add Pickup for each extra place you load from, like a storage locker or a second home.
- Click Add Drop-off for each place you unload.
- Put the stops in order with Move Up and Move Down, then click Save.
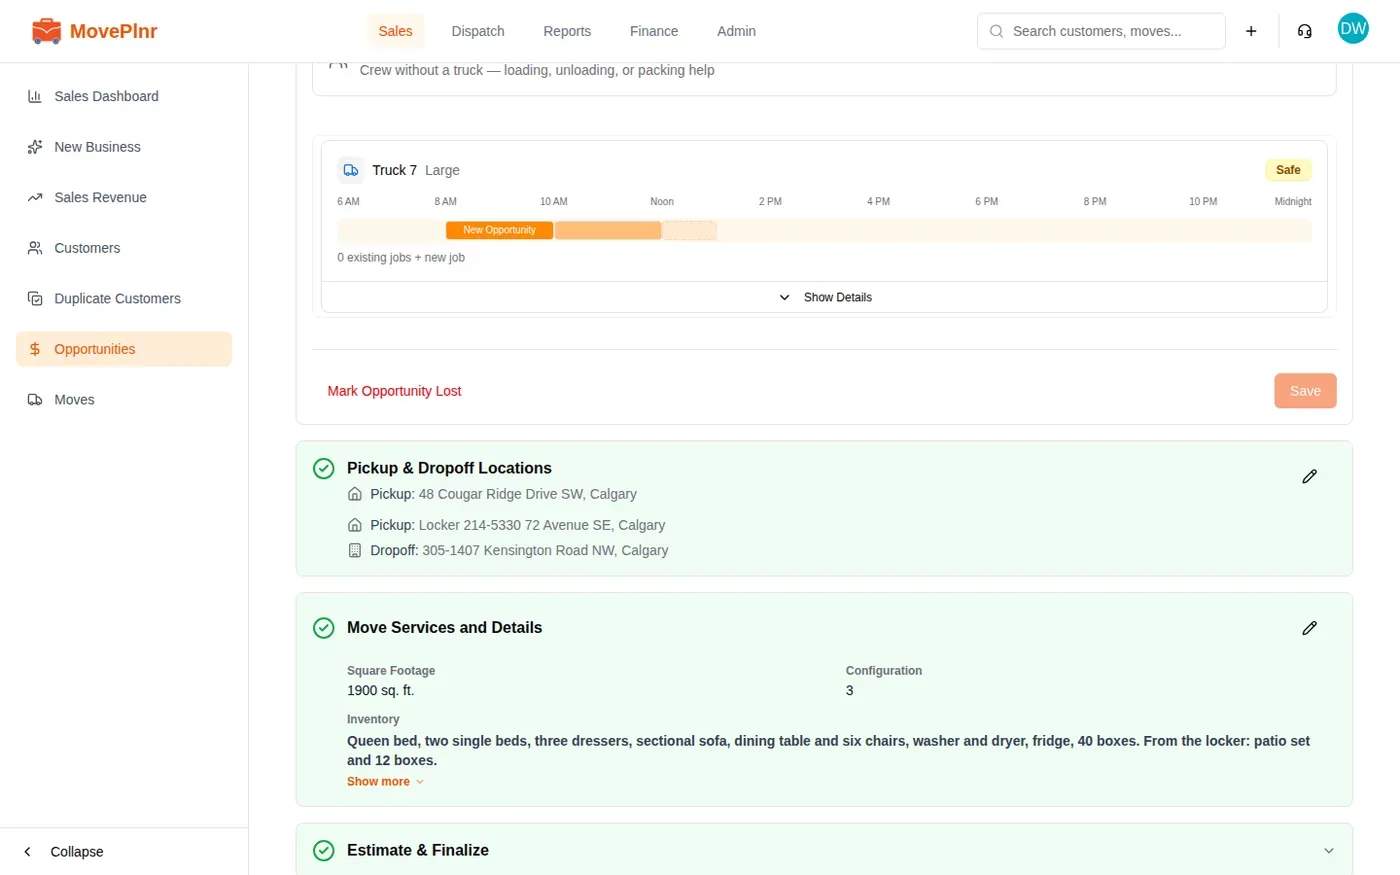
Then fill in Move Services and Details: the square footage, the rooms and the inventory. When you save, MovePlnr works out the hours, crew and truck for the job.
Check the numbers
Open Estimate & Finalize to see what the estimate is built on: the distance, the travel time, the total hours, the crew and the truck. Click How was this estimated? to read how the hours were worked out, and See the full breakdown for the whole calculation. If the inventory looks thin, it says so, so you can ask the customer before you quote.
Price and send the estimate
- In Estimate & Finalize, click Other Actions, then Send Estimate.
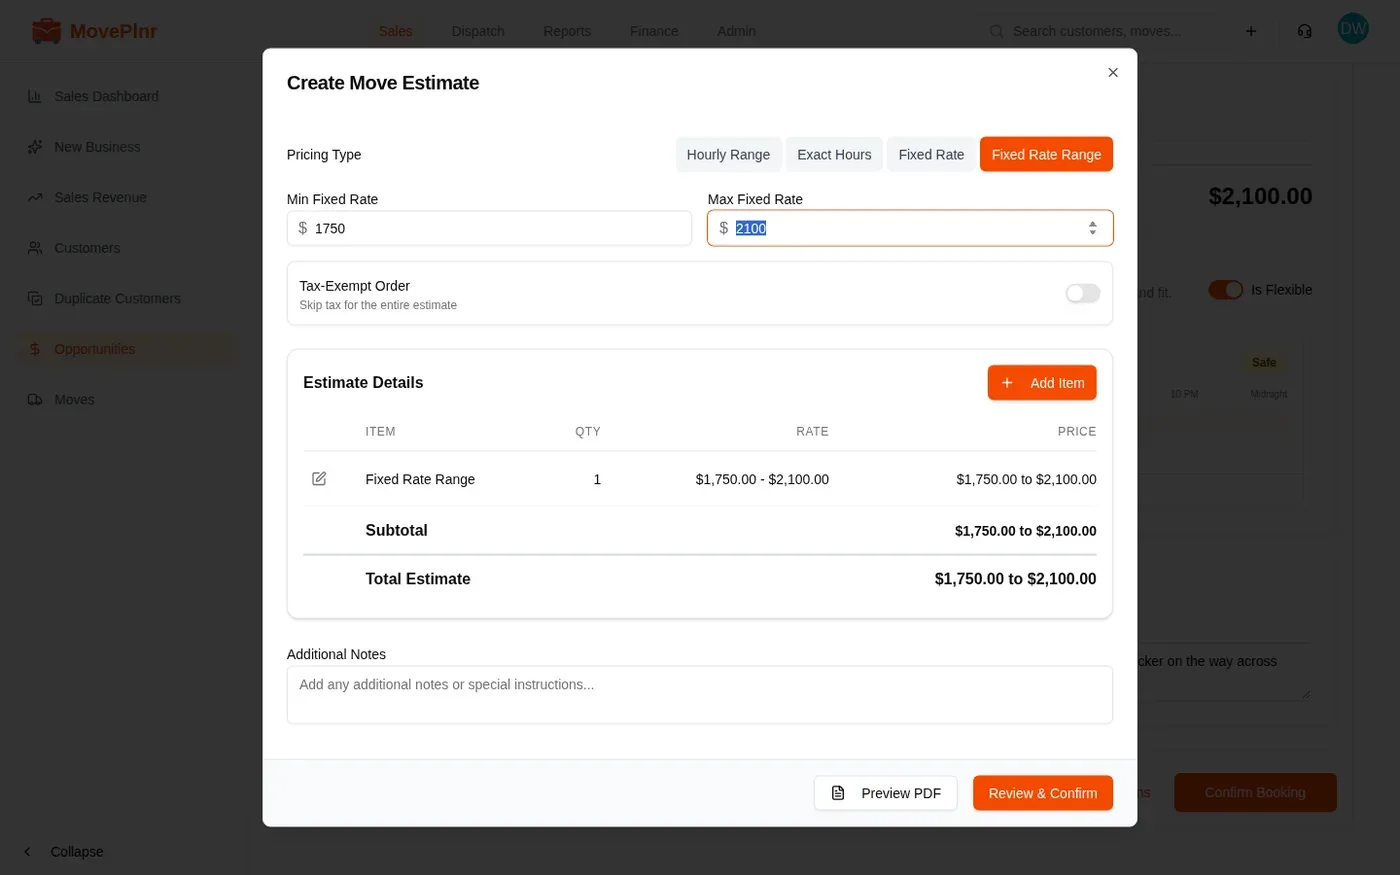
- Pick the Pricing Type.
- Fill in the hours, the rate or the price. The Estimate Details table shows each line and the Total Estimate as you type.
- Click Add Item for anything else on the job, like packing supplies or a piano.
- Click Preview PDF to see what the customer gets, then Review & Confirm.
Hourly Range
Do this: the usual local move.
Exact Hours
Do this: when you know the job well.
Fixed Rate
Do this: one flat price.
Fixed Rate Range
Do this: a flat fee that depends on the job.
Review and send
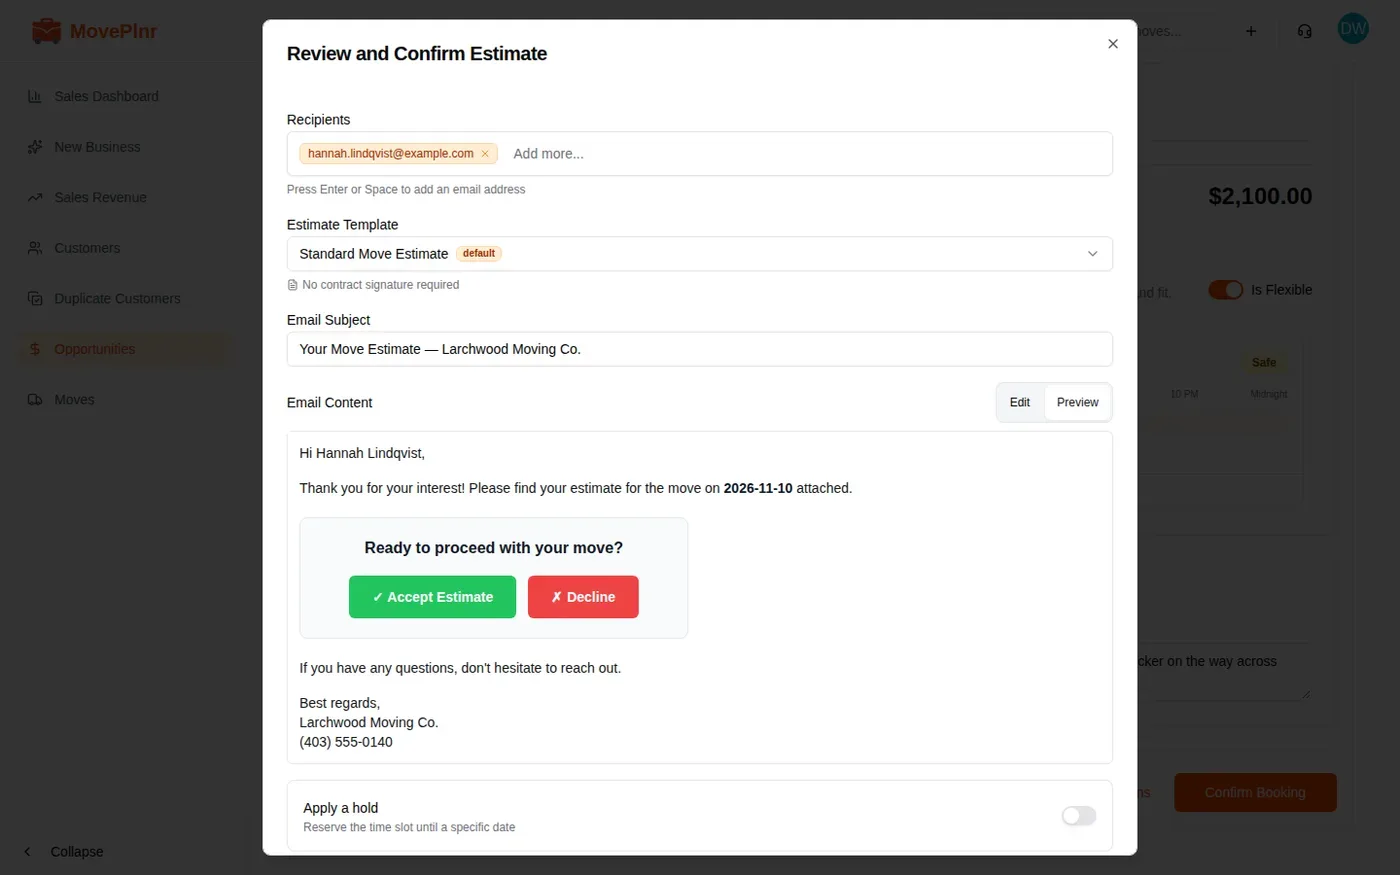
The second step is the email itself.
- Check the Recipients. The customer’s email is already there. Press Enter after an address to add another.
- Pick the Estimate Template. It sets the PDF and says whether a contract signature is needed.
- Check the Email Subject and the Email Content. The email carries Accept Estimate and Decline buttons for the customer.
- Turn on Apply a hold to keep the date and truck for the customer until a date you pick.
- Set a deposit on acceptance, automatic reminders and a follow-up task if you want them.
- Click Send Estimate.
Follow the estimate
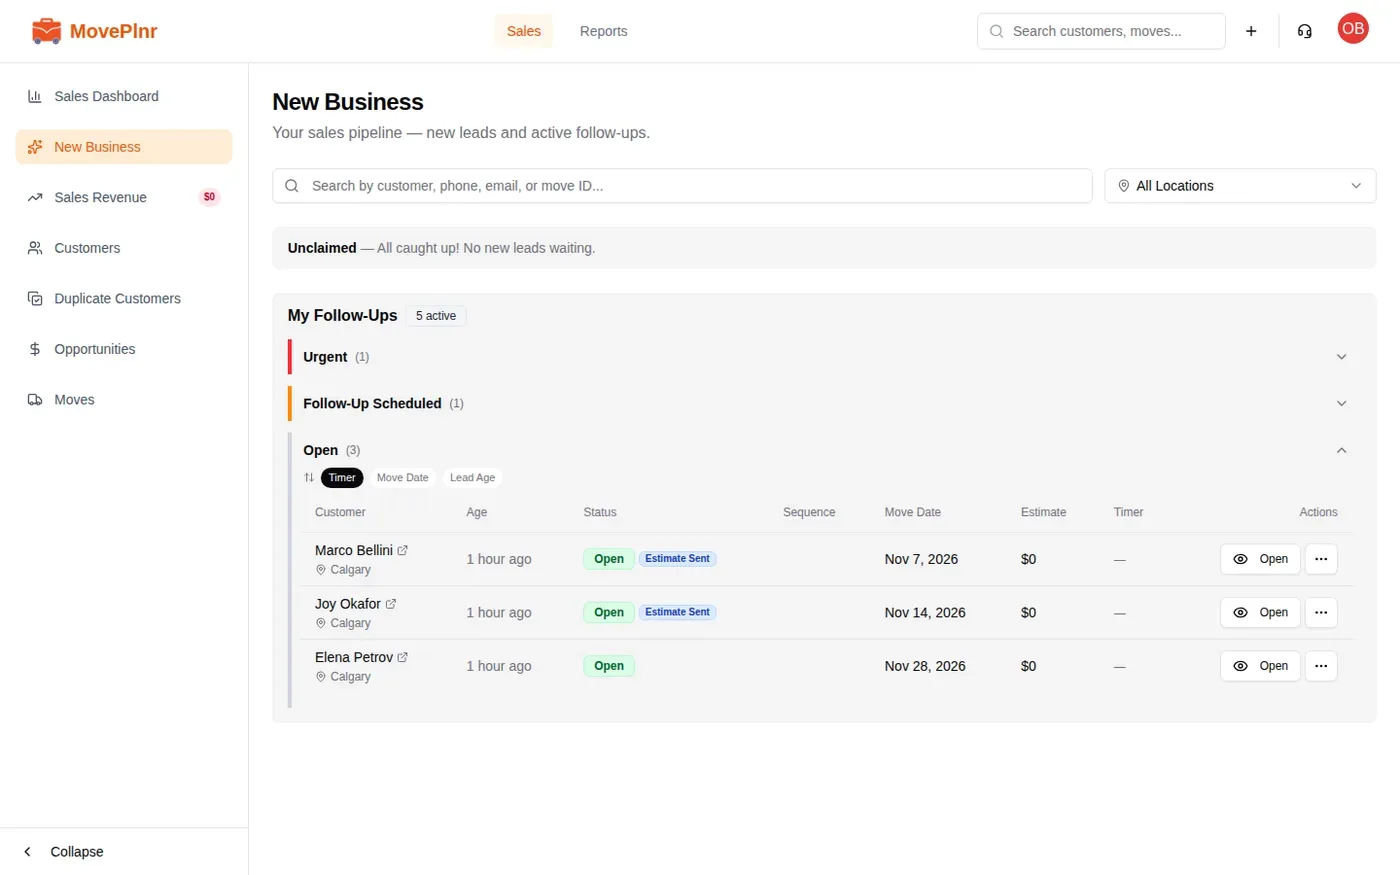
Once the estimate is sent, the opportunity carries an Estimate Sent badge on New Business, your pipeline. From there you see what the customer did next, without opening every opportunity.
- “Opened email” shows when the customer opened the estimate email.
- “Viewed estimate” shows when they opened the estimate itself, with how long ago.
- “Estimate Accepted” replaces “Estimate Sent” when they accept.
- “Viewed contract” shows when they opened the contract, if the template asks for a signature.
You also get a notification the moment an estimate is viewed, accepted or declined. A customer still looking at your price is the best time to call.
When the customer declines
The customer picks a reason when they decline: the price, or something else, with a note. MovePlnr marks the opportunity lost with that reason, cancels its pending follow-ups and emails you. The Estimates report under Reports lists every declined estimate with its reason, so you can see which objections come up most.
Book an on-site estimate
Some jobs need someone to walk through the home first. Book the visit from the customer’s page with New, then New Estimate Booking, or click Promote to Deep Estimate under Move Services and Details on the opportunity.
Every visit lands on Estimates in the Dispatch menu: the customer, the address, the visit date, the move date, the status and the estimator. A visit with nobody on it shows Unassigned, and the menu shows a count until someone is assigned.
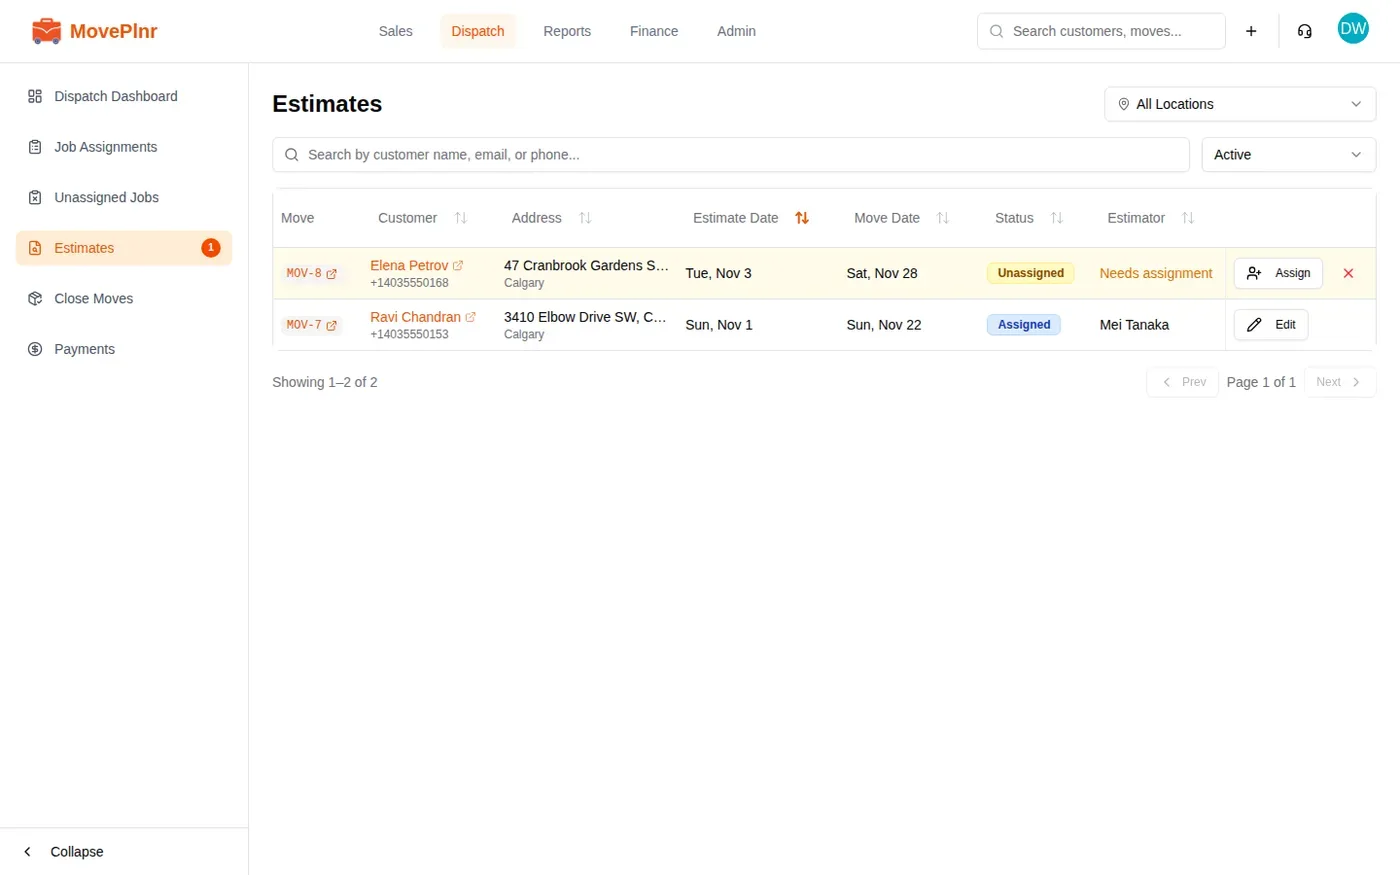
Assign an estimator
- Click Assign on the visit.
- Check the date and the start and end time.
- Pick the Estimator. Under Availability, each estimator’s week shows their estimates, moves and time off. Click a day to take its next open slot.
- Pick a truck, or turn on Skip truck selection.
- Add notes for the estimator if it helps, then click Assign.
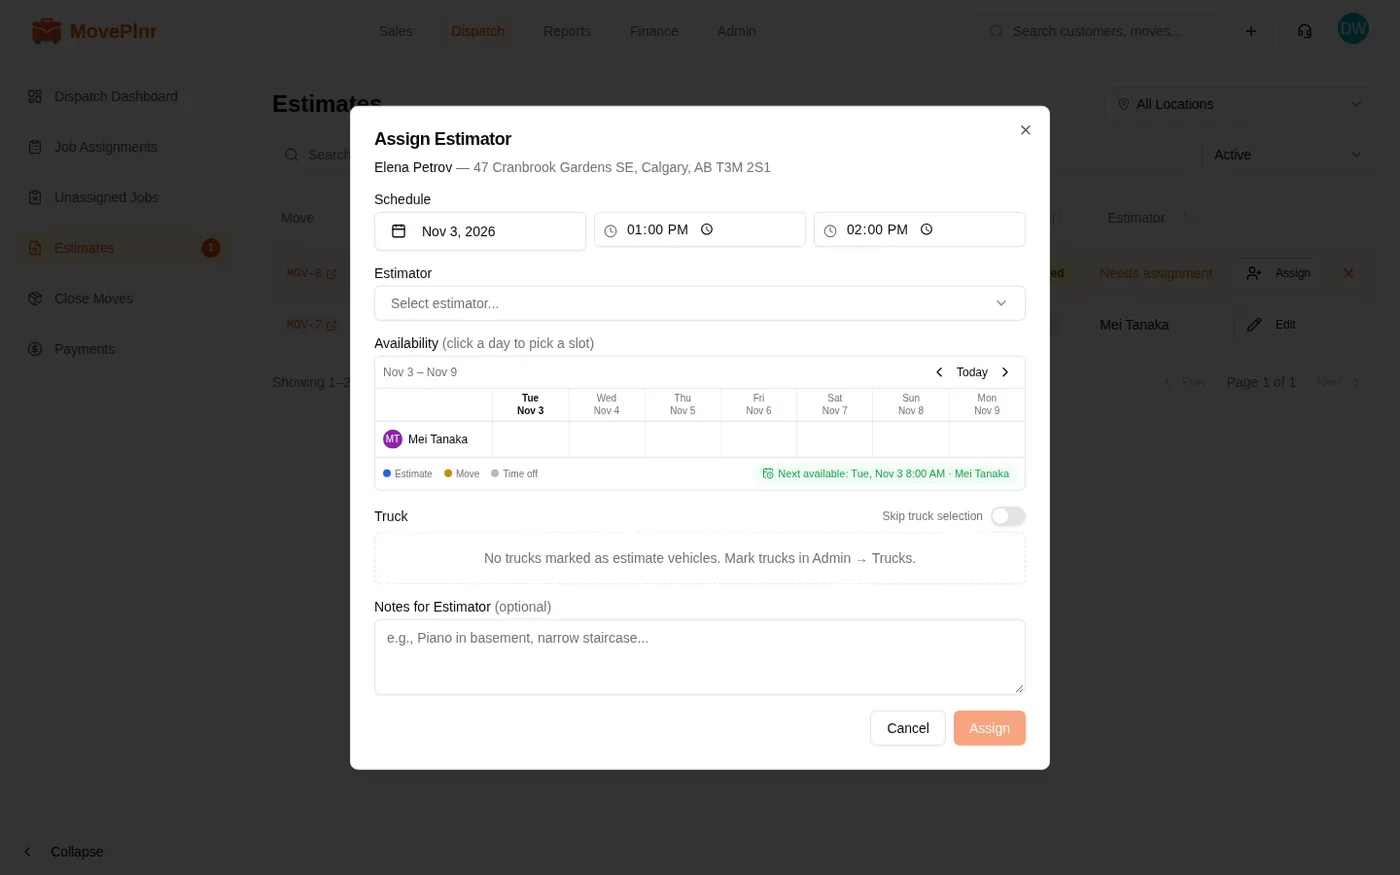
Change a booking
Click Edit on an assigned visit to open Edit Estimate Booking. Change the address, date or time and click Save Changes, click Reassign to give it to someone else, or Unassign to take the estimator off. The same window opens from Edit Booking on the opportunity.
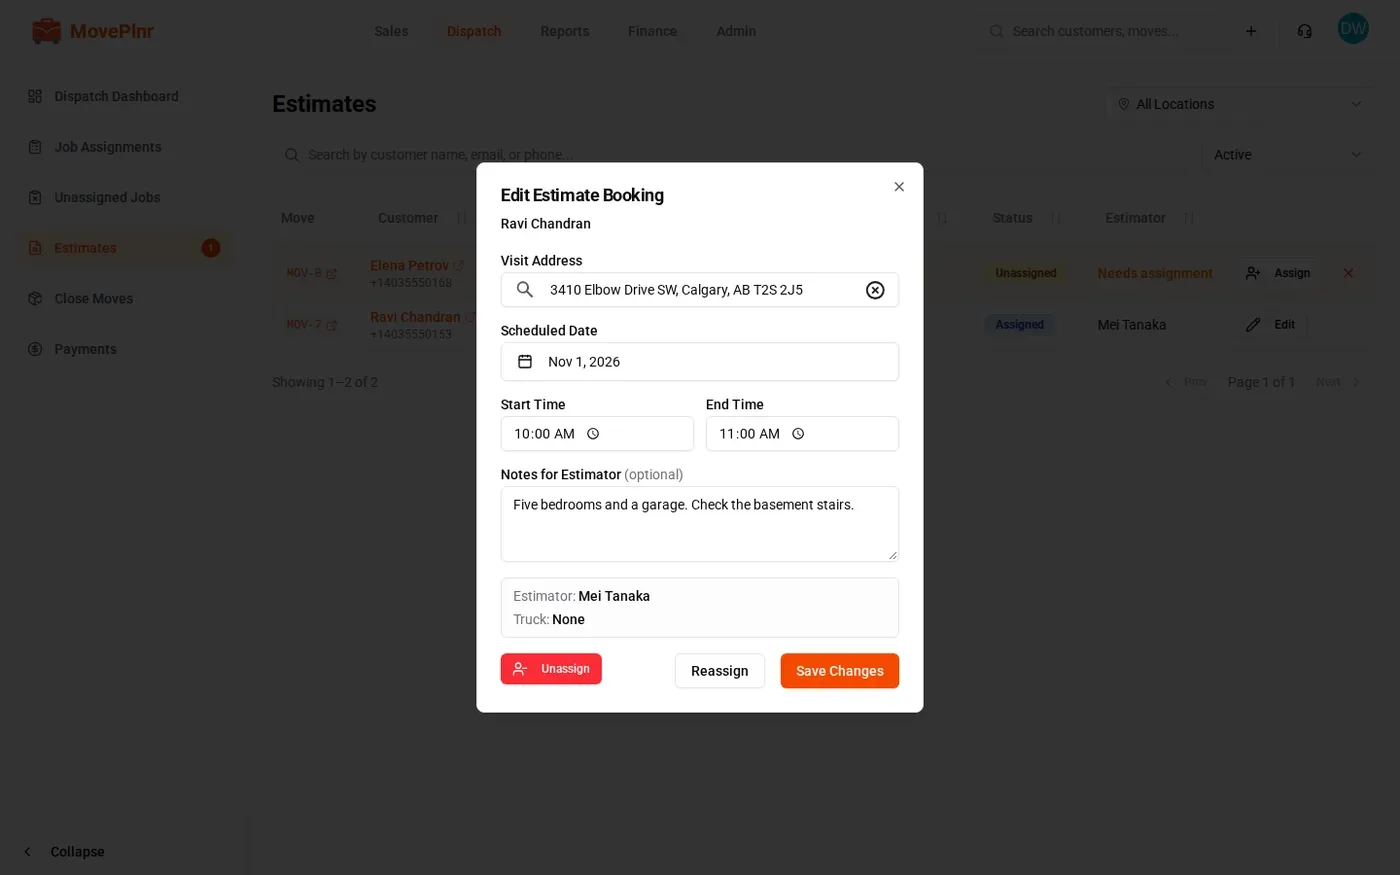
When the estimator finishes, the opportunity goes back to its sales rep’s Urgent list on New Business, ready to price and send.