
Before you start
Contracts is an add-on. Once an admin turns it on, Contract Settings appears under Settings, and booking a move sends a contract for the customer to sign. Waivers need the customer waivers add-on, and the reminder and uncommit options on a contract each have their own add-on too.
Setting up templates is an admin job. Sales reps choose a template and send it.
Set up a contract template
- Open Settings and choose Contract Settings. Every template for the location is listed here, and one is marked Default: that is the one a send starts with.
- Click Add Contract to upload a new PDF, or Edit to change an existing template.
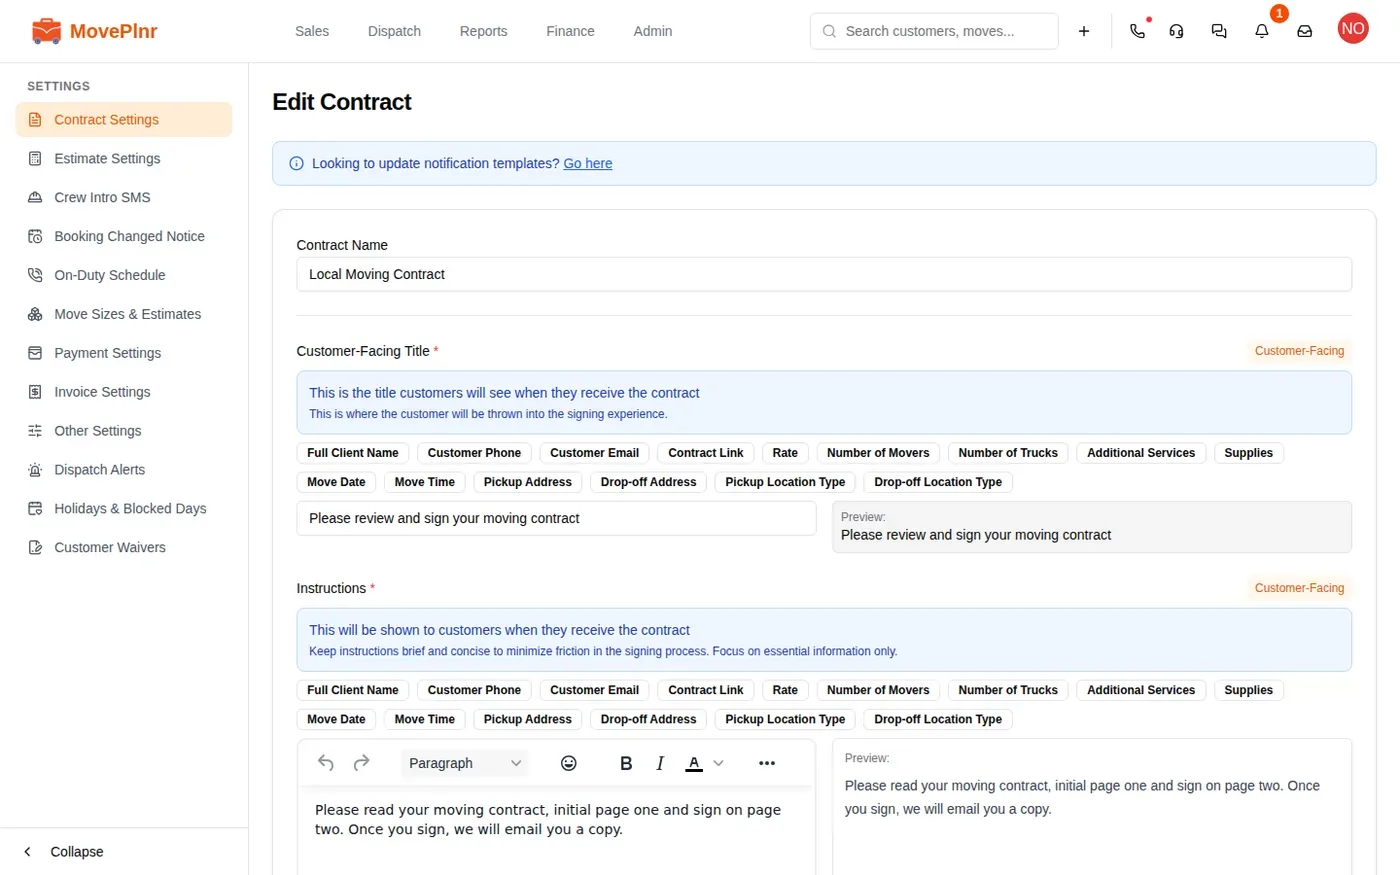
- Give the template a Contract Name. Your team sees this name. The customer sees the Customer-Facing Title and the Instructions instead.
- Click Save Changes.
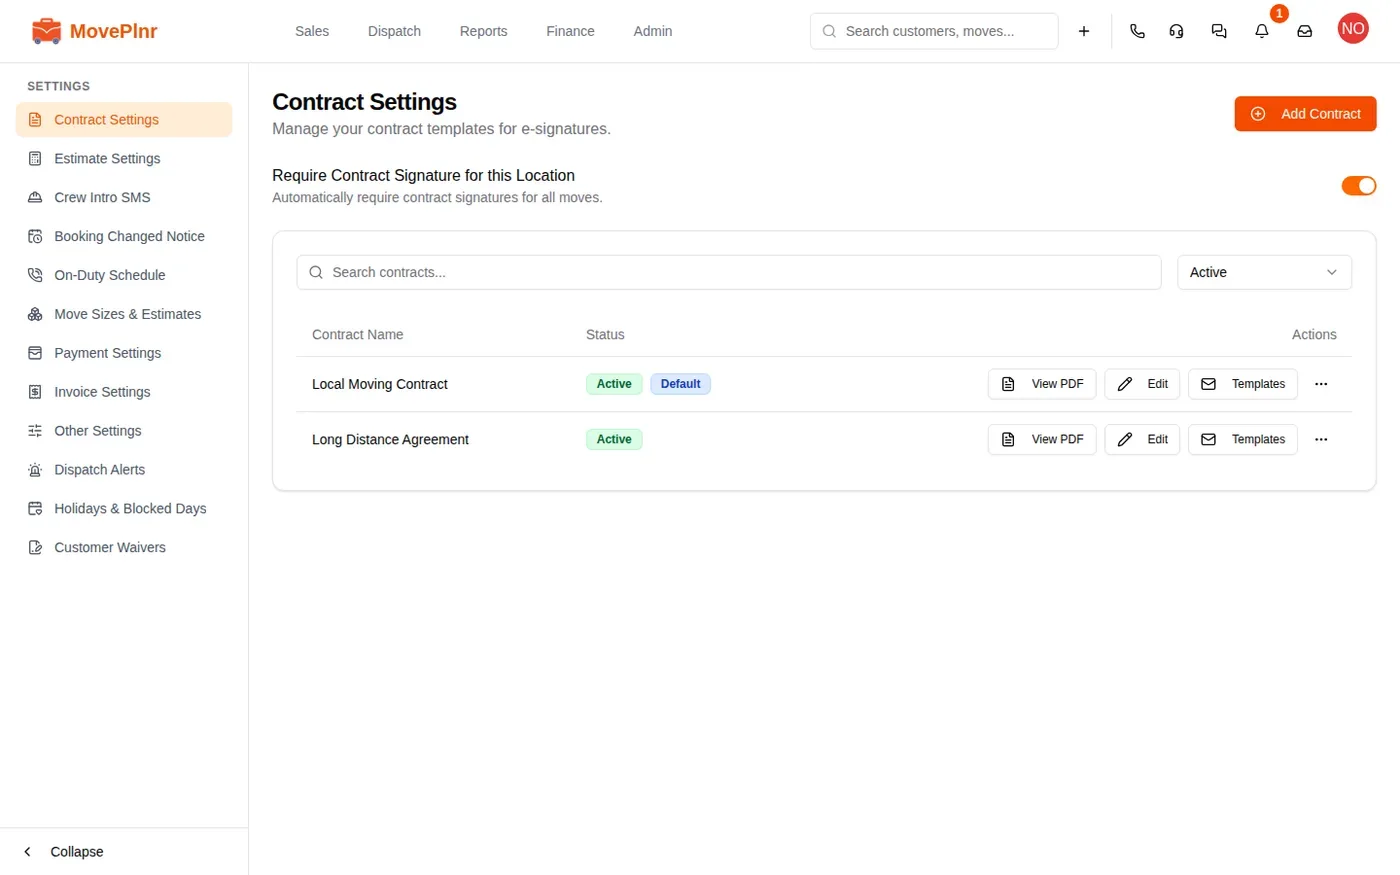
Require Contract Signature for this Location at the top of the page decides whether moves at this location need a signed contract at all.
Placeholders, initials and signatures
When you upload a template’s PDF, you place boxes on it: a signature, initials on any page you want initialed, and placeholders that MovePlnr fills in from the move, such as the customer’s name and the move date. The customer sees a finished document with their own details already on it.
The title and the instructions take placeholders too. Click a chip such as Full Client Name or Move Date to drop it in, and the preview beside the box shows how it reads.
Attach files
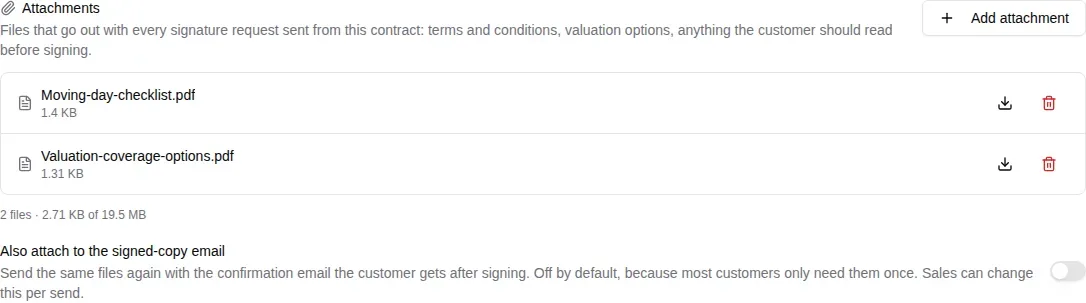
Under Attachments, click Add attachment to add files that go out with every signature request from this template: your terms, a moving day checklist, valuation options. PDF, Word, Excel, images and text files all work, up to 10 MB each and 19.5 MB in total.
Also attach to the signed-copy email sends the same files again with the confirmation the customer gets after signing. It starts off, because most customers only need them once.
Estimate templates take attachments the same way, under Estimate Settings.
Waivers the customer signs first
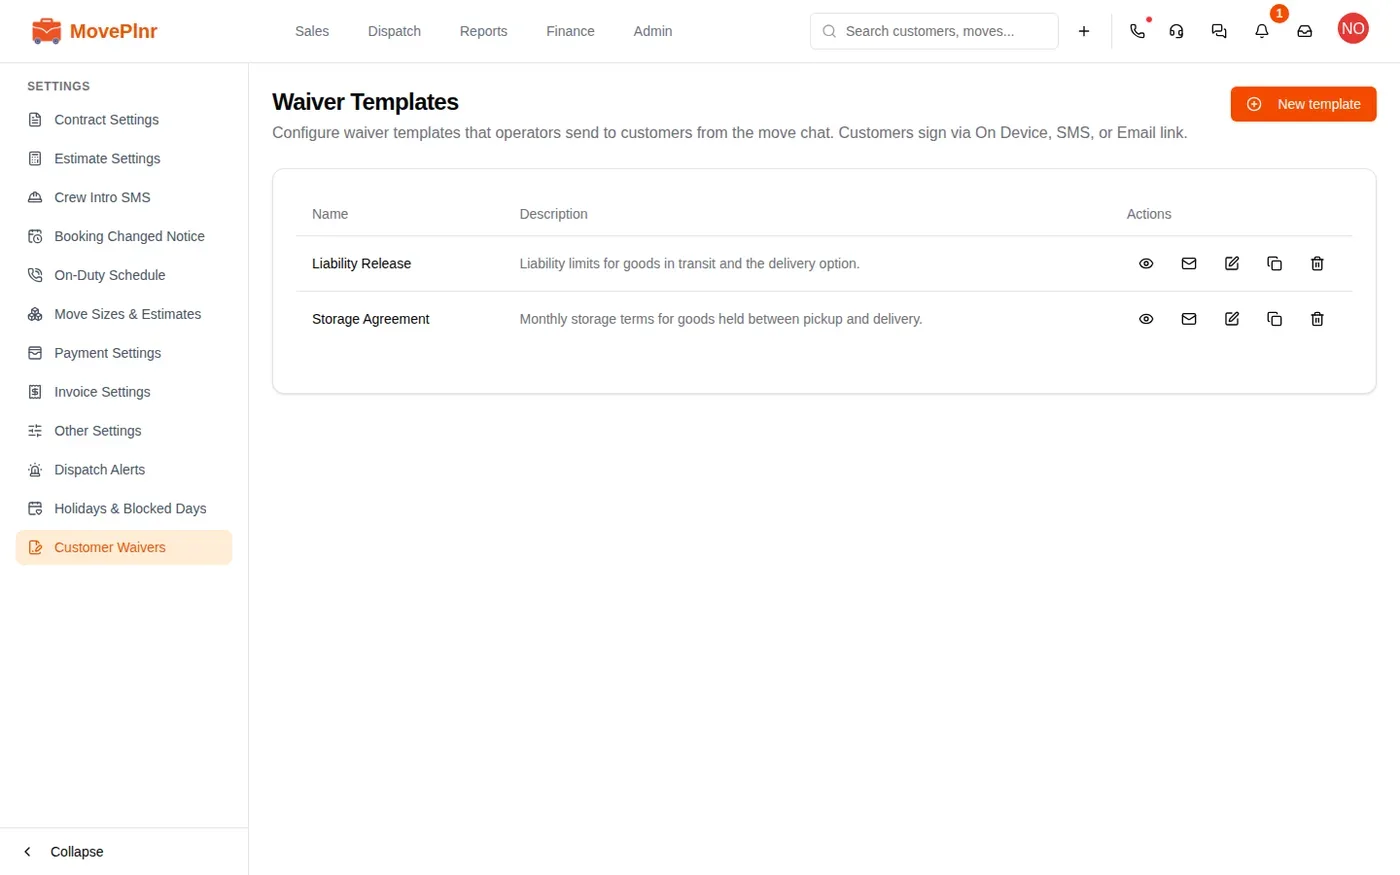
A template can carry waivers the customer signs before the contract, from the same link. Tick them under Waivers signed before this contract. The waivers themselves are set up under Customer Waivers, on the Waiver Templates page.

Remind customers who have not signed
Turn on Send Reminders and MovePlnr emails the customer until they sign.
- Reminder Interval: how many days between reminders.
- Maximum Reminders: the reminders stop after this many, signed or not.
- Urgent Reminders: a daily reminder in the last days before the move.
- Send SMS reminders as well: a text with each reminder, on top of the email.
Uncommit if Not Signed goes one step further. Once the reminders run out, MovePlnr frees the move’s dispatch slot and tells the customer. You can also have it cancel the move if the contract is still unsigned close to the move date.
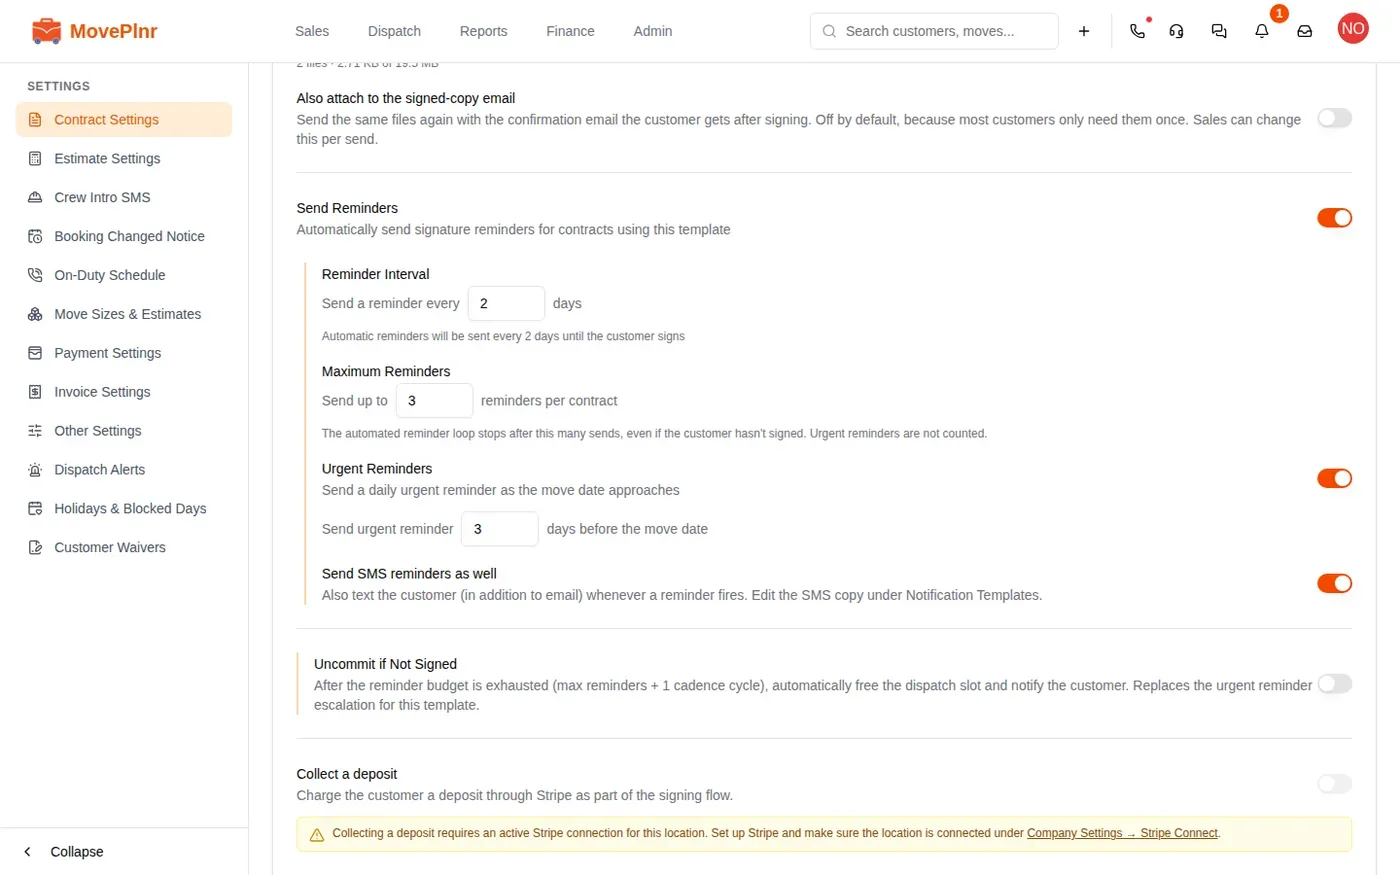
Below the reminders, Collect a deposit takes a deposit through Stripe as part of signing, once the location has an active Stripe connection.
Send the contract when you book
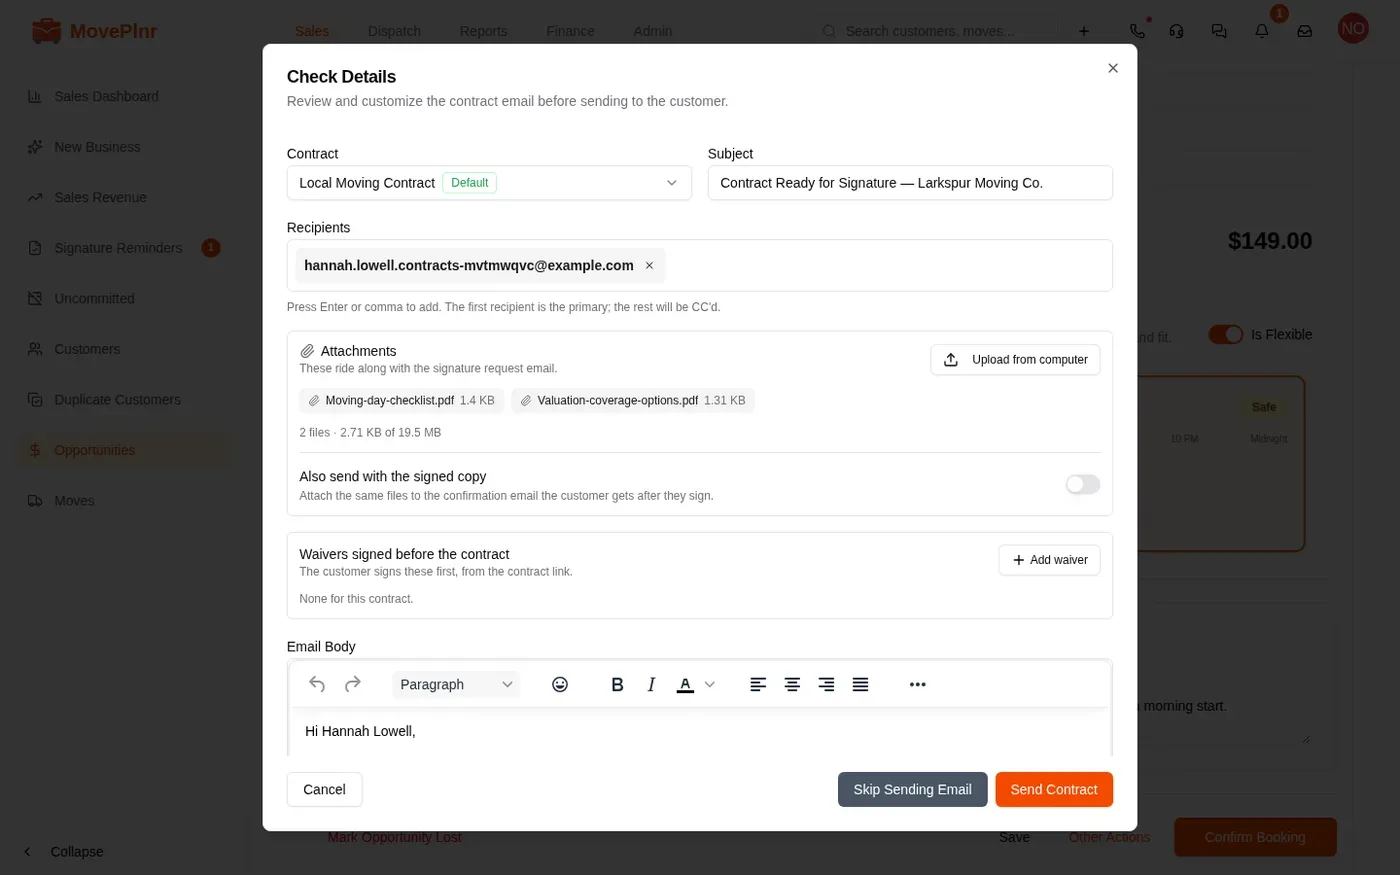
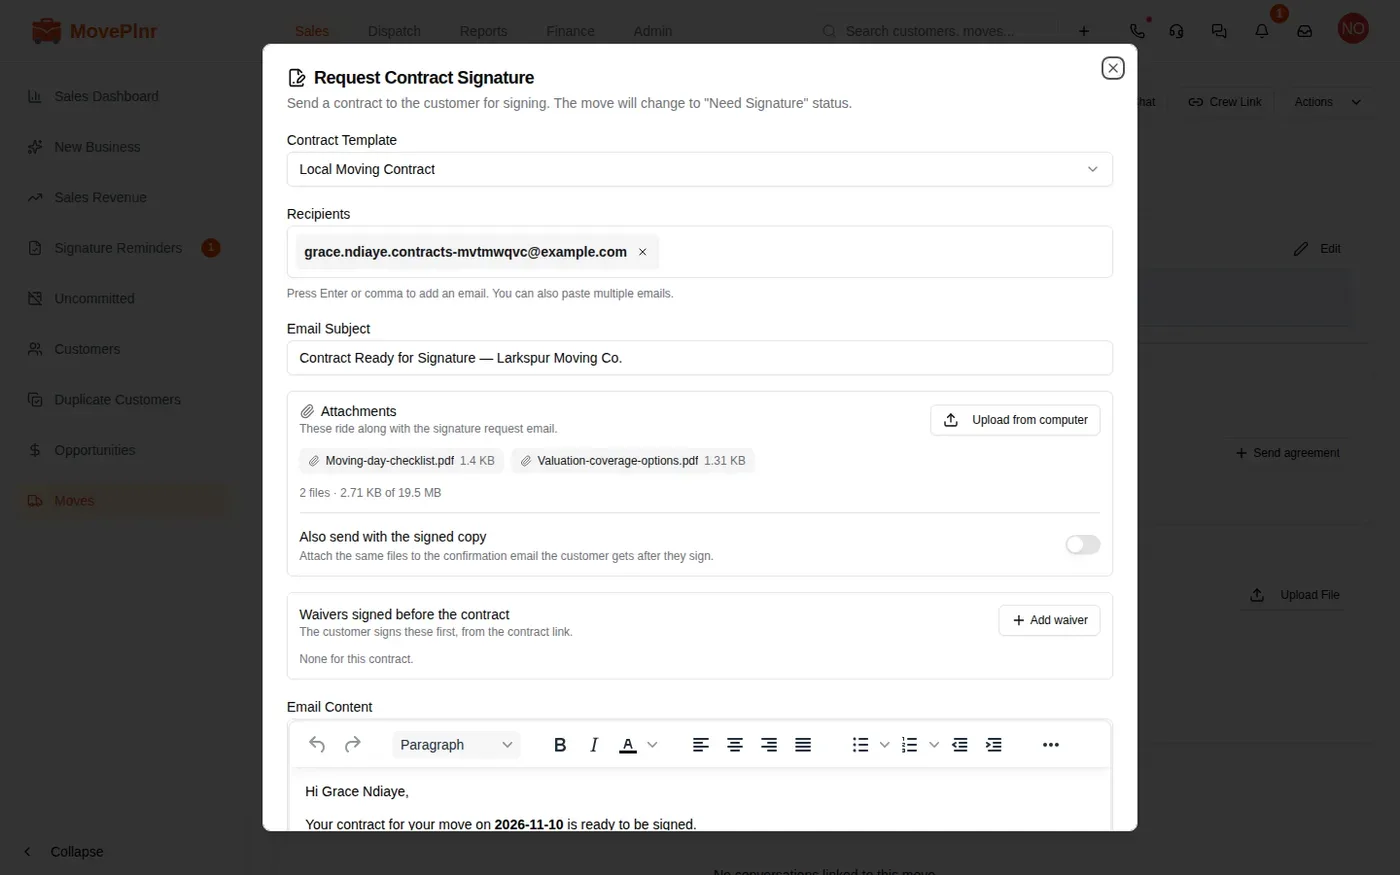
On an opportunity, click Confirm Booking. When the location uses contracts, the window that opens is Check Details: the contract email, ready to send.
- Check the Contract. It starts on the default template, and you can pick another.
- Check the Recipients. The first address gets the contract, and anyone after it is copied.
- The template’s attachments are already listed. Upload from computer adds a file to this one send, and Also send with the signed copy decides whether the files go out again after signing.
- Read the email and click Send Contract. Skip Sending Email books the move without sending anything.
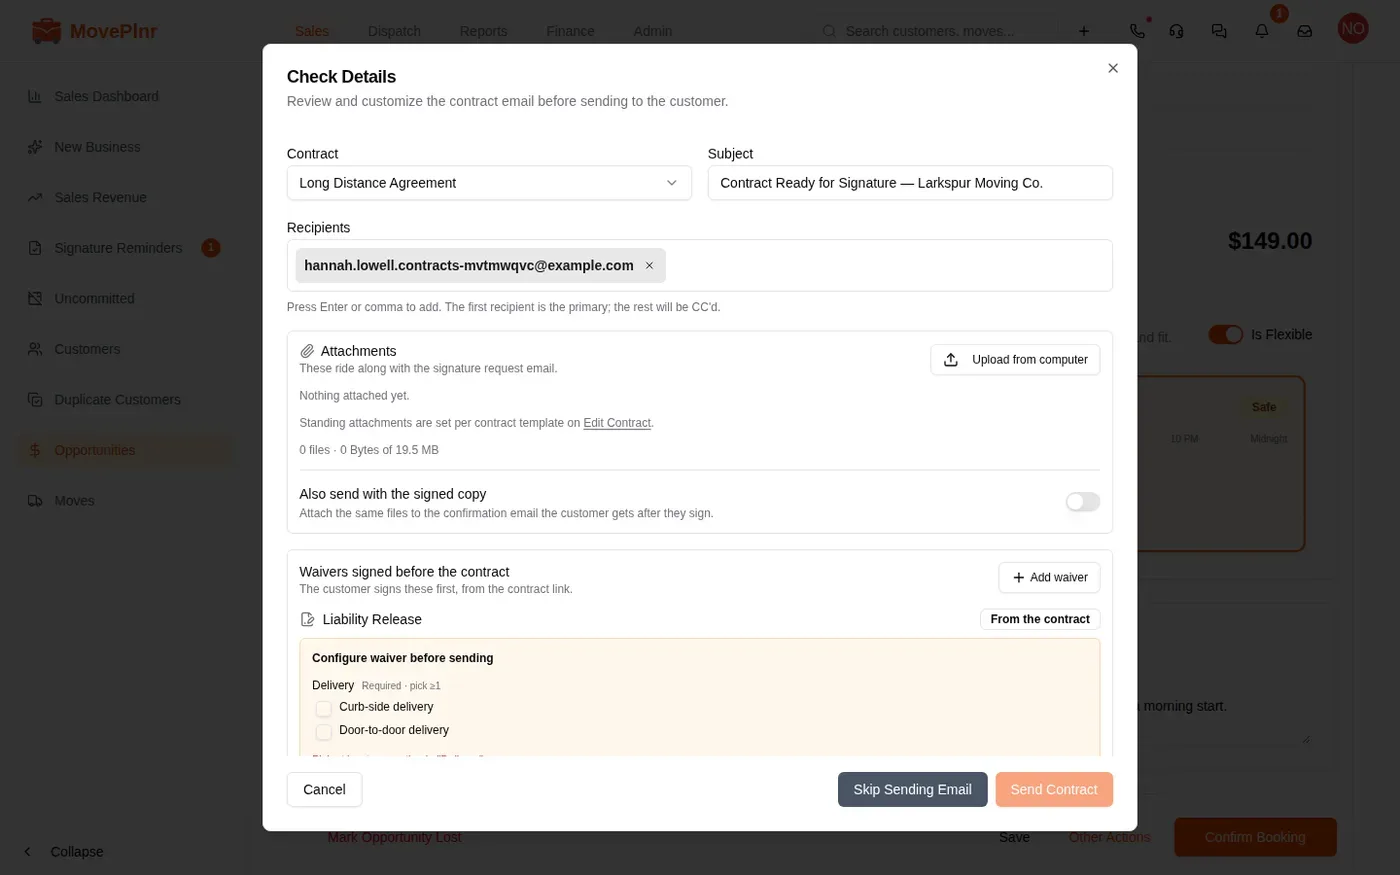
When the contract you choose carries waivers, they are listed under Waivers signed before the contract. If a waiver has choices the office makes, such as the delivery option, tick them here before you can send. Add waiver adds another waiver to this one send.
The move now shows Need Signature until the customer signs, then moves to Pending.
Follow up on an unsigned contract
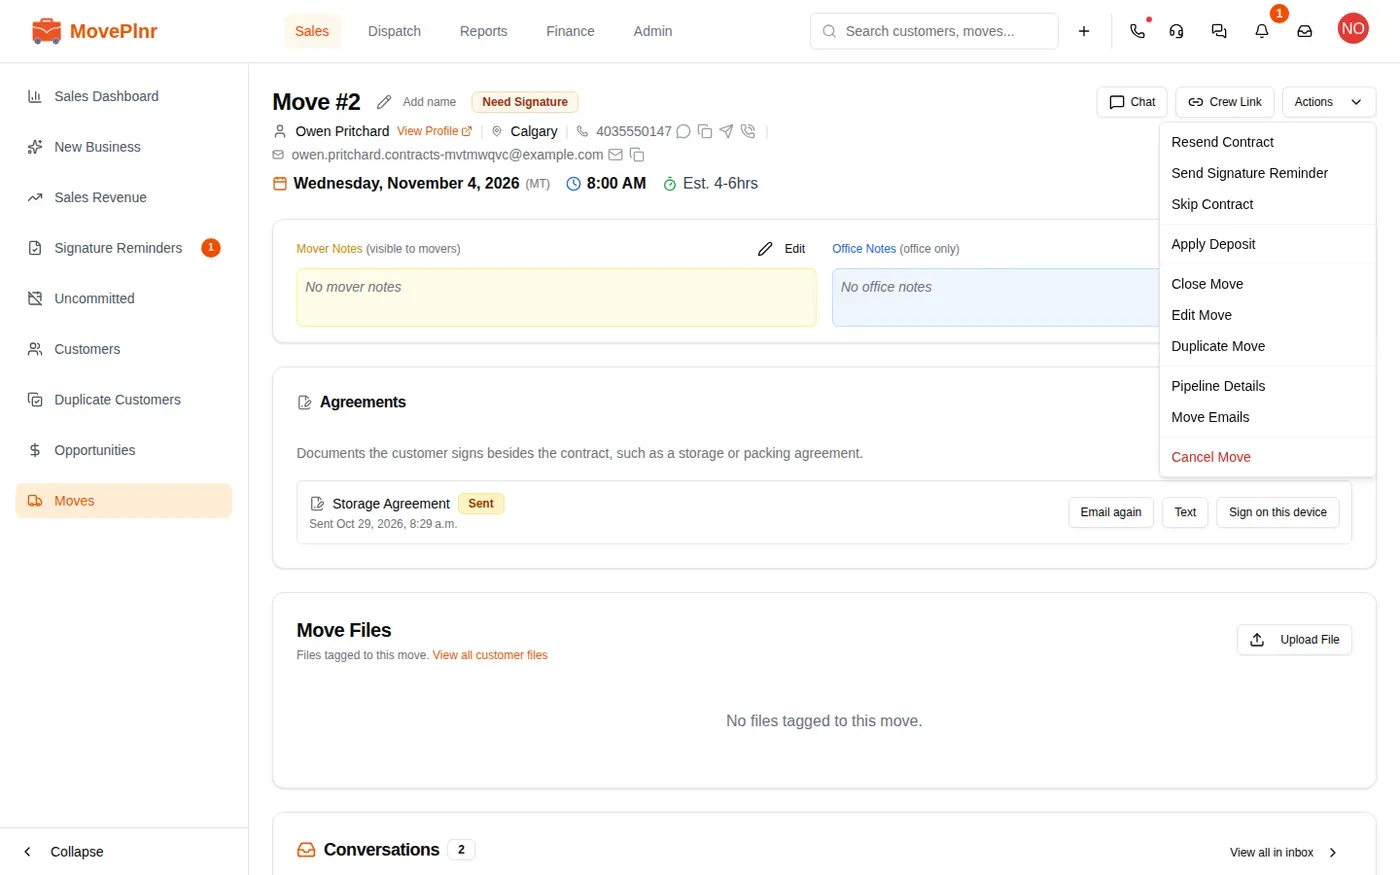
Open the move and click Actions. While the move is Need Signature, you can:
- Resend Contract: send the signing link again, with any changes.
- Send Signature Reminder: send one reminder now.
- Skip Contract: move it on to Pending without a signature.
Signature Reminders in the Sales menu lists every move still waiting for a signature, so nobody has to go looking. Uncommitted lists moves that lost their slot to an unsigned contract.
Send a contract later
A move booked without a contract sits at Pending. Open it, click Actions, then Request Contract Signature. Pick the Contract Template, check the recipients and the email, and send. The move changes to Need Signature.
Once a contract is signed, the same menu offers Request New Signature, to have the customer sign again after a change, and Share Signed Contract, to email or text the customer a copy of what they signed.
Record a contract signed on paper
When the customer signs a printed copy, upload it to the move.
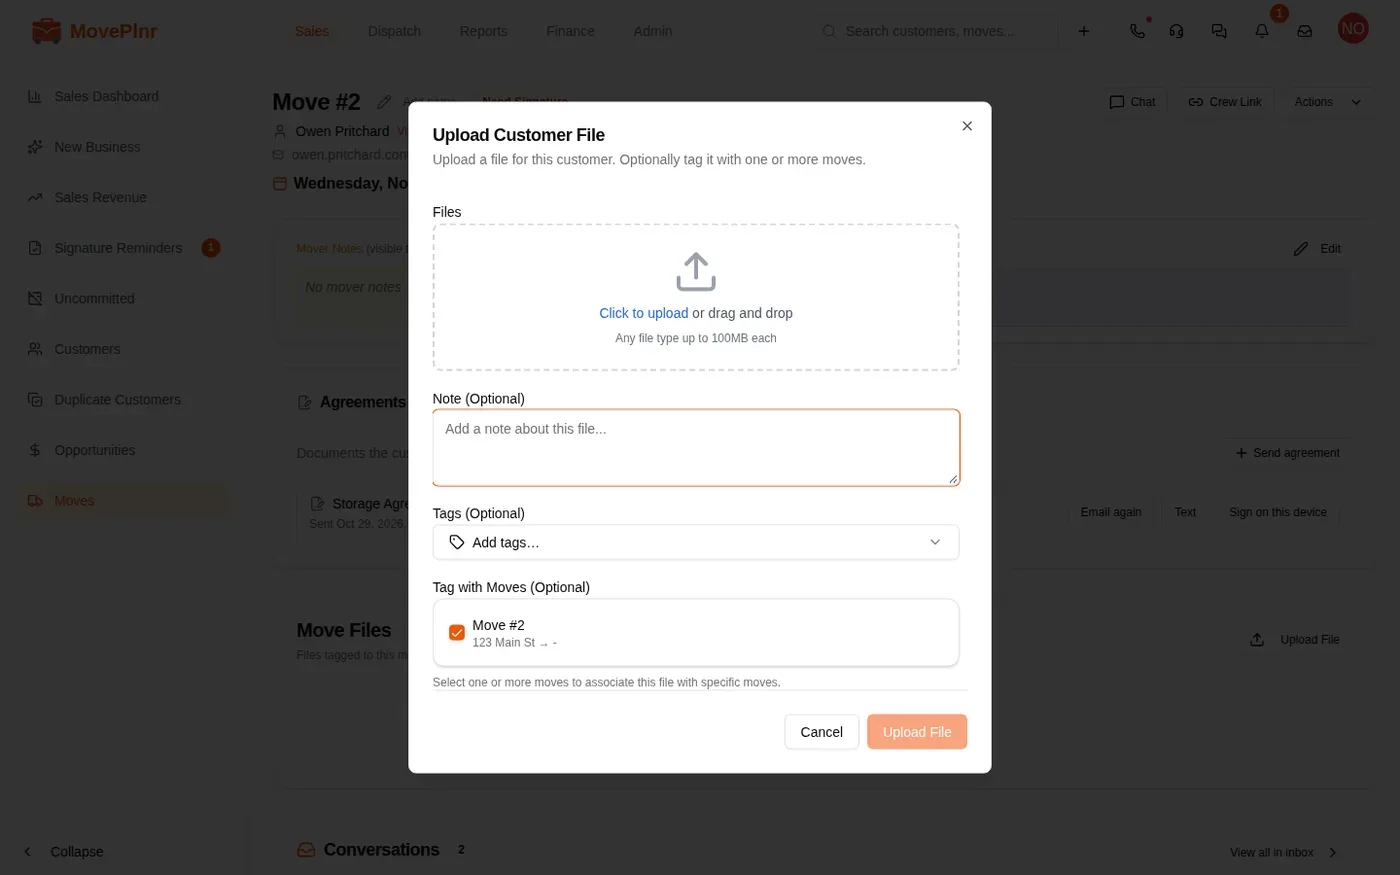
- On the move, click Upload File under Move Files. The Upload Customer File window opens with the move ticked under Tag with Moves (Optional).
- Choose the scanned contract. With one file and a move that needs a signature, a switch appears to mark the file as the signed contract.
- Turn it on and upload. The move goes from Need Signature to Pending.
Send other agreements on a job
A job has one contract, but it can carry as many other agreements as it needs: a storage agreement, a packing agreement. They are listed in the Agreements card on the move and on the opportunity.
- Click Send agreement and choose one.
- Send it with Email again or Text, or hand the customer your screen with Sign on this device.
- The row shows where it stands: sent, opened, or signed, with a link to the signed copy.
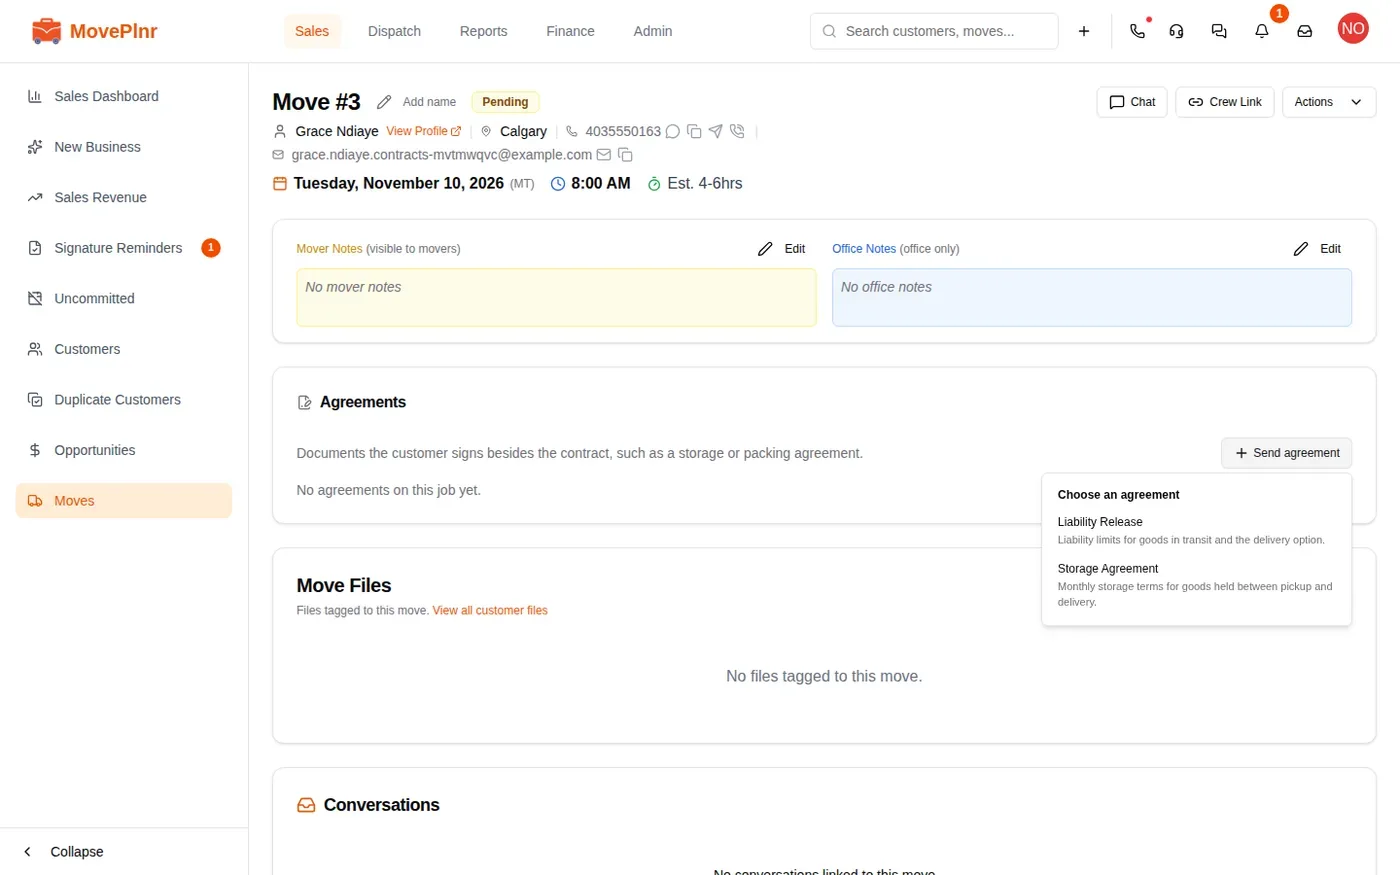

A waiver that went out with the contract shows here too, marked as signed with the contract. It has no send buttons of its own, because the customer signs it from the contract link.