
Before you start
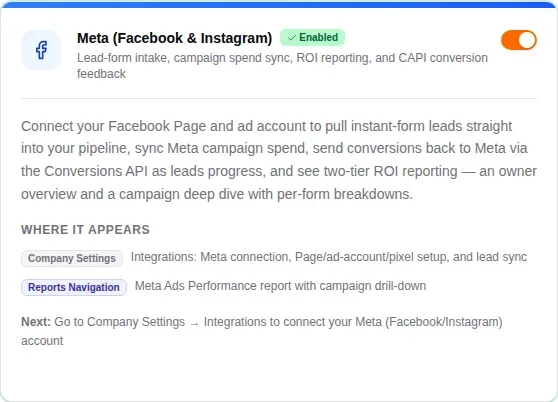
Meta lead ads need the Meta (Facebook & Instagram) add-on. It sits on top of Source Attribution, which sits on top of Lead Sources, so those two need to be on as well. The Meta Ads Performance and Meta Ads Conversions reports also need the Reports add-on. A company admin turns them on in Add-on Management, where Meta is listed under Sales.
To connect Meta and change its settings you need the Ads setup (Google, Meta) permission. To read the two reports you need Meta Ads report and Meta Ads conversions. The Admin preset has all three, and the owner can add them to any other preset. You also need a Facebook login that manages your company’s Facebook Page and its ad account.
How Meta and MovePlnr work together
- Someone sees your ad on Facebook or Instagram and fills in its instant form: their name, email, phone and any questions you added.
- Meta tells MovePlnr straight away. The person arrives as a new lead with the Facebook Ads source, and their answers are on the lead.
- Every night, MovePlnr pulls each campaign’s spend, impressions and clicks from your ad account.
- As the lead moves through your pipeline, MovePlnr tells Meta through its Conversions API when it became a lead, booked and closed, so Meta can show your ads to people more like your paying customers.
Connect your Facebook Page
Open Meta Setup from the Marketing menu, under Ads & Attribution. Admins also find it under Integrations, on the Meta card. Until you connect, the page says Not connected and shows one button.
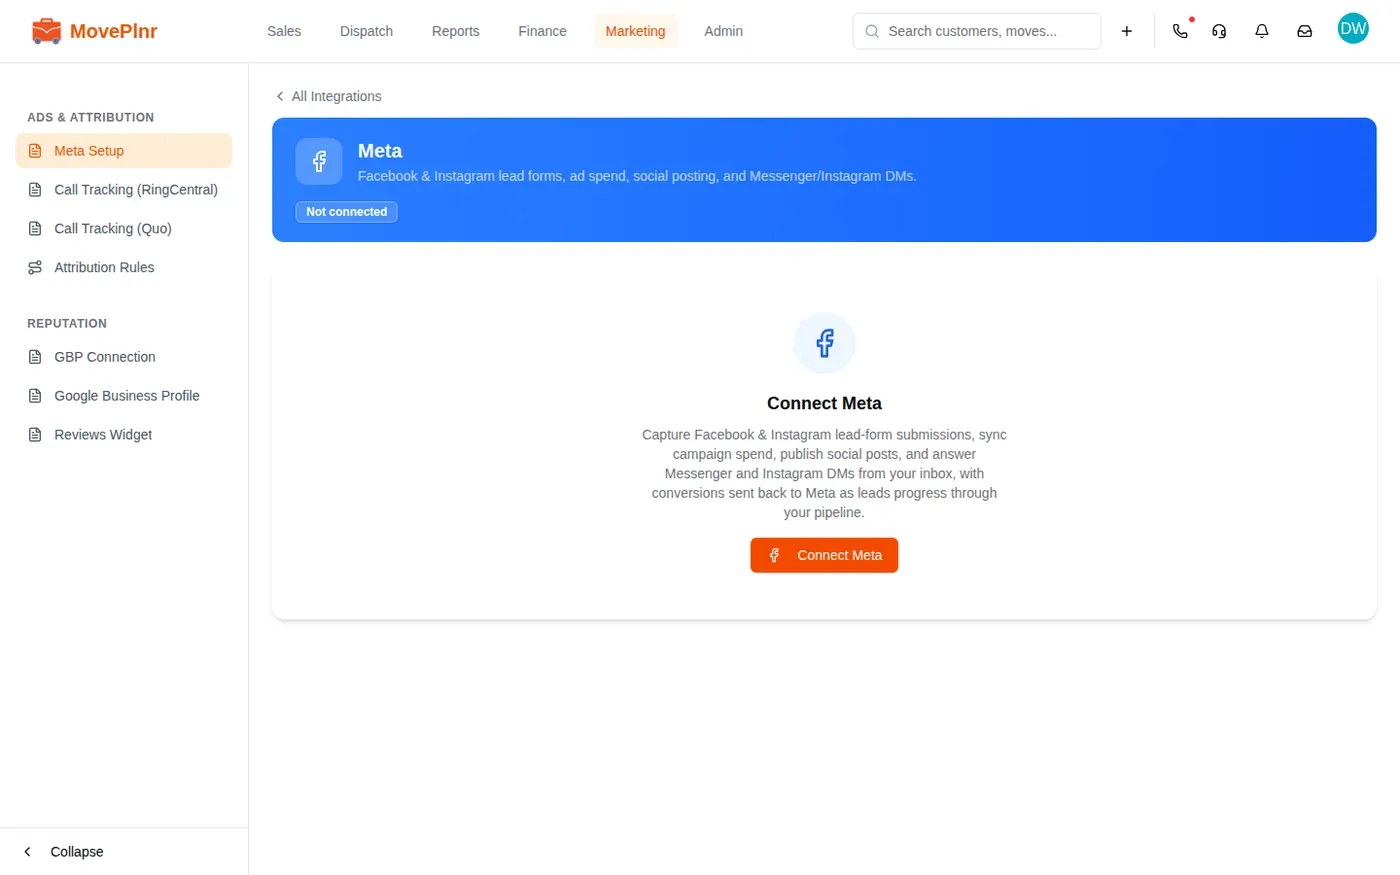
- Click Connect Meta. A Facebook window opens.
- Sign in with the Facebook login that manages your Page and ad account, then allow MovePlnr the access it asks for.
- Back in MovePlnr, the Select a Facebook Page card lists the Pages that login manages. Pick the Page whose lead forms and ads MovePlnr should manage, then click Connect Page.
You’ll see a Facebook screen like the illustration below. It is not a capture of Facebook’s site, and their own screen looks different.
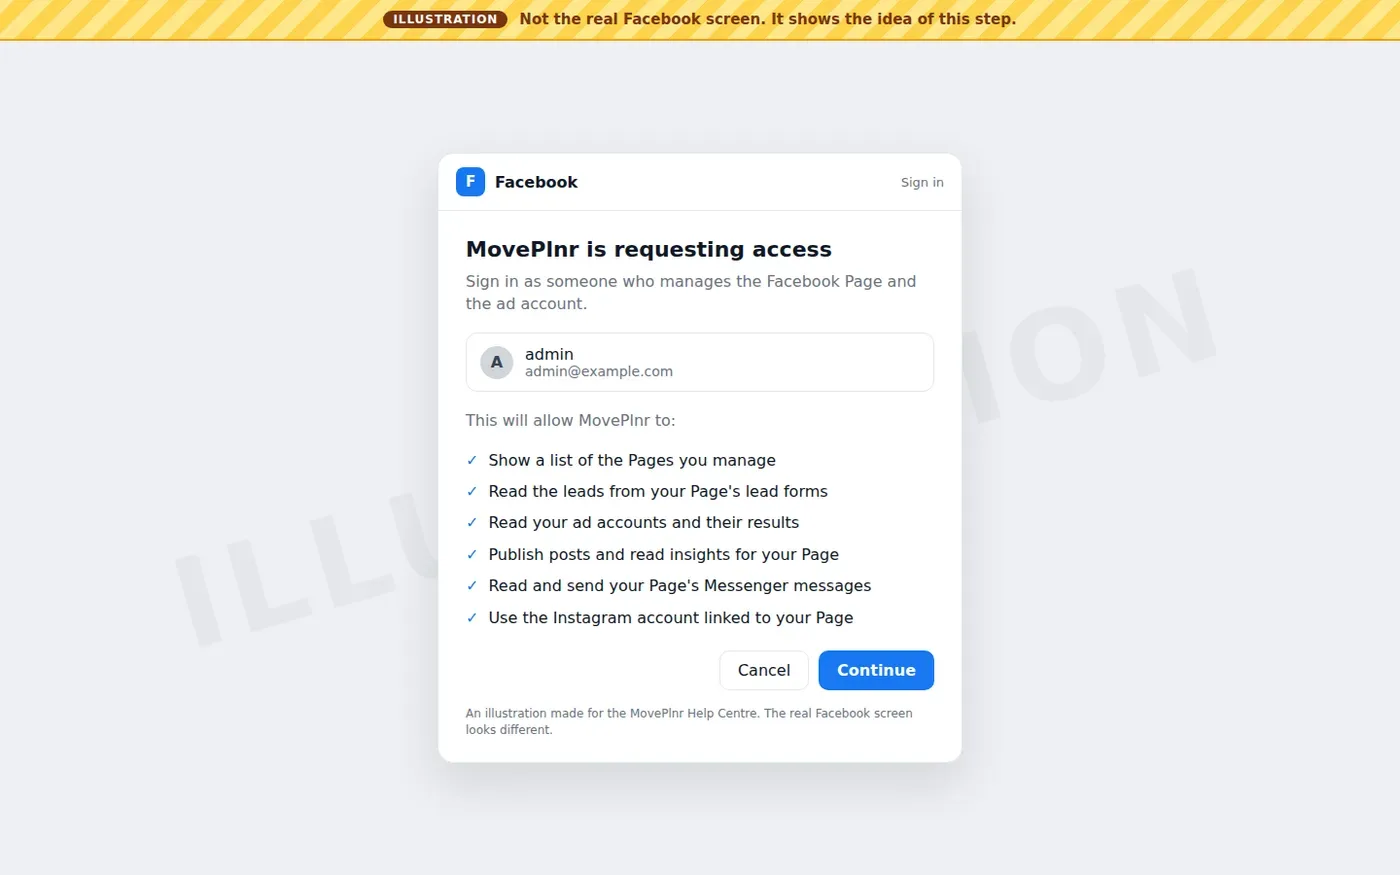
MovePlnr asks for more than lead ads need, because the same connection also publishes social posts and answers Messenger and Instagram messages. If your Page has a linked Instagram business account, its name shows under the Page once you connect.
Finish the setup checklist
Once the Page is connected, the top of Meta Setup shows the Page name, its Page number and a Connected badge. Under it, the Setup Checklist takes you through the rest. Each row gets a green tick when it is done.
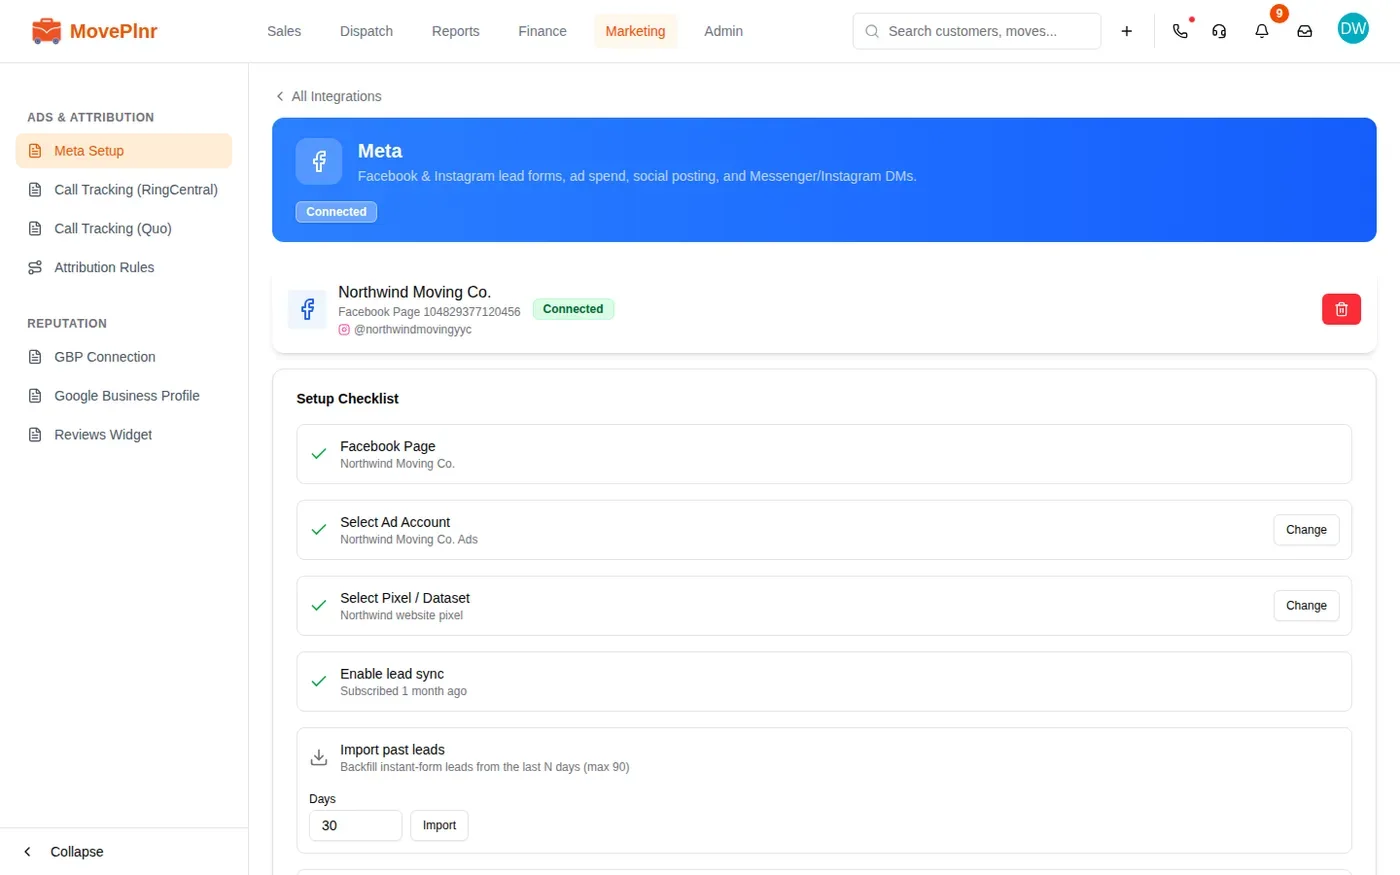
- Facebook Page is ticked as soon as you connect.
- Select Ad Account: click Select and pick the ad account your campaigns run in, then click Link account. MovePlnr pulls campaign spend from this account.
- Select Pixel / Dataset: click Select and pick your pixel, then click Link pixel. This is where MovePlnr sends conversions. Pick the ad account first.
- Enable lead sync: click Enable. From then on, every new instant-form lead on your Page comes into MovePlnr as it arrives.
- Import past leads: type how many days back to go, up to 90, and click Import to bring in leads from before you connected.
- Sync spend now: click Sync Now to pull this week’s spend right away instead of waiting for the nightly sync. After the first sync, Backdate spend data appears below it: pick a From and To date and click Pull Data to fill in older months.
Lead forms become leads
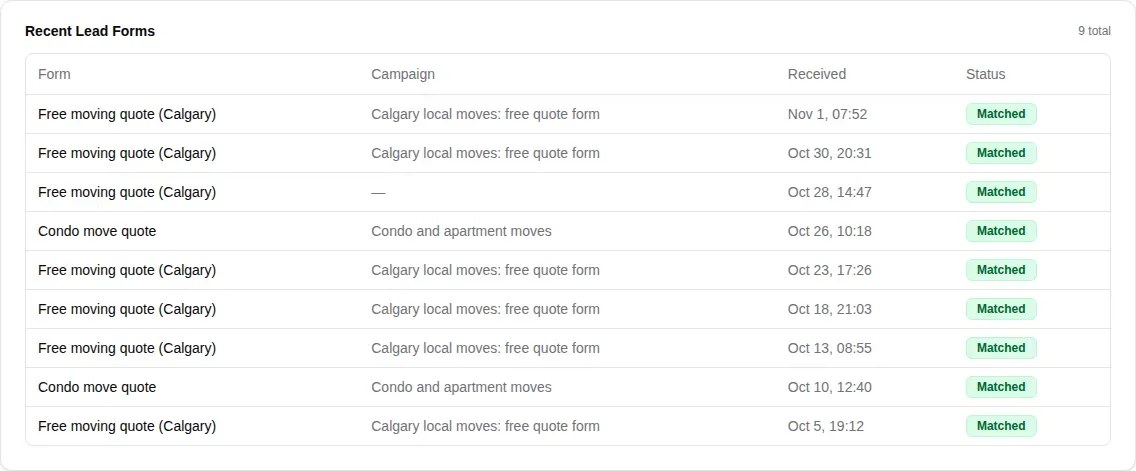
Every instant form someone fills in is listed under Recent Lead Forms on Meta Setup, newest first, with the form, the campaign it came from and when it arrived. Matched means the lead is in MovePlnr: click the badge to open the customer. A dash in the Campaign column means the form was filled in without an ad, for example from your Page.
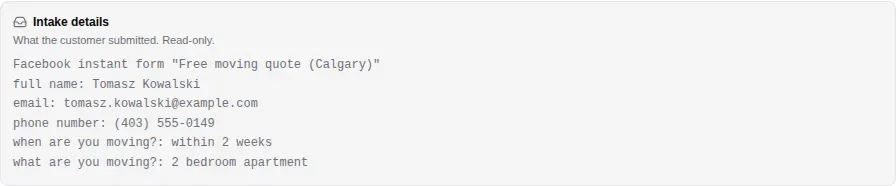
The lead itself lands in New Business like any other, with the Facebook Ads lead source. If the person is already a customer, the inquiry joins their record and they keep the source they had. Everything they typed into the form is on the lead under Intake details, so whoever calls them back knows the move size and timing before they dial.
Choose your conversion tracking stages
Under Conversion Tracking Stages on Meta Setup, a switch for each stage decides whether it is sent to Meta. All three start on.
| Stage | Sent when | Value sent |
|---|---|---|
| Lead | A new opportunity is created | $0 |
| Booked | The move is booked, waiting for a signature or pending | The quote |
| Closed | The move is closed | The actual revenue |
Conversions go to the pixel you picked in the checklist. MovePlnr matches each one to the person in the strongest way it has: the instant-form lead itself, the Facebook click on your website, or the customer’s email and phone.
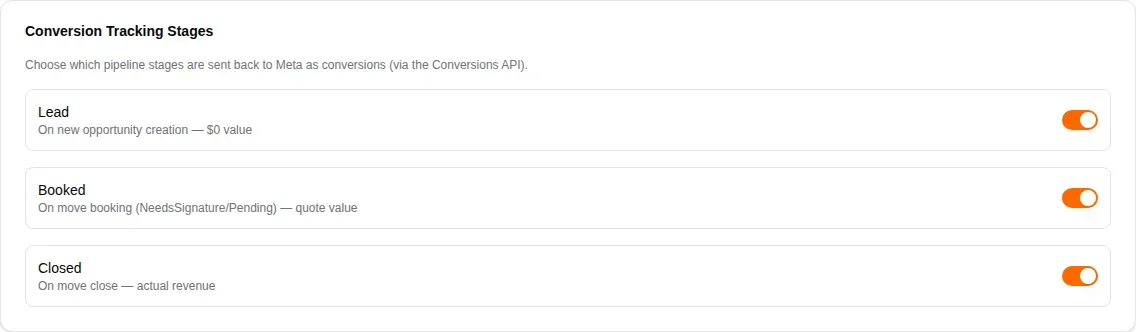
Turning a switch off stops MovePlnr from recording that stage from then on. Conversions it already recorded stay on Meta Ads Conversions, below.
Read the Meta Ads Performance report
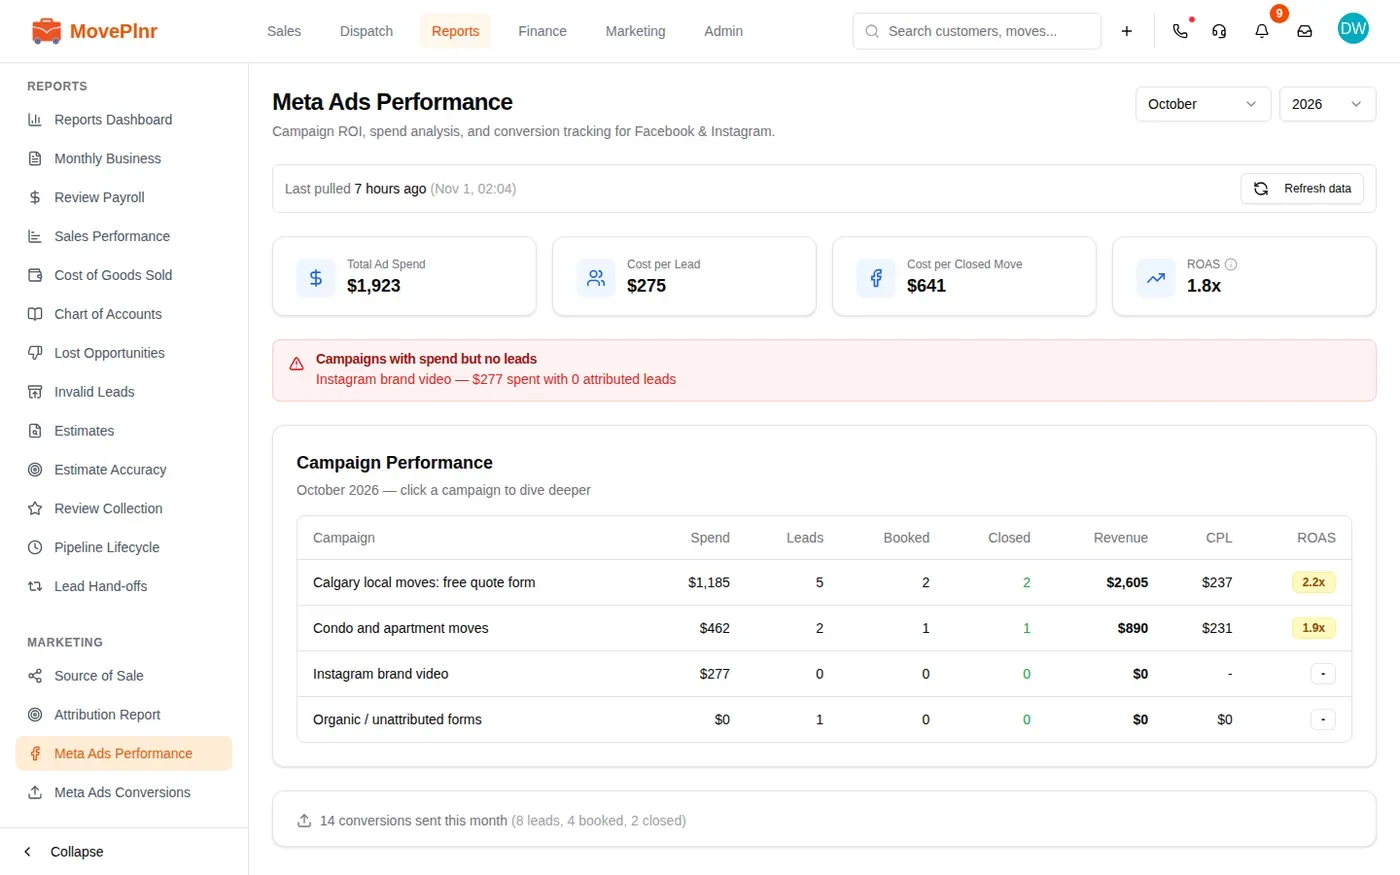
Open Meta Ads Performance from the Reports menu, under Marketing. Pick a month and a year at the top right. The page then shows:
- When the spend was last pulled, with Refresh data to pull the latest now. After a refresh it counts down five minutes before you can refresh again.
- Four totals for the month: Total Ad Spend, Cost per Lead, Cost per Closed Move and ROAS, the revenue each ad dollar brought back.
- A red warning that lists any campaign that spent more than $50 in the month with no leads to show for it.
- Campaign Performance: one row per campaign with its spend, leads, booked and closed moves, revenue, cost per lead (CPL) and ROAS. The ROAS badge is green at 3x or more and amber from 1x. Forms filled in without an ad are counted in their own Organic / unattributed forms row, which has no spend.
- How many conversions were sent to Meta that month, split into leads, booked and closed.
Each lead counts toward the campaign its instant form came from, so there is nothing to tag or set up on your website. Revenue is the total of the closed moves.
Drill into a campaign
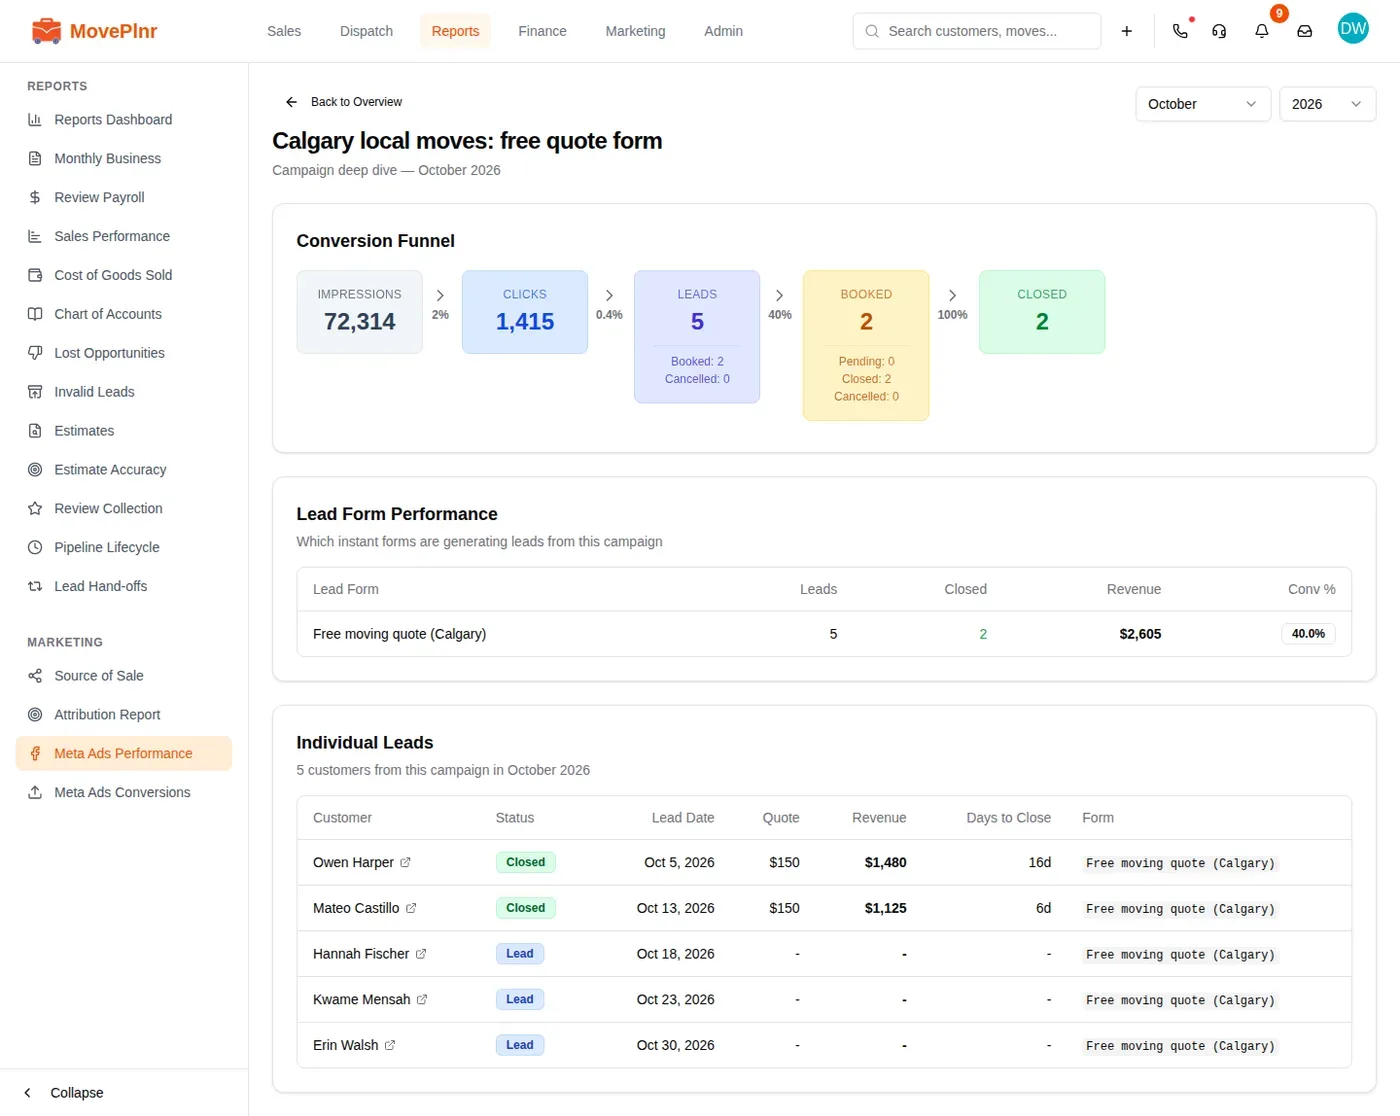
Click a campaign’s row to open its deep dive for the same month.
- Conversion Funnel: Impressions, Clicks, Leads, Booked and Closed side by side, with the percentage that made it from each stage to the next. Leads and Booked also show how many were booked, pending, closed or cancelled.
- Lead Form Performance: each instant form that brought leads from this campaign, with its leads, closed moves, revenue and conversion rate.
- Individual Leads: each customer, their status, lead date, quote, revenue, days to close and form. Click a customer to open them in a new tab.
Check the conversions sent to Meta
Meta Ads Conversions, also under Marketing in the Reports menu, lists every conversion MovePlnr sent or tried to send: the move, the customer, the stage, the value, how it was matched, its status, when it was created and when it was sent. The link at the bottom of Meta Setup opens it too.
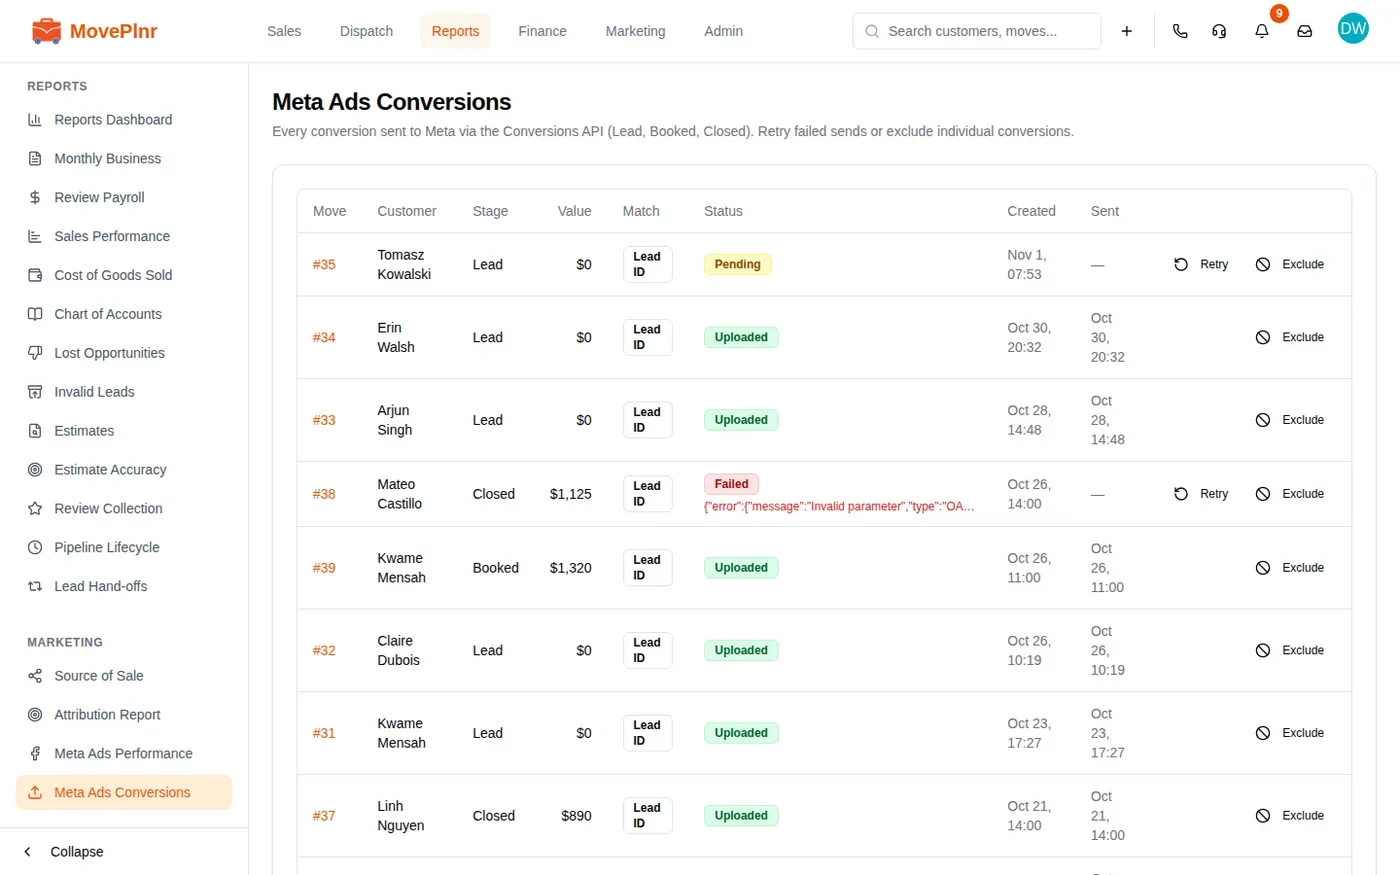
- Uploaded means Meta has it.
- Pending means it goes with the next send. Anything left Pending is sent again with the nightly sync.
- Failed shows Meta’s reason under the badge. Fix the cause, then click Retry on the row.
Click Exclude on a row to stop a conversion from ever being sent, for example a test move. MovePlnr asks first, because this can’t be undone.
Reconnect or disconnect
- If Meta stops accepting the connection, for example after a password change or when the person who connected loses access to the Page, the badge at the top of Meta Setup turns red and says why. Lead intake, spend sync and conversions pause. Click Re-Authorize, sign in to Facebook again and pick your Page.
- The red bin at the top right of Meta Setup disconnects Meta. MovePlnr asks you to confirm, then stops lead intake, campaign syncing and conversions. You can connect again later.