
Before you start
Attribution rules need the Source Attribution add-on, which sits on top of Lead Sources. The Attribution Report also needs the Reports add-on. A company admin turns them on in Add-on Management.
When Source Attribution is first turned on, MovePlnr adds three rules for you: a Google click ID (gclid) or a gad_source tag sets Google Ads, and a Facebook click ID (fbclid) sets Facebook Ads. If those sources don’t exist yet, they are created.
Company admins and marketing managers can manage rules, read the report and merge sources.
How attribution works
- A lead sends your website form. The address of the page they sent it from comes with it, for example
/calgary-movers?gclid=...&gad_campaignid=.... - MovePlnr reads the tags in that address and checks your active rules in the order the list shows, oldest first. The first rule that matches sets the lead source.
- If no rule matches, the lead keeps your default source, and the tags it carried show up as a suggestion on the rules page.
Leads that arrive by email in your connected inbox work the same way, with rules that check the email’s headers instead of the page address. A rule only sets the source on a new customer. A customer you already have keeps theirs until you apply a rule to them yourself.
Start from your lead sources
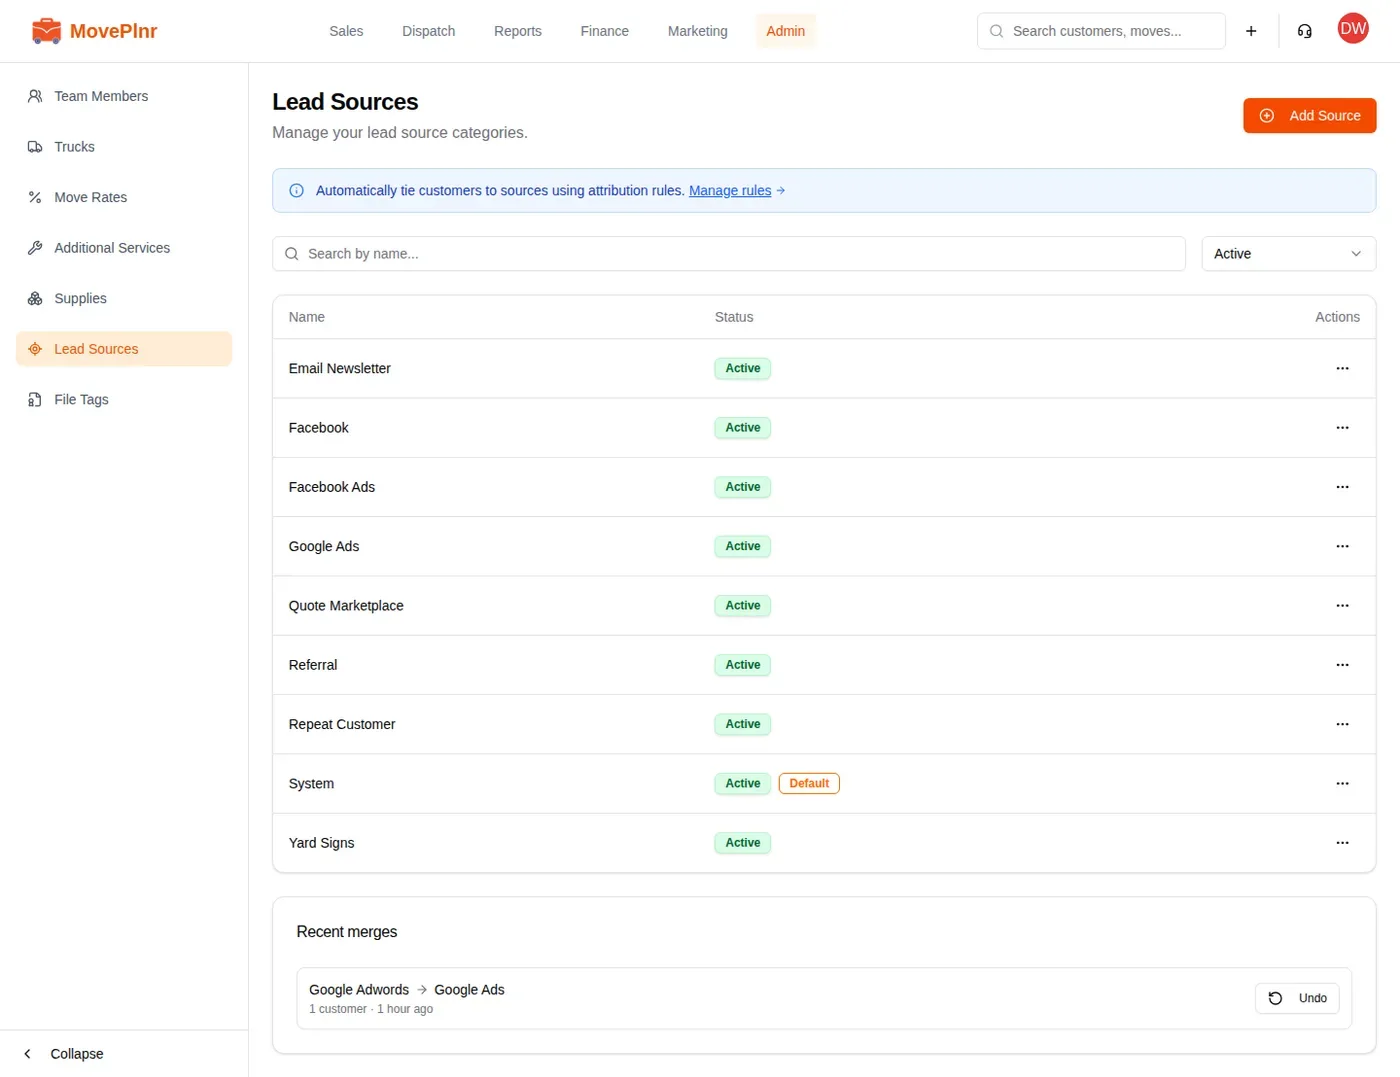
Rules point at your lead sources, so start there. Open Lead Sources. Admins find it under Admin; marketing managers find it under Marketing. Add any source you are missing with Add Source, then click Manage rules in the blue bar to open the rules.
The rules list
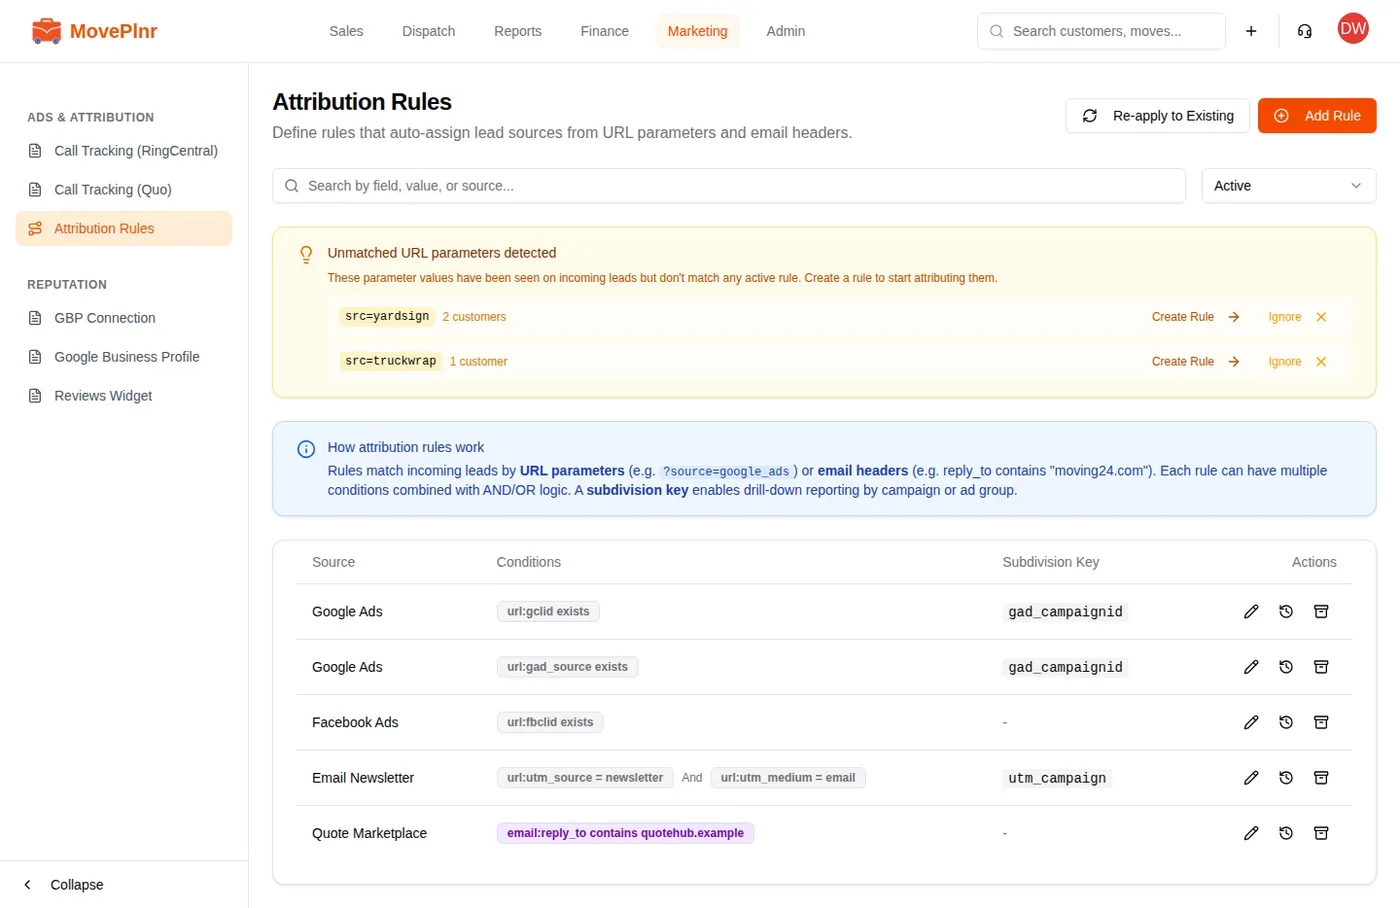
Attribution Rules lives under Marketing. Each row is one rule:
- The source the rule sets.
- Its Conditions. A grey badge checks a URL parameter, like
url:fbclid exists. A purple badge checks an email header, likeemail:reply_to contains. - The Subdivision Key, if it has one: a second tag the rule records so the report can split the source, for example by campaign.
The pencil edits a rule, the clock applies it to customers you already have, and the box archives it. Switch the filter from Active to Archived to find an archived rule and restore it.
Create a rule from a suggestion
The yellow Unmatched URL parameters detected card lists tags that came in on real leads but match no active rule, with how many customers carried each one. A tag with many different values, like an ad click ID, shows once with an “any value” badge. MovePlnr also notifies admins and marketing managers when a lead arrives with tags no rule matches.
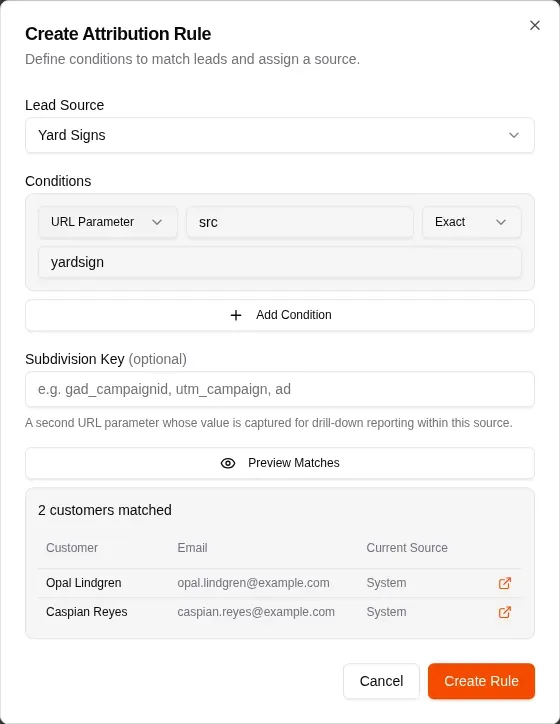
- Click Create Rule beside the tag. The rule opens with the tag already filled in.
- Under Lead Source, pick the source these leads belong to.
- Click Preview Matches to see which customers already carry the tag, and the source each one has now.
- Click Create Rule to save it.
Not every tag is a source. Click Ignore to hide a suggestion for good, for example a tag that only ever describes a campaign.
Build a rule by hand
Click Add Rule to start from an empty rule.
- Pick the Lead Source.
- Set the first condition. Choose URL Parameter to check a tag in the page address, or Email Header to check the from, reply_to, to or subject of an emailed lead.
- Type the parameter name, like
utm_source. Choose Exact for an exact match or Contains to match part of the value. Type the value, or leave it empty to match any lead that has the parameter at all. - Click Add Condition for another check. The small button between two conditions switches between And, where every condition must match, and Or, where any one is enough.
- Optional: add a Subdivision Key, like
utm_campaignorgad_campaignid, to record that tag’s value for the report. - Click Preview Matches, then Create Rule.
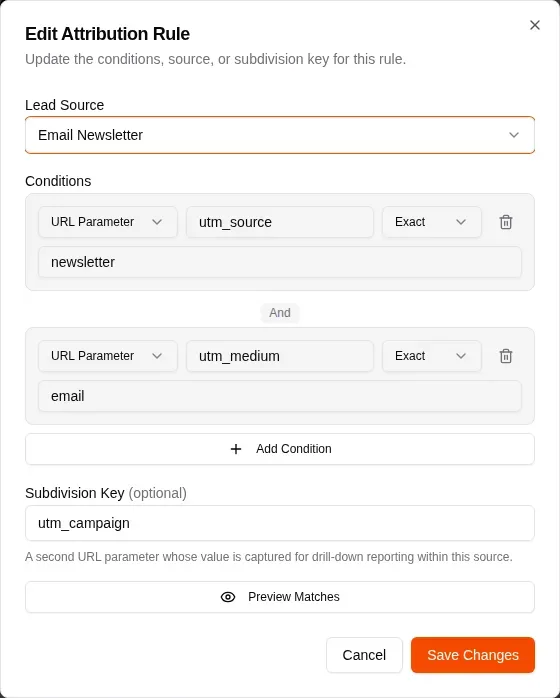
To change a rule later, click its pencil, change it in Edit Attribution Rule and click Save Changes. A changed rule applies to new leads from then on.
Apply rules to customers you already have
A new rule only sets the source on leads that arrive after you save it. Two ways to reach older customers:
- The clock on a rule’s row applies that one rule to existing customers whose tags match it. When you create a rule, the confirmation offers the same thing.
- Re-apply to Existing, at the top of the page, runs all your active rules over every customer no rule has matched yet. The first matching rule sets each one’s source.
Both skip customers a rule already matched, so a customer never gets set twice. Both change the lead source on the customers they match.
Read the Attribution Report
Open Reports, then Attribution Report. Marketing managers also find it under Marketing.
- Choose which date counts: Move Date, the sale date or the lead creation date.
- Choose the period. Last 3 Months is the default; a custom range is at the bottom of the list.
The page then shows, for that period:
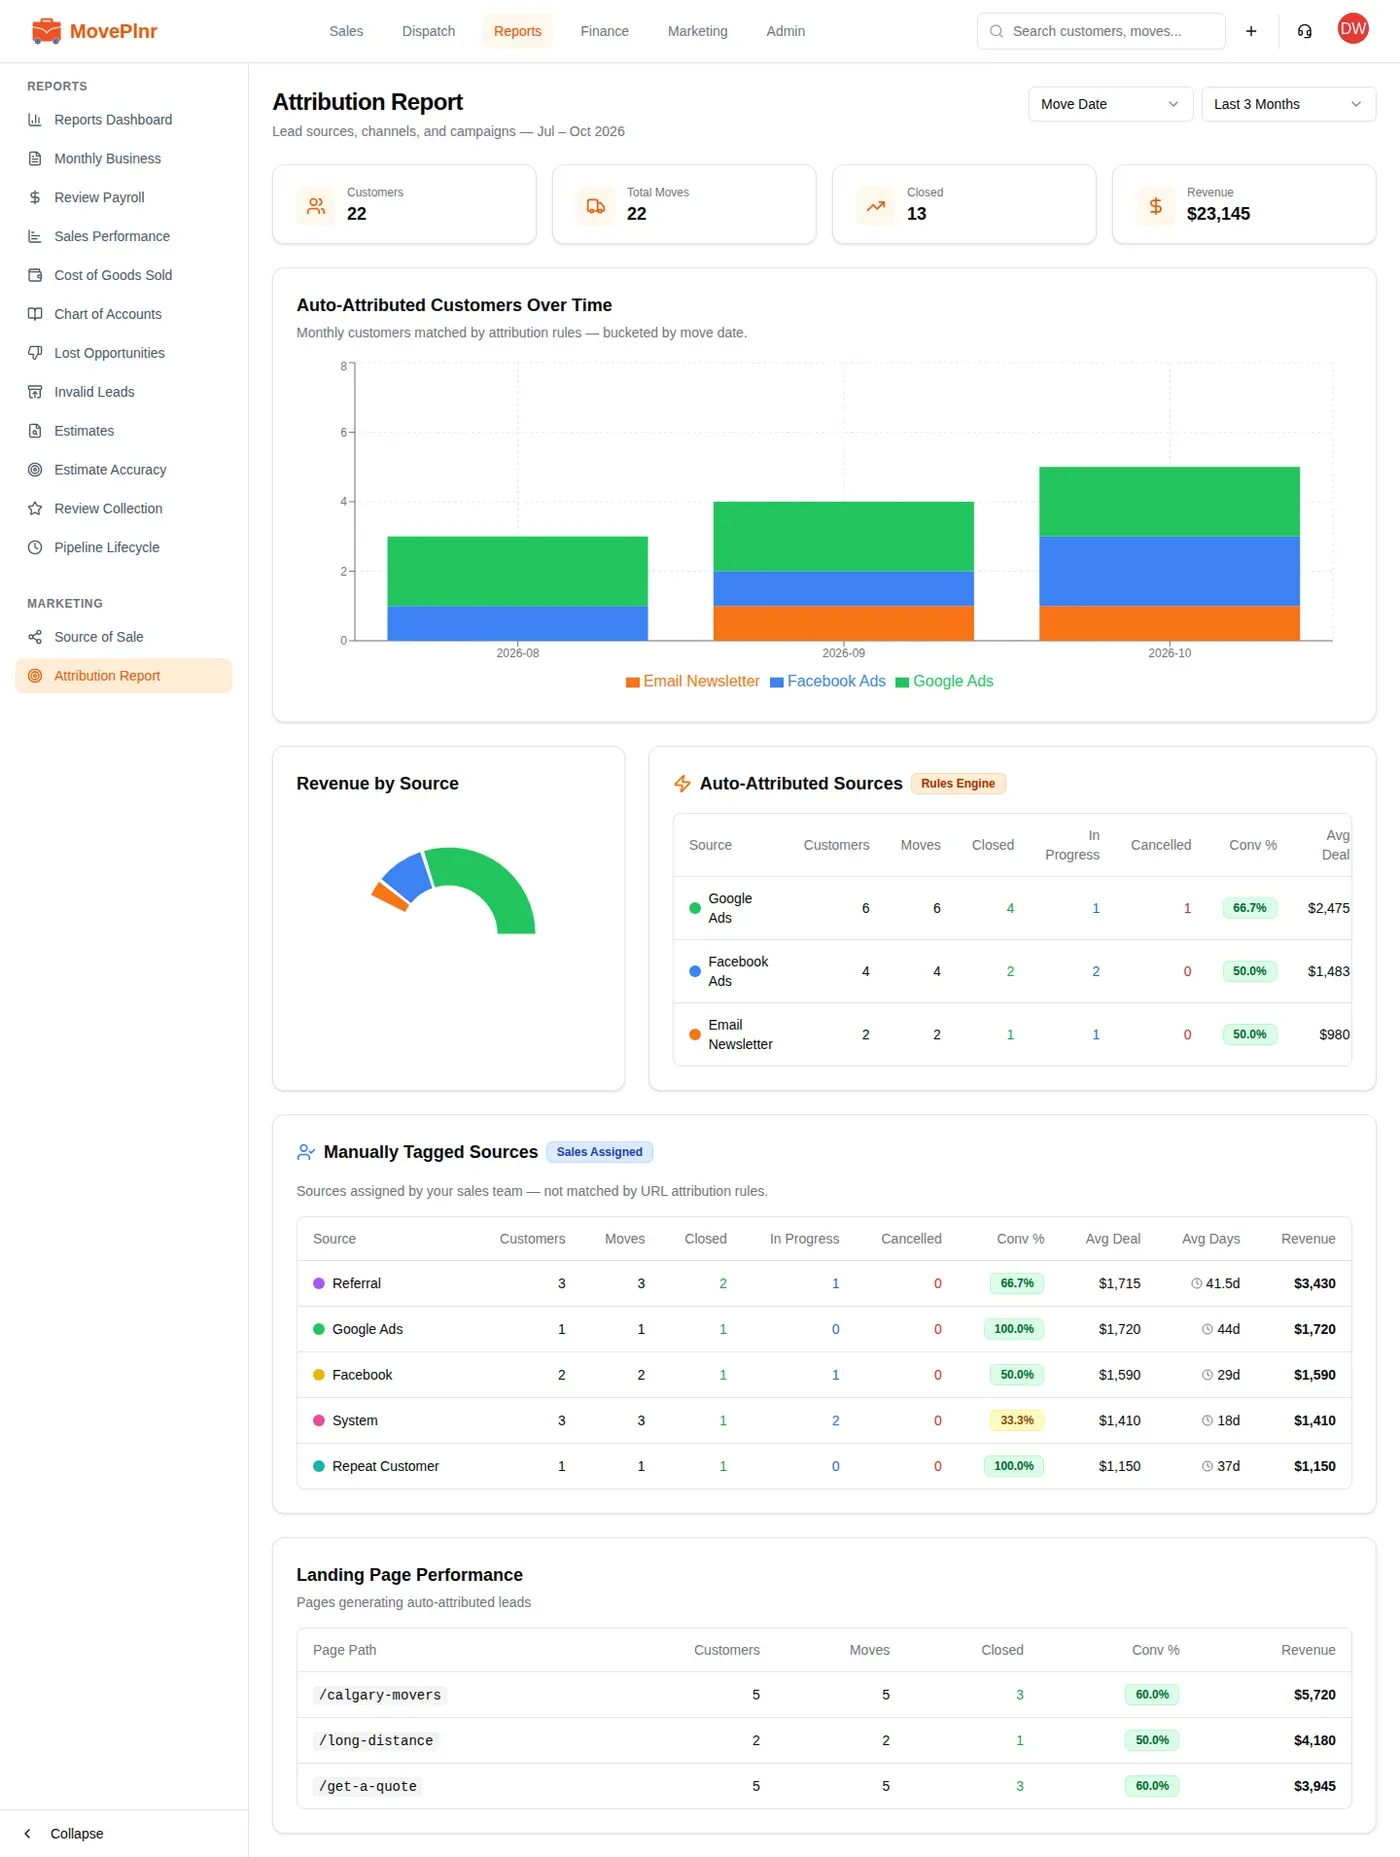
- Customers, total moves, closed moves and revenue across every source. Revenue is the pre-tax total of closed moves.
- Auto-Attributed Customers Over Time: customers a rule matched, month by month, by source.
- Revenue by Source: how the revenue from rule-matched customers splits.
- Auto-Attributed Sources: each source the rules set, with customers, moves, closed, in progress, cancelled, conversion, average deal, average days to close and revenue.
- Manually Tagged Sources: the same numbers for sources your team picked by hand.
- Landing Page Performance: rule-matched customers grouped by the page they sent the form from.
Drill into a source
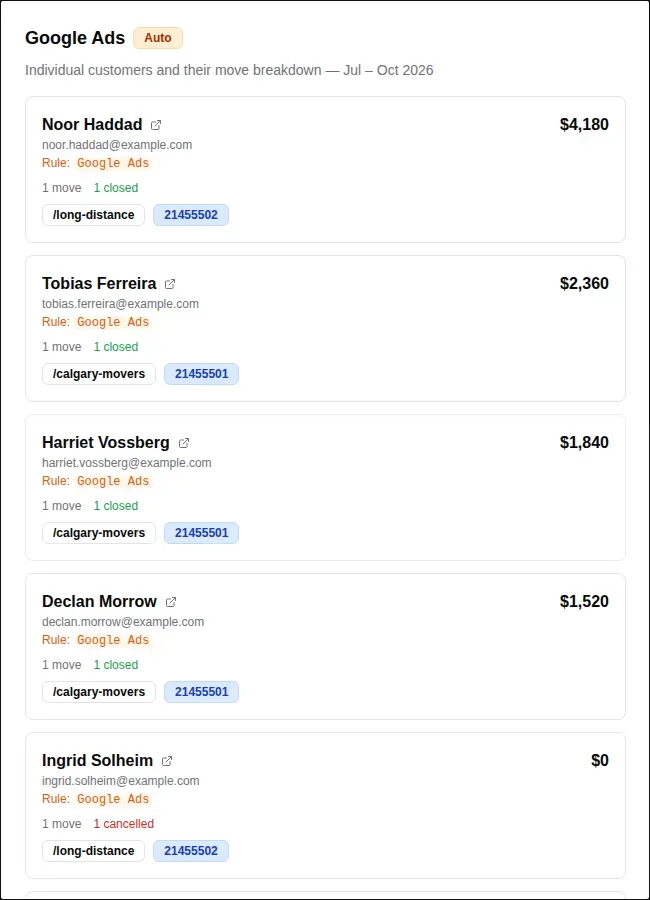
Click any source row to see the customers behind it: their jobs, revenue, the page they came from and, when the rule has a subdivision key, the value it recorded, such as the campaign ID. Click a customer to open them. Click a row in Landing Page Performance to see the customers who came from that page.
Merge duplicate lead sources
Over time a source list collects near duplicates, like “Facebook” beside “Facebook Ads”. Merging folds one into the other.
- On Lead Sources, open the menu on the duplicate’s row and choose Merge into.
- Under Merge into, pick the source to keep. The dialog says how many customers will move.
- Click Merge sources.
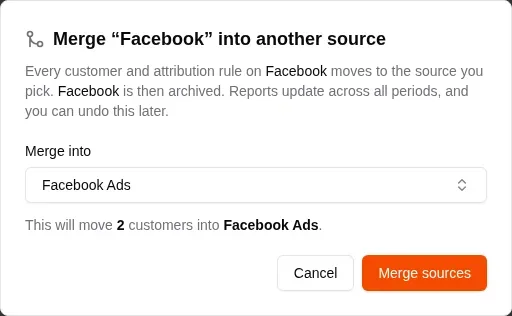
The duplicate’s customers and attribution rules move to the source you keep, and the duplicate is archived. Reports update for every period. Your default source and the system source can’t be merged away.
Changed your mind? Recent merges, under the source list, shows each merge with how many customers it moved. Click Undo to restore the source.