
Before you start
Company admins, dispatchers and sales reps can use every tool on this page. Marketing managers can open customers but don’t see the merge tools.
Nothing is merged without you. The scan only lists records that look alike, and every merge shows what will happen before you confirm. Every merge keeps a receipt and can be undone.
Find duplicates
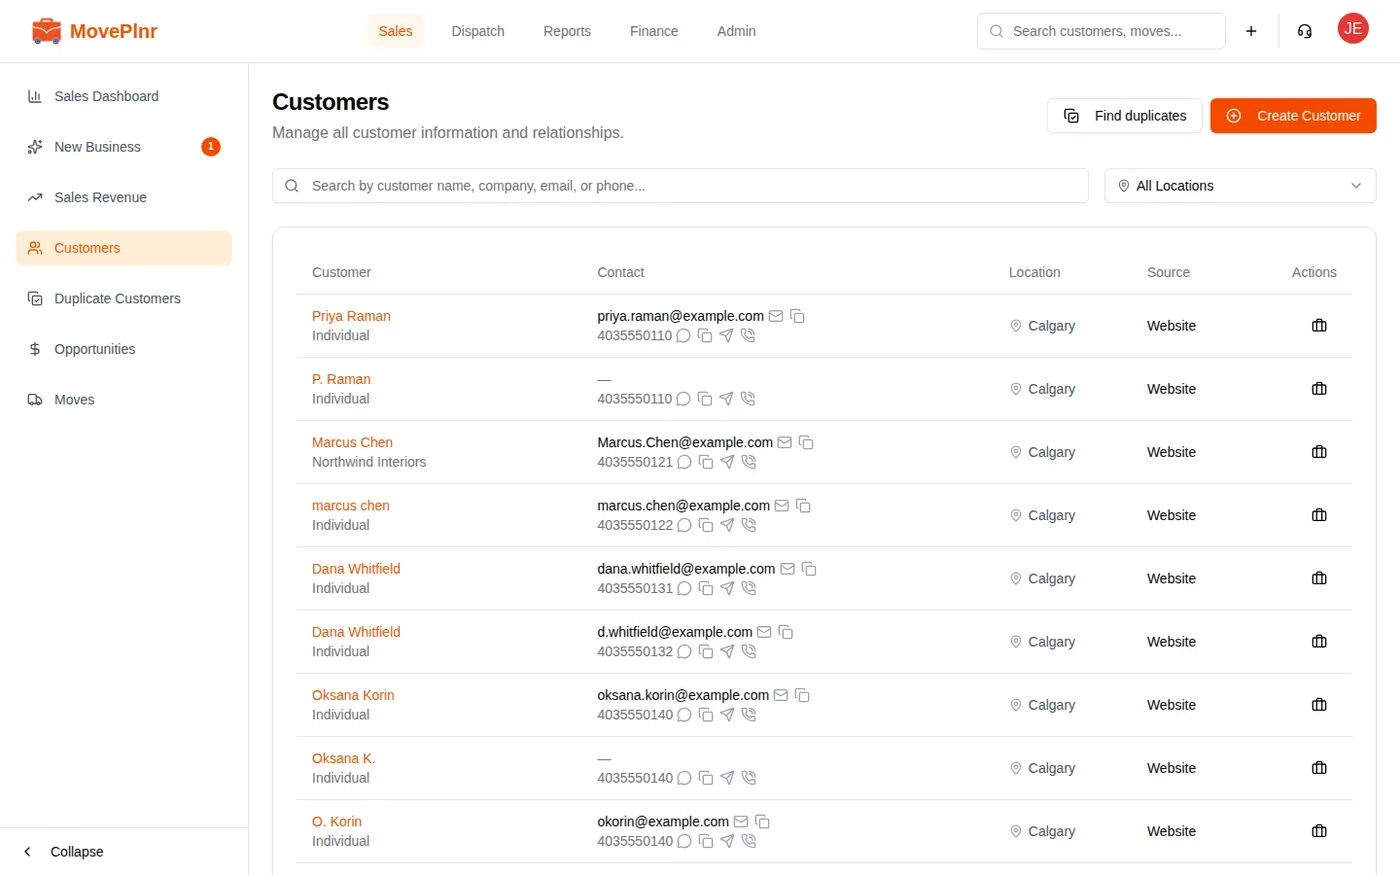
- Open Customers from the Sales menu and click Find duplicates. The same page is in the Sales menu as Duplicate Customers.
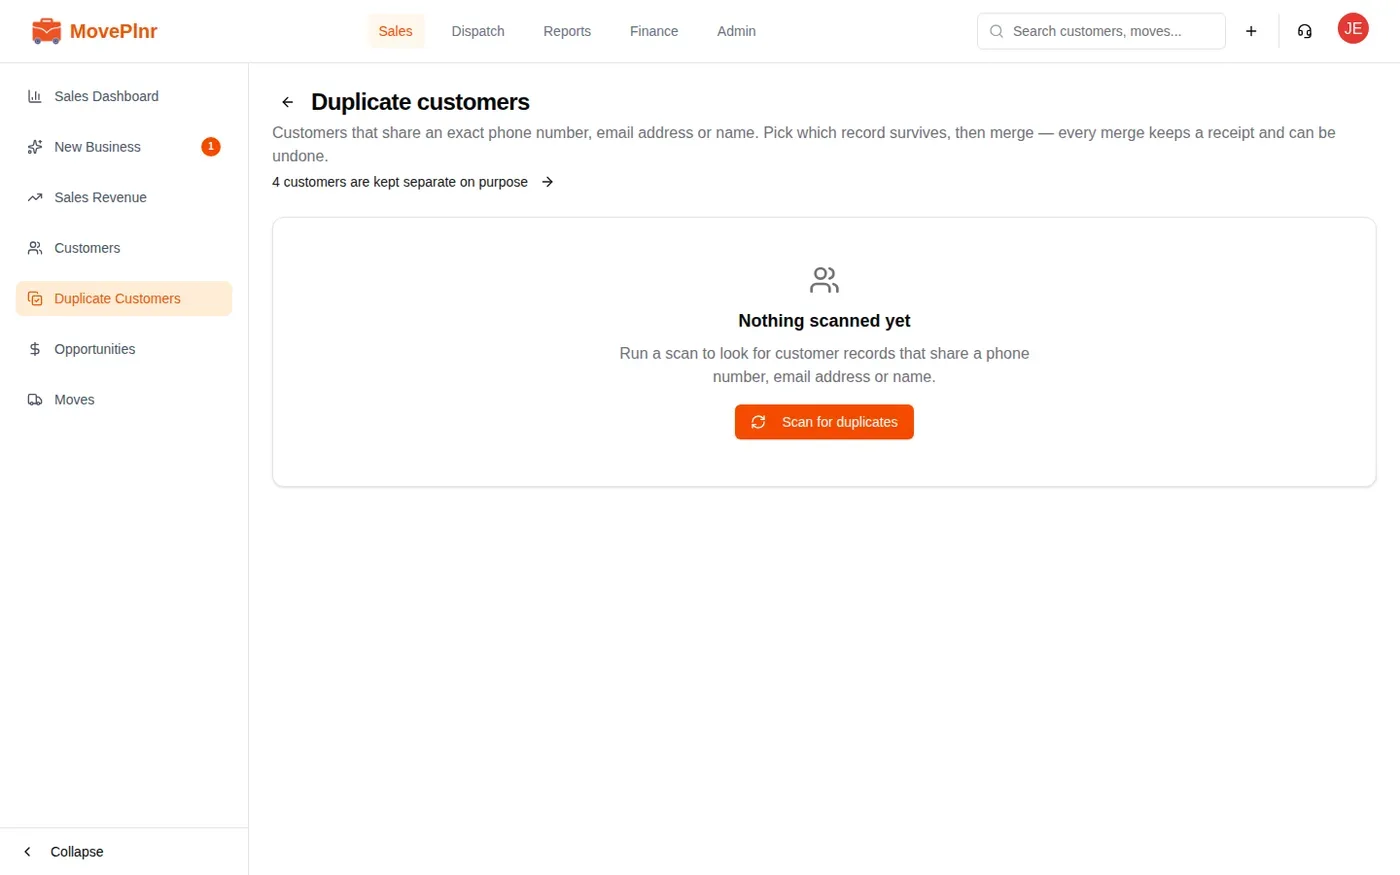
- Click Scan for duplicates. The scan looks at every customer and groups the ones that share an exact phone number, email address or name.
- Work through the groups. Click Re-scan at any time to look again.
Read a group
Each group says why its records matched: Same phone, Same email or Same name. A pair that shares both a phone and an email shows both labels. Email and name matches ignore capital letters, so a name typed in lower case still matches.
Each record shows its phone, email, whether it has an address, and how many moves it has. MovePlnr picks the most complete record as the Survivor: the one with more moves, an address, an email and notes. If you would rather keep a different one, click Make survivor on it.
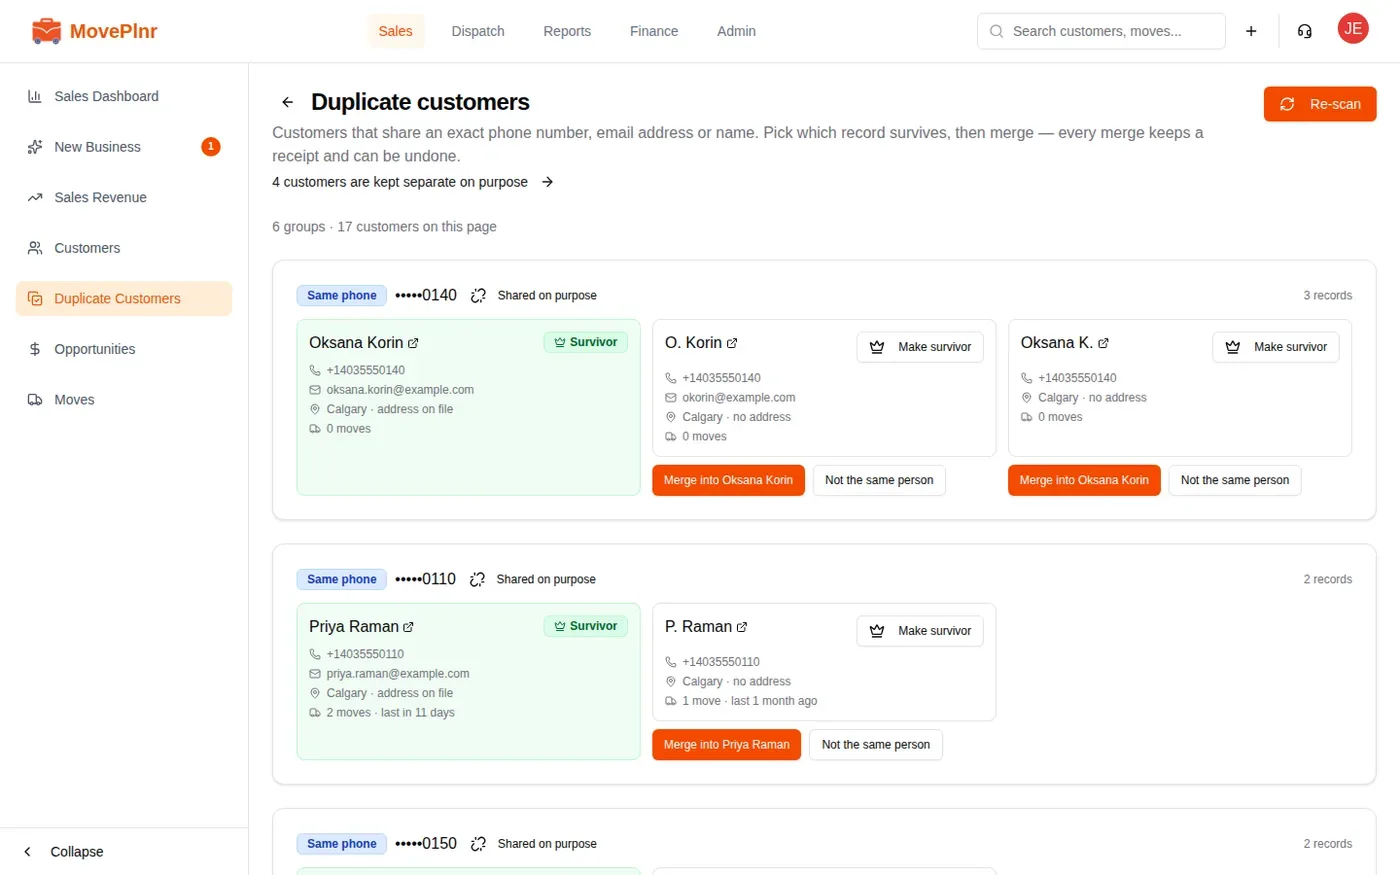
A group of three works one merge at a time. Merge one record into the survivor, then the next.
A value many customers share
When more than five customers share one phone number or email, the group folds into a single row. That is usually a shared line, such as a relocation company’s desk or a property manager’s office, rather than a pile of duplicates. Click Show members to see who they are, Review as pairs to go through them one by one, or Shared on purpose to stop that value from showing up again.

Merge two records
- On the record you want to fold in, click its Merge button. The button names the survivor.
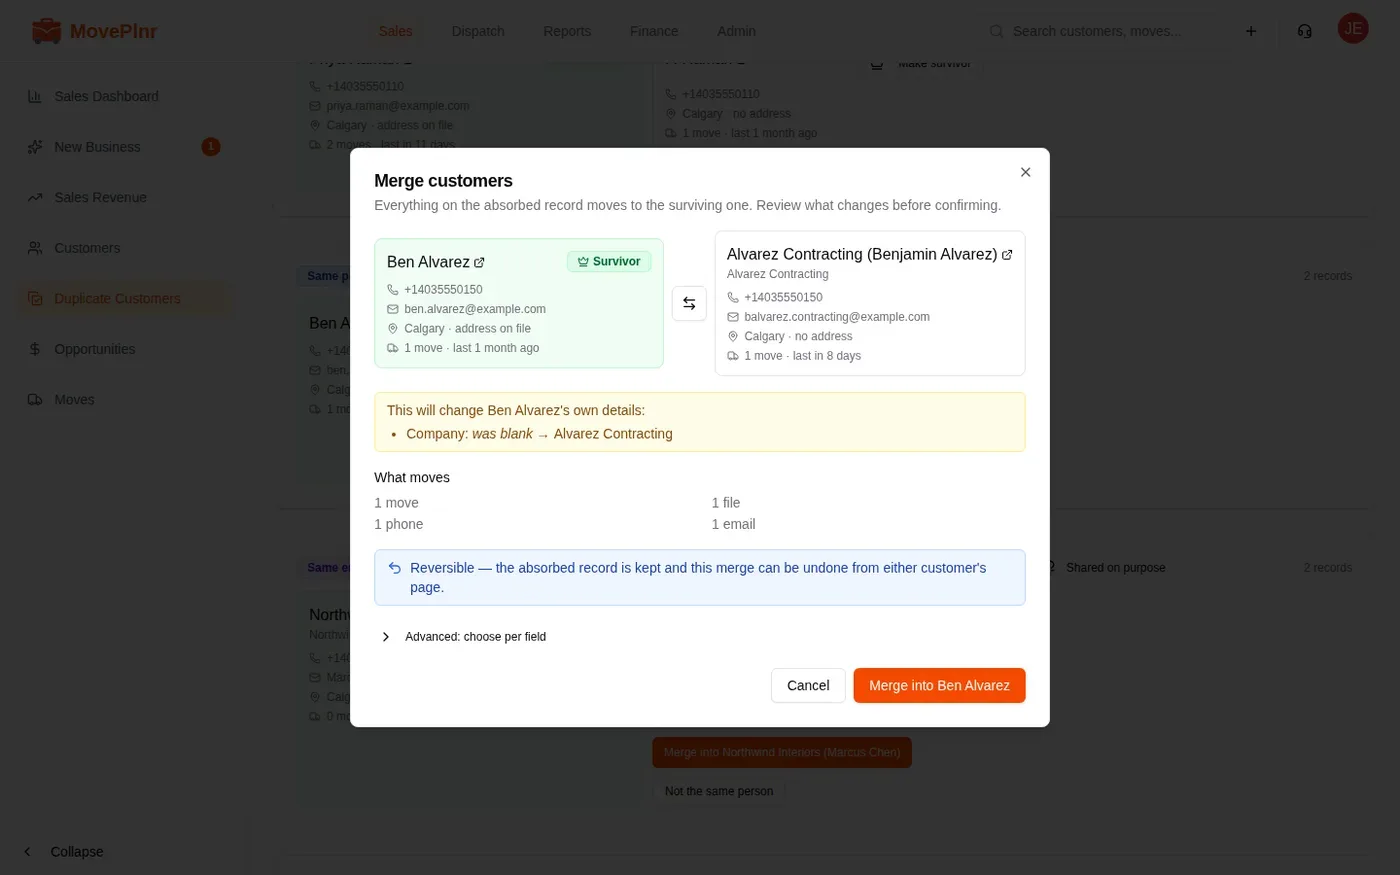
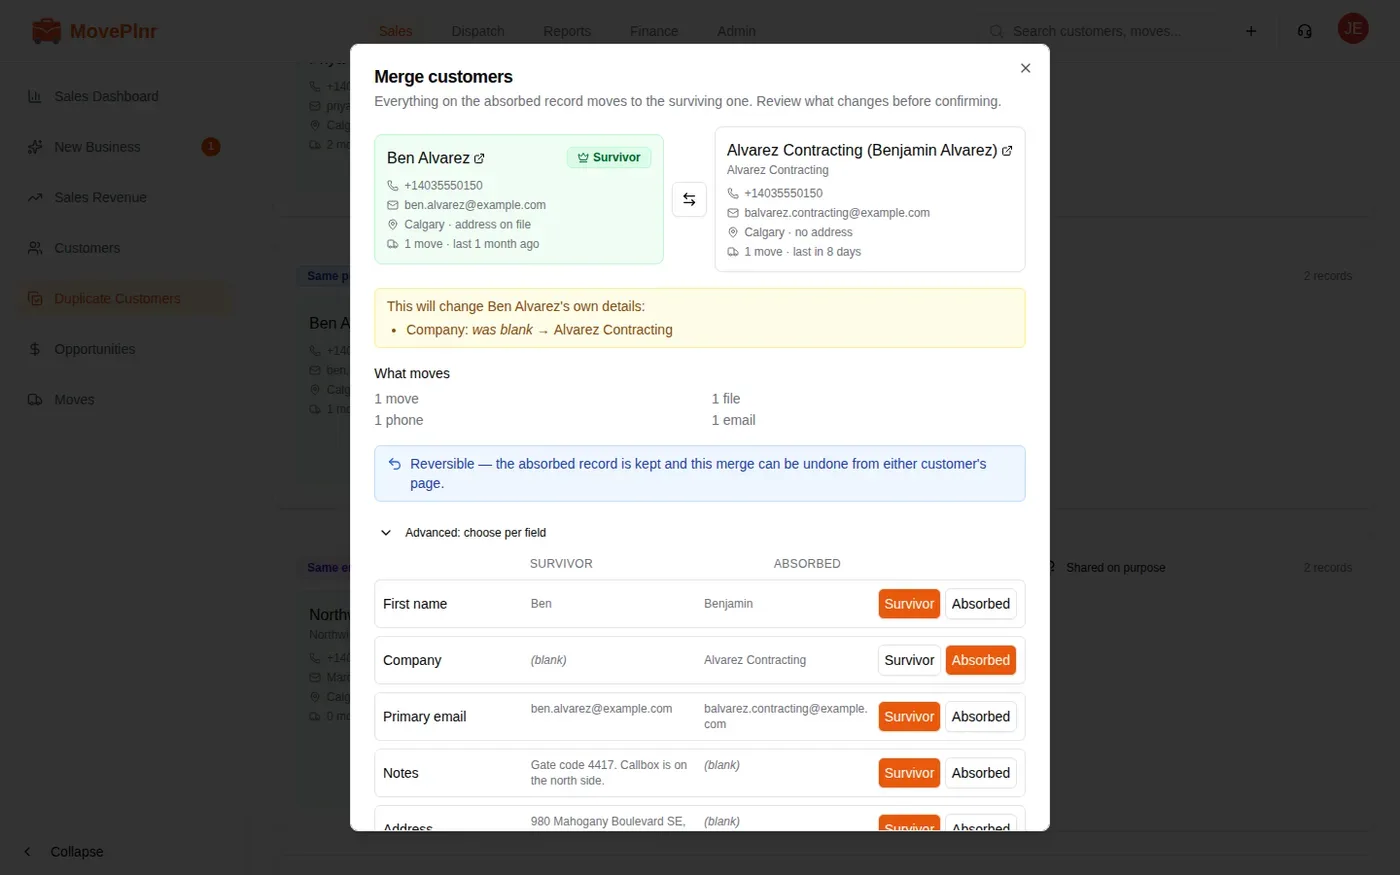
- Check the two cards. The survivor is on the left. Click the arrows between them to swap which one survives.
- Read the yellow box, if there is one. It lists anything about the survivor’s own details that will change, such as a company name filled in from the other record.
- Under What moves, check what comes across: moves, files, phone numbers, emails, messages and the rest.
- Click the orange Merge button to confirm.
After a merge, a message confirms how many records moved, with an Undo button for the moment you realise it was the wrong pair.
Choose per field
By default the survivor keeps its own name, email, notes, address and settings, and any blank on the survivor is filled from the other record. To pick differently, open Advanced: choose per field. Each field that differs shows both values. Click Survivor or Absorbed for each one.
Merge from a customer’s page
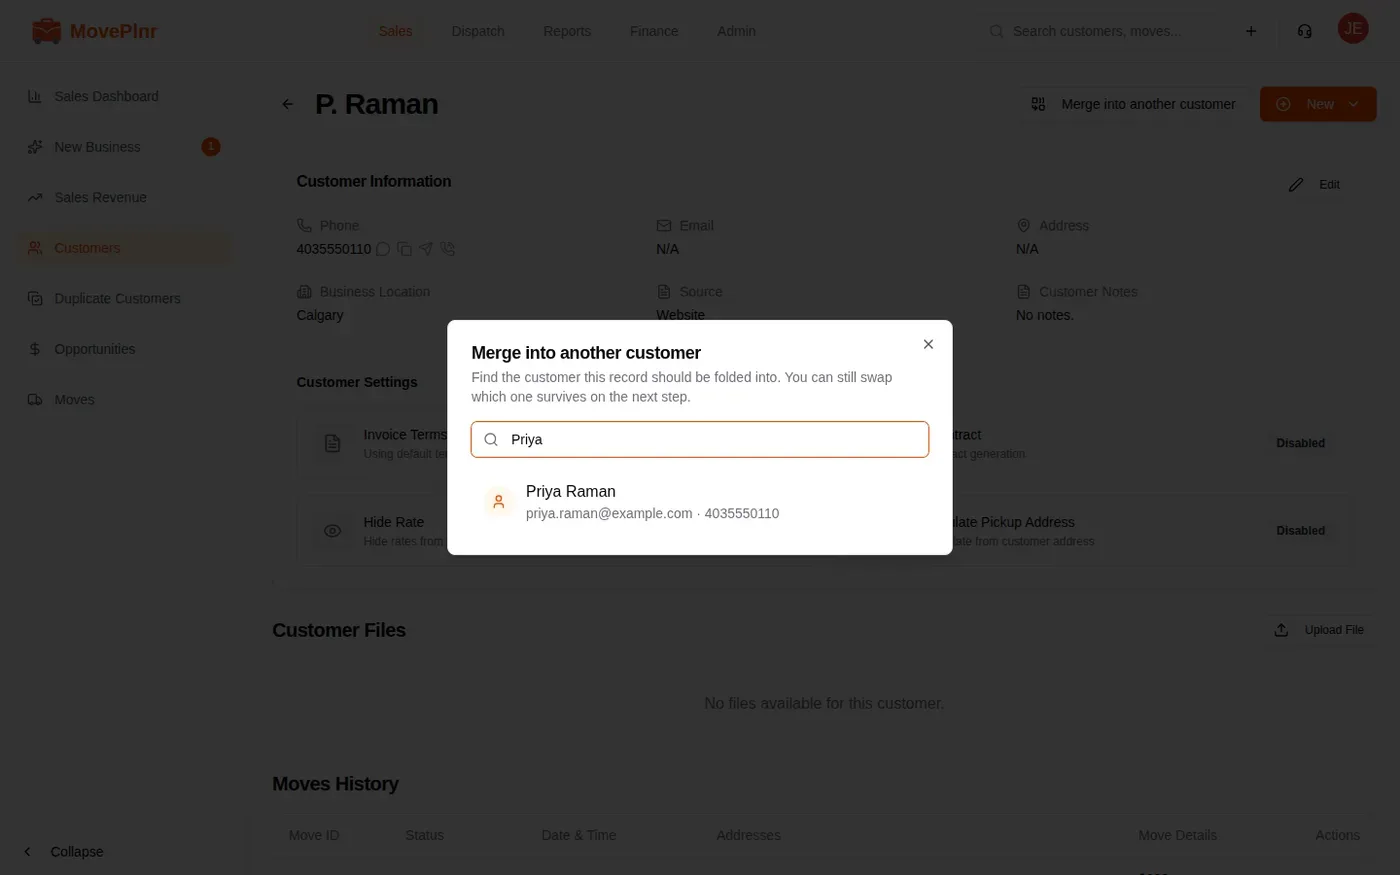
You don’t need a scan to merge. On any customer’s page, click Merge into another customer, search for the record it belongs to by name, company, email or phone, and pick it. The same Merge customers window opens, so you still see everything before you confirm.
Undo a merge
A merge never deletes the absorbed record. It is archived, and its page says where its records went. Old links and searches for its name still find it.
There are two ways back:
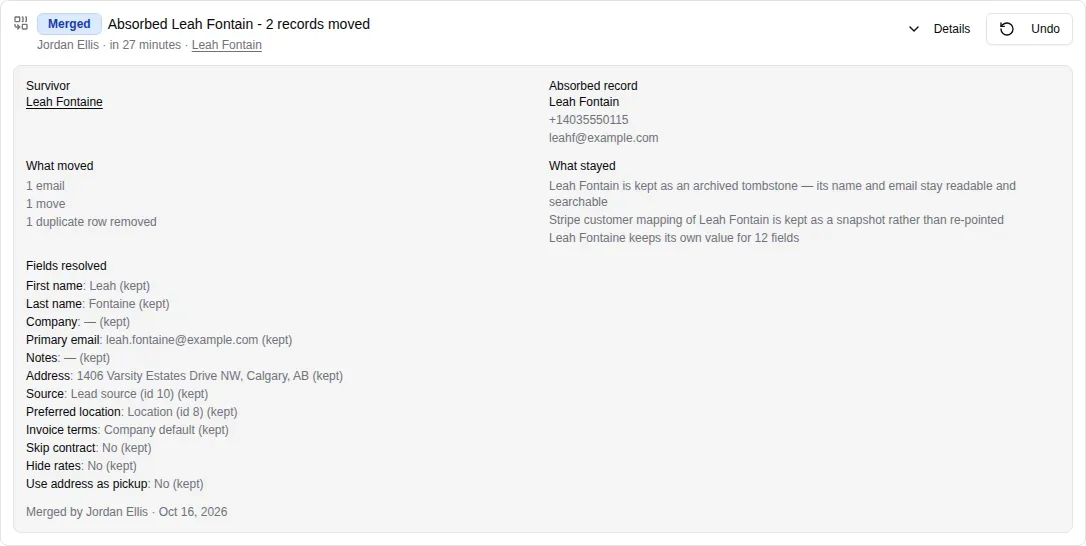
- On the survivor’s page, scroll to History. The merge is listed there. Click Details to see the full receipt: what moved, what stayed and which value each field kept. Click Undo to reverse it.
- On the absorbed record’s page, click Undo merge in the yellow banner.
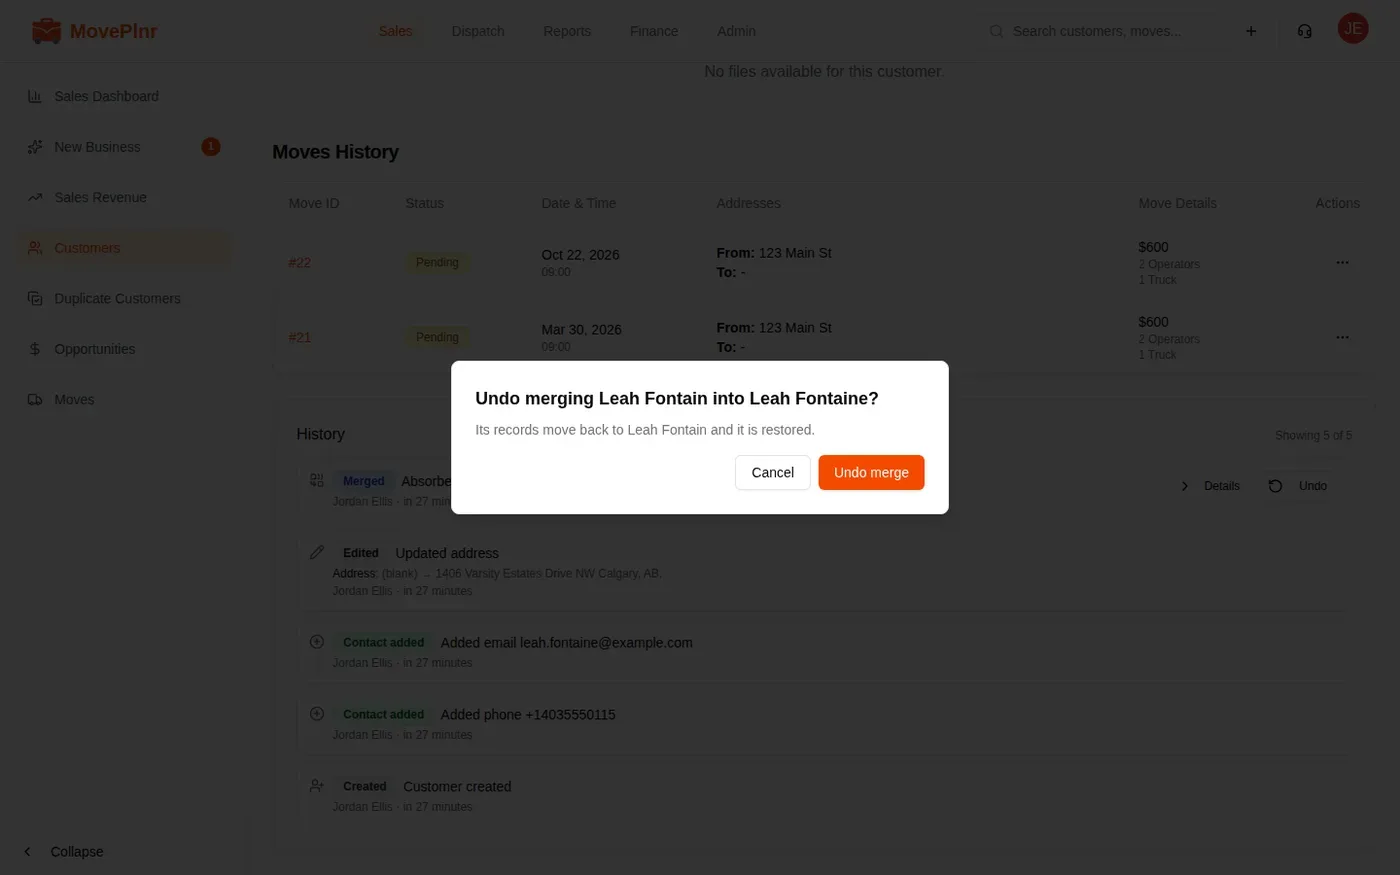
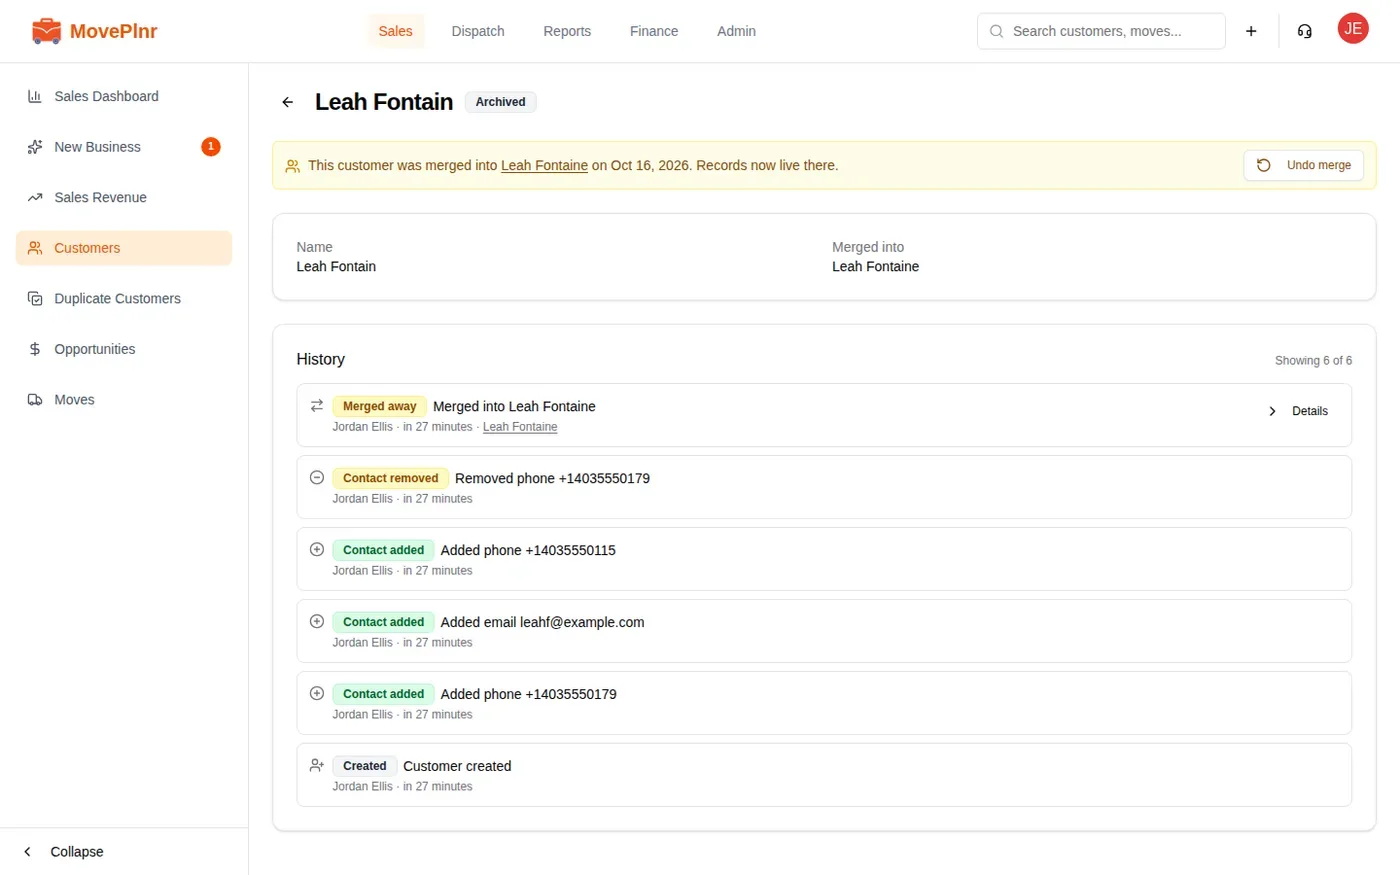
History also lists every other change to a customer: who created it, each field edit, and every phone or email added or removed.
Records that are not duplicates
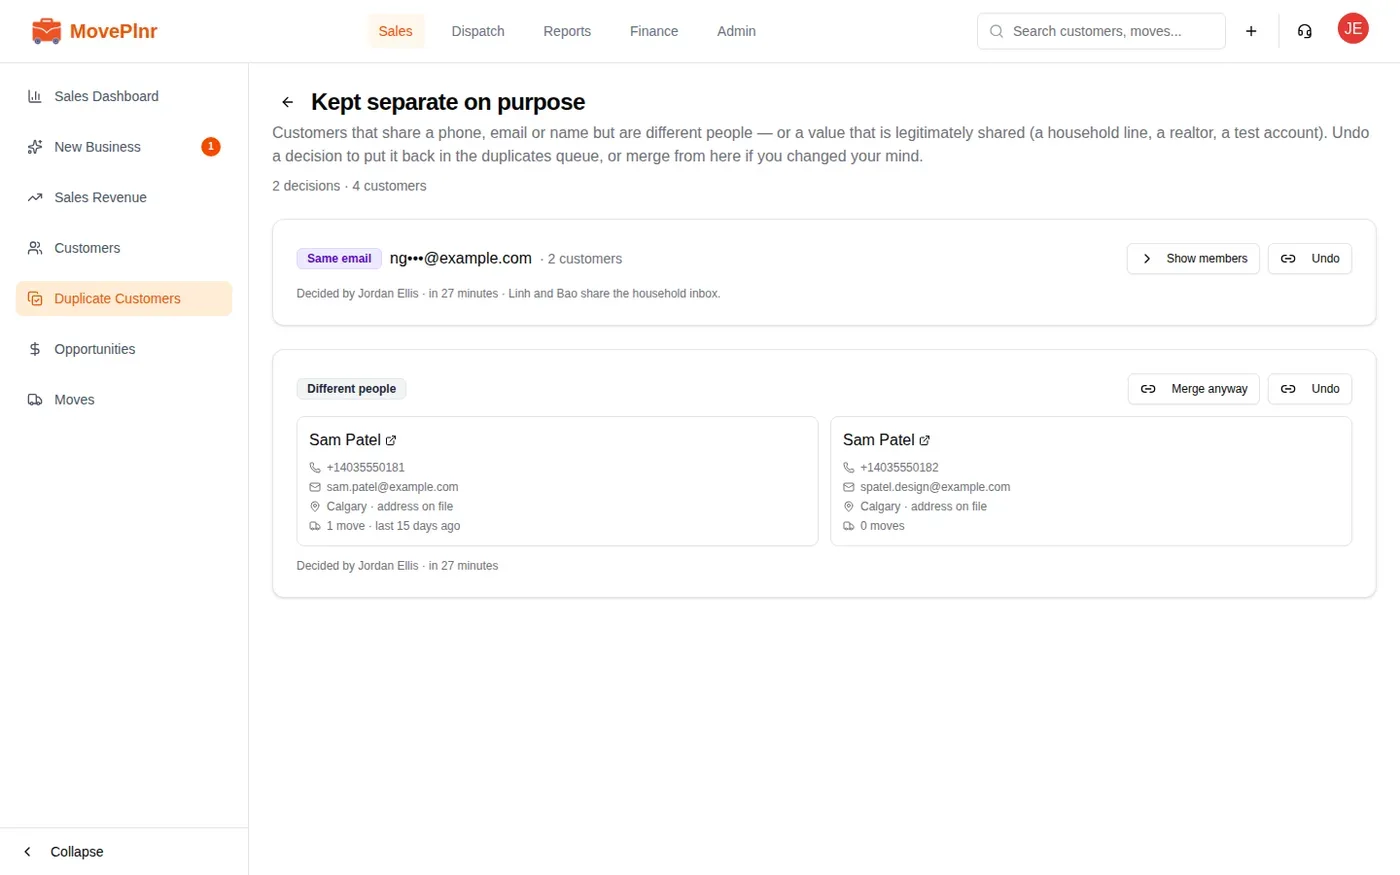
Two different people can share a name, and a family can share one email. Tell MovePlnr once and the scan stops asking.
- Not the same person under a record keeps that pair apart.
- Shared on purpose beside a phone, email or name marks the value itself as shared. Every customer holding it drops out of the scan.
Both decisions land on Kept separate on purpose, linked at the top of the Duplicate customers page. From there, Undo puts a decision back in the scan, and Merge anyway opens the merge window if you change your mind.
When a web request lands on the wrong customer
When a website form arrives with a phone or email that already belongs to a customer, MovePlnr adds the new request to that customer instead of creating a second record. Usually that is right. Sometimes it isn’t: a new tenant with the old tenant’s number, or a family member using someone else’s email.
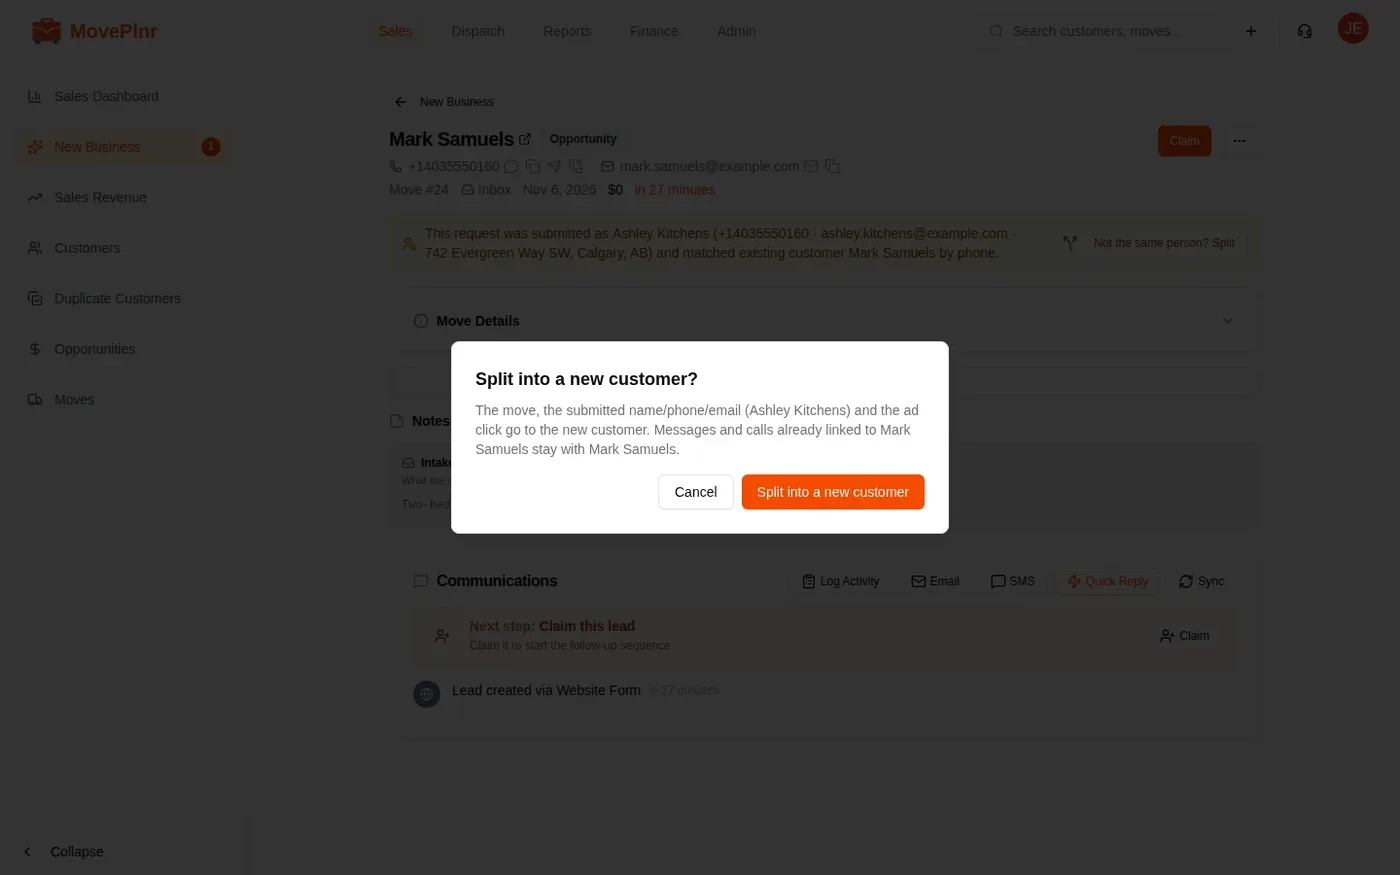
The opportunity says so in a yellow box: the name, phone, email and address the person typed, and which customer it matched. If it is someone else, click Not the same person? Split.
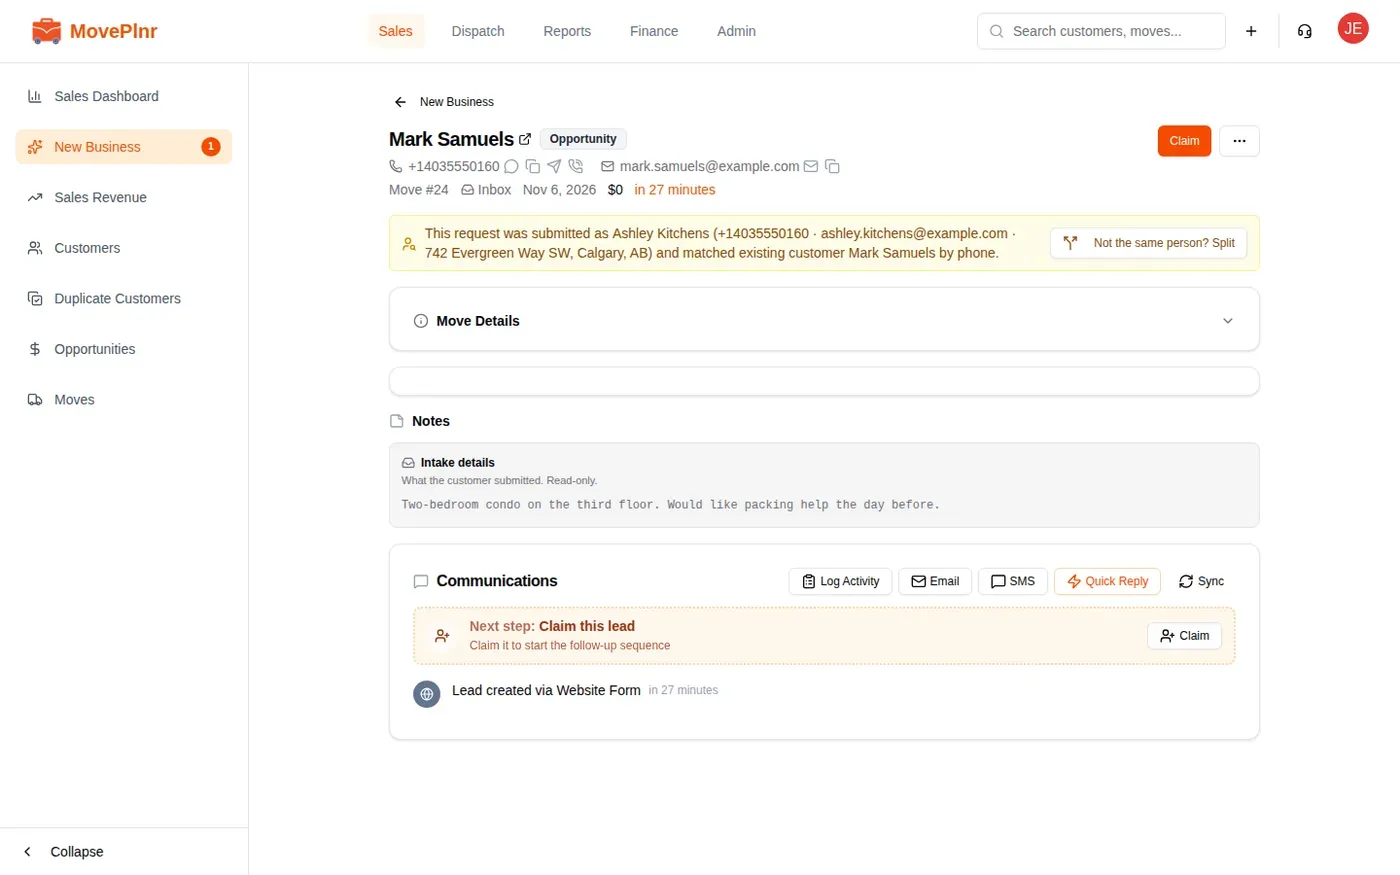
Splitting creates a new customer from what was submitted, and moves the request and its ad click to it. Messages and calls already linked to the matched customer stay where they are. The matched customer’s History has the same Split button, on the row marked Web request matched.
Organize customer files with tags
Tags label the files on a customer’s page so they are quick to find: inventory lists, insurance certificates, parking permits, quotes.
Set up your tags
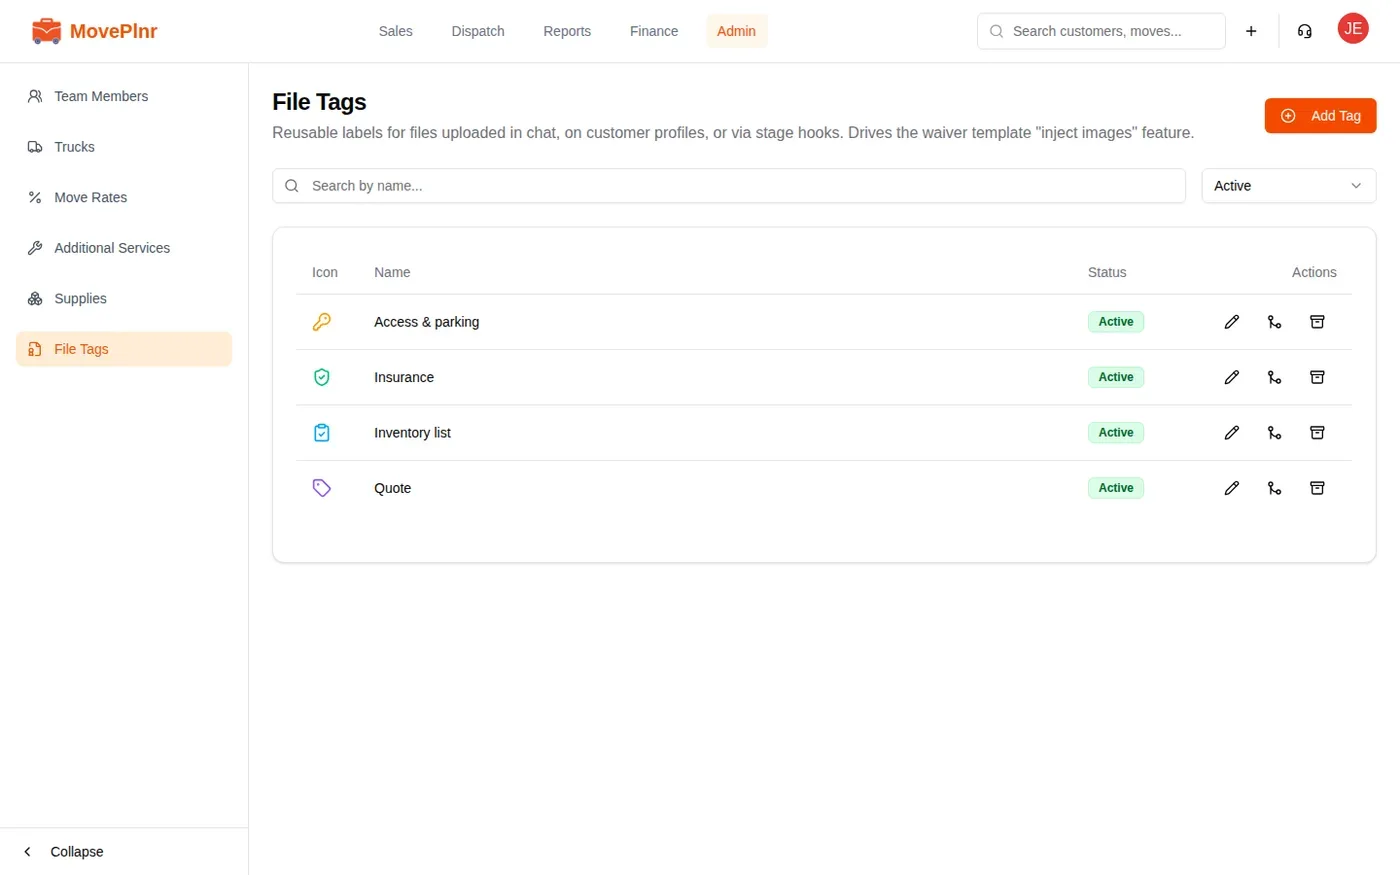
A company admin manages the list. Open File Tags from the Admin menu and click Add Tag. Give it a name, an icon and a colour. Names must be unique. From the same list you can edit a tag, merge one tag into another, or archive one you no longer use.
Tag and find files
- Pick tags when you upload a file, or later from the file’s row: click Tag and tick the tags you want.
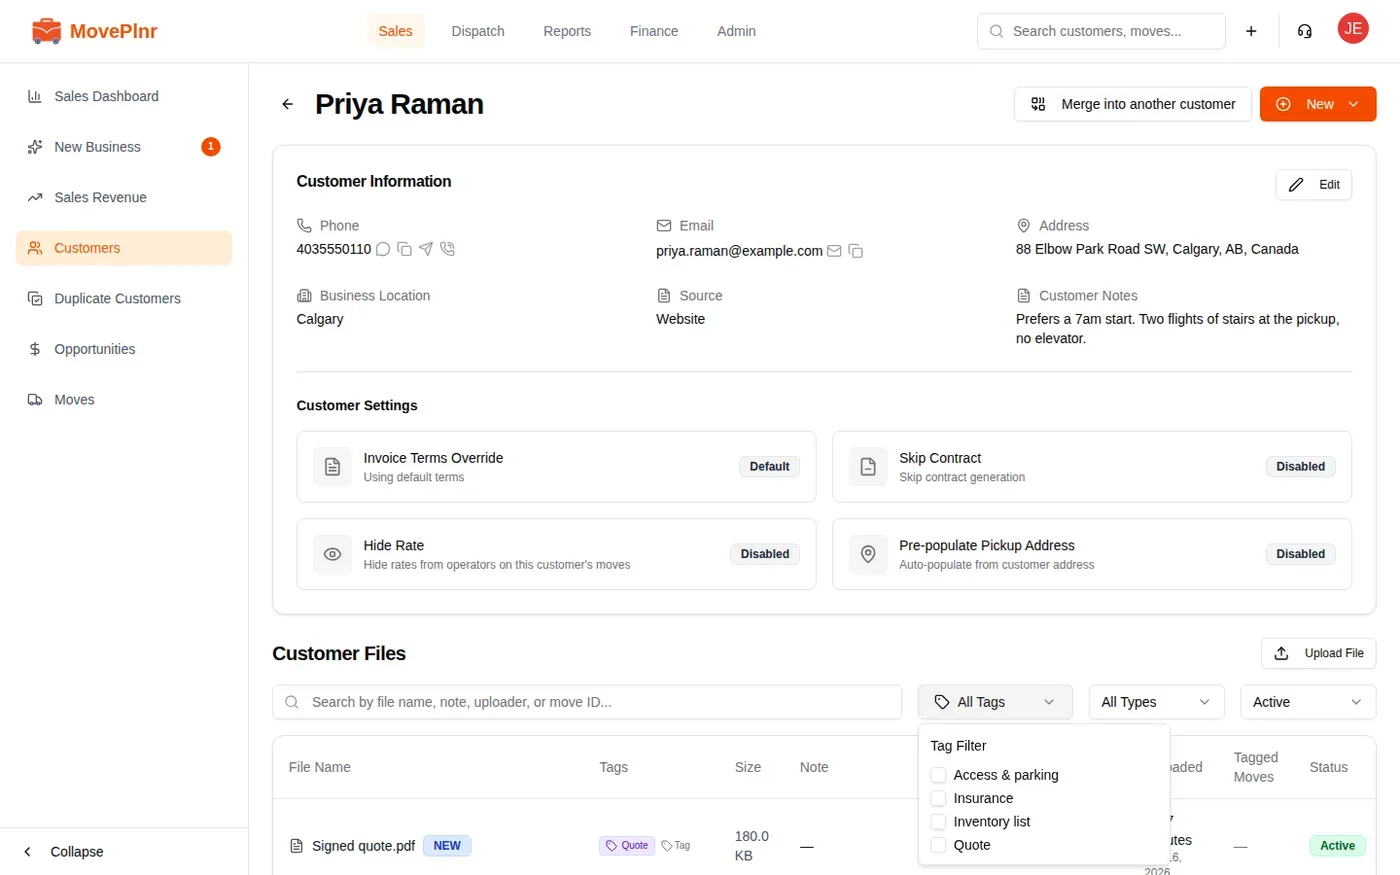
- To find files, open All Tags above the list and tick one or more tags under Tag Filter.
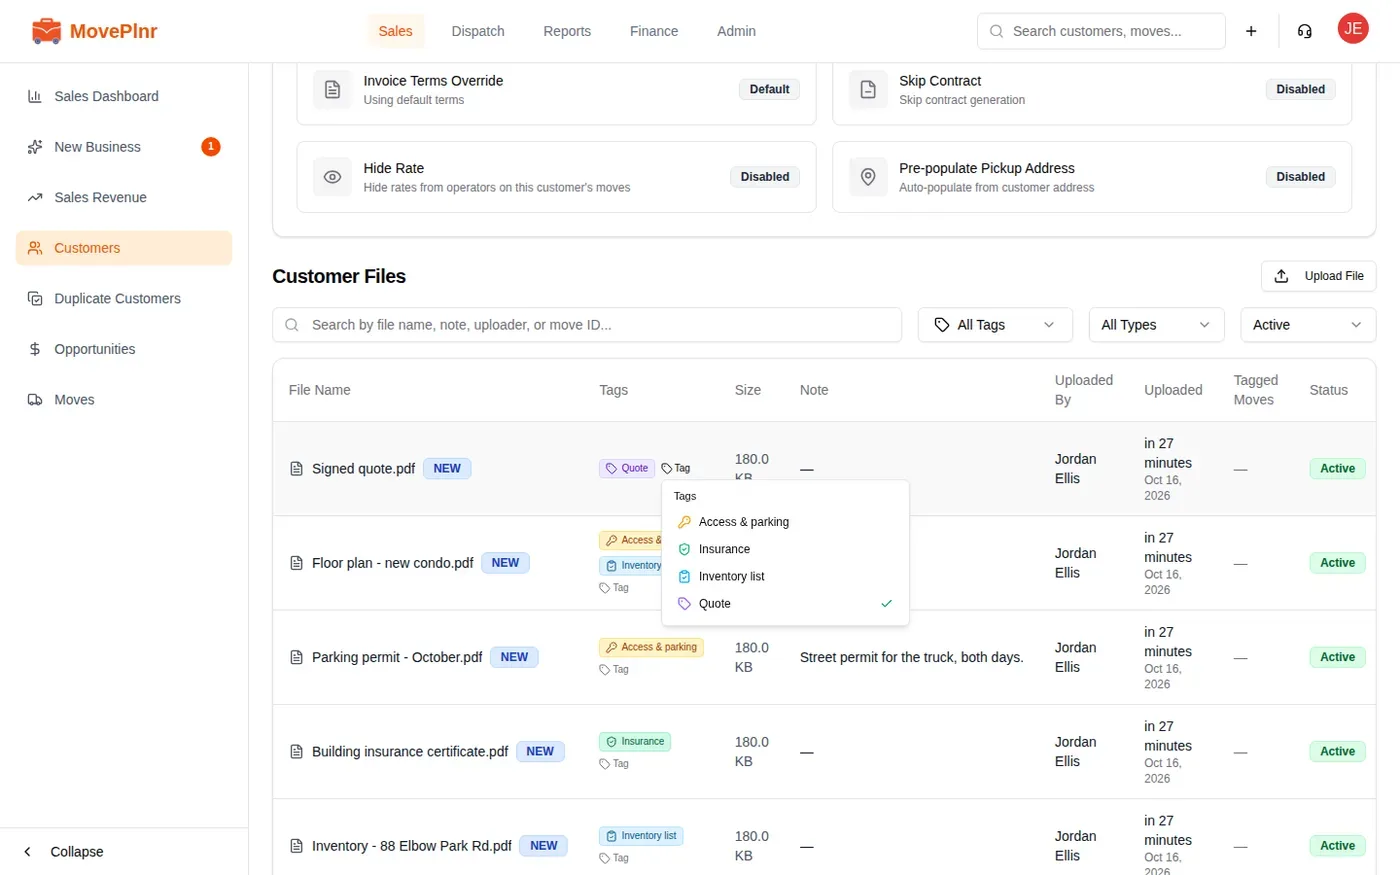
Tags are shared across MovePlnr: the same list appears on photos and files in the move chat. When you merge two customers, their files come across with their tags.