
Before you start
Waivers need the customer waivers add-on. Once an admin turns it on, Customer Waivers appears under Settings, and the Agreements card shows up on every move.
Building templates is an admin job. Anyone who works the job can send one: office admins, dispatchers, sales reps and the crew on the move.
Set up a waiver template
Open Settings and choose Customer Waivers. The Waiver Templates page lists every waiver for the location picked at the top of the page. Each row has five buttons: preview, notification email, edit, copy to other locations, and archive.
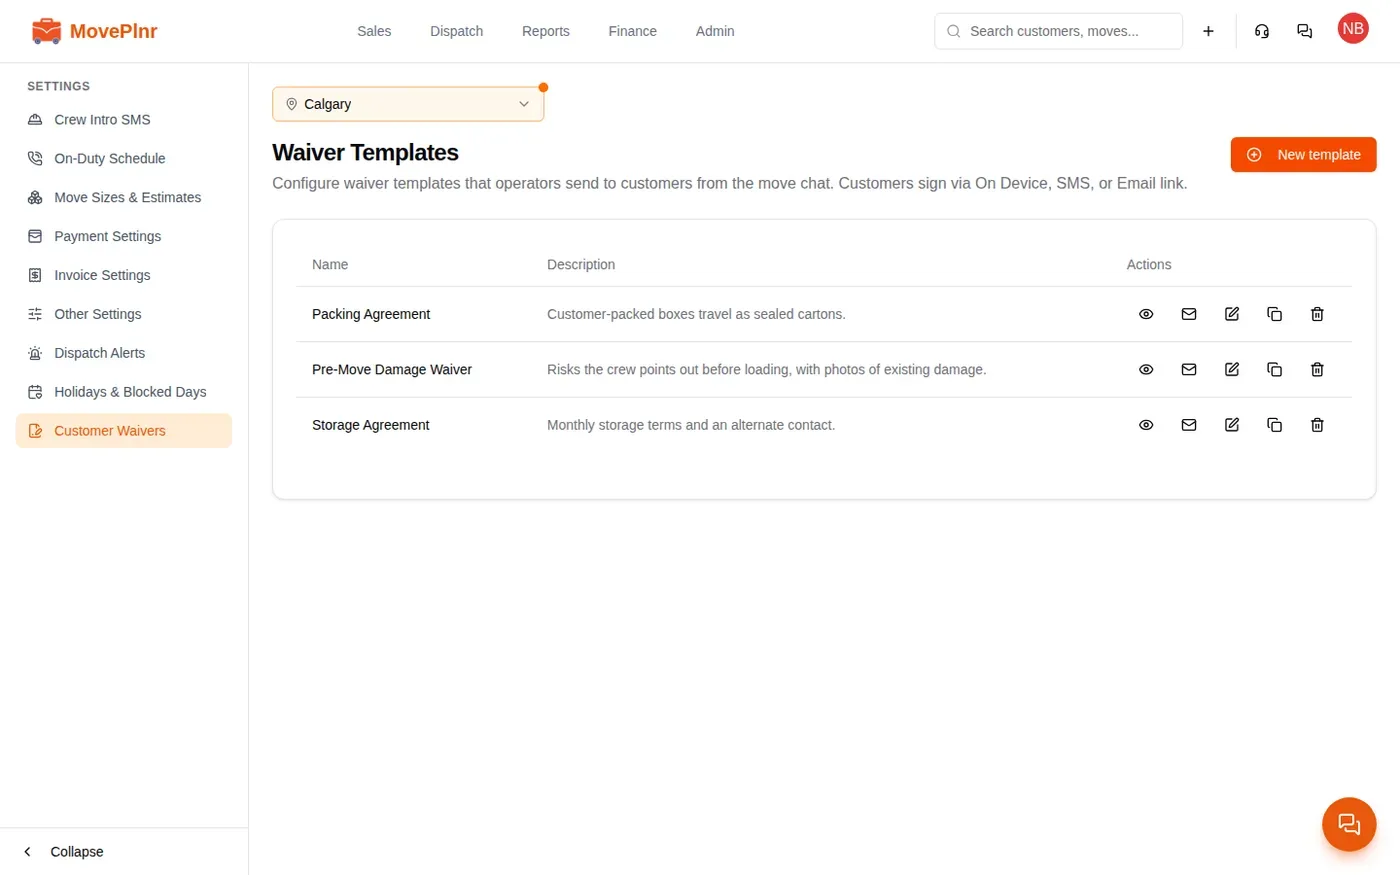
- Click New template.
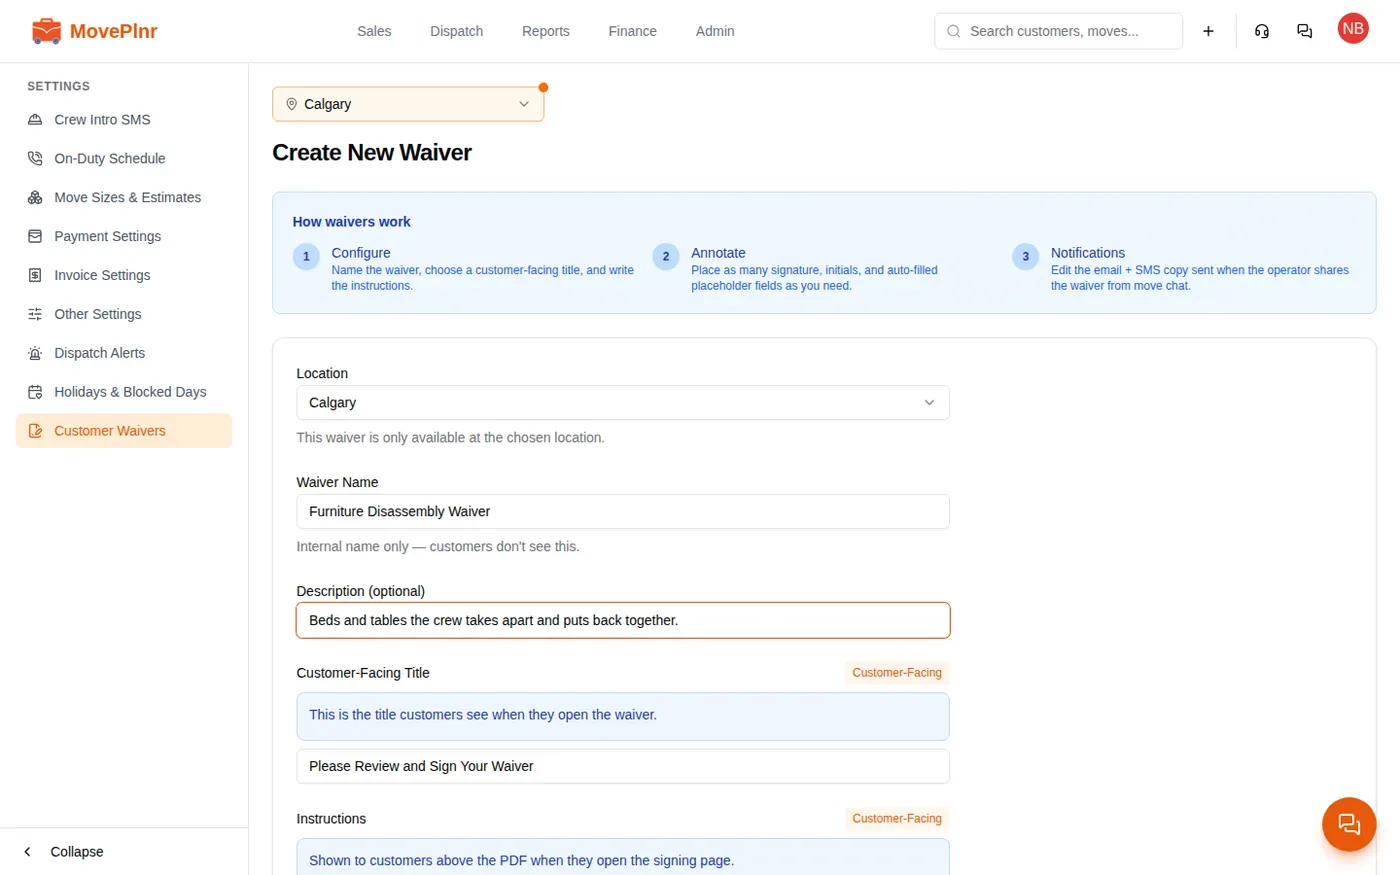
- Pick the Location. The waiver is only offered on jobs at that location.
- Fill in the Waiver Name (your team sees it) and an optional description, which helps whoever picks the waiver at send time.
- Write the Customer-Facing Title and the Instructions. The customer sees both above the PDF on the signing page, and placeholders such as the customer’s name are filled in from the move.
- Upload the waiver as a PDF and click Start Annotation.
Place the boxes on the PDF
Annotation opens the PDF with a toolbar. Drag out a box wherever the customer or your team fills something in:
- A signature, and initials on any page you want initialed. Every waiver needs at least one signature.
- Placeholders that MovePlnr fills in from the move, such as the customer’s name and the move date.
- Waiver options: a checkmark, or a checkmark with a short line of text. Your team ticks them when sending, and only the ticked ones print on the customer’s copy.
- An operator text field, for something your team writes in at send time, such as damage the crew noticed.
- A customer text field, for something the customer writes in while signing, such as an alternate contact.
Options sit in groups. Mark a group as required and nobody can send the waiver until at least one option in it is ticked. Save the annotation and the template is ready.
Preview it as the customer
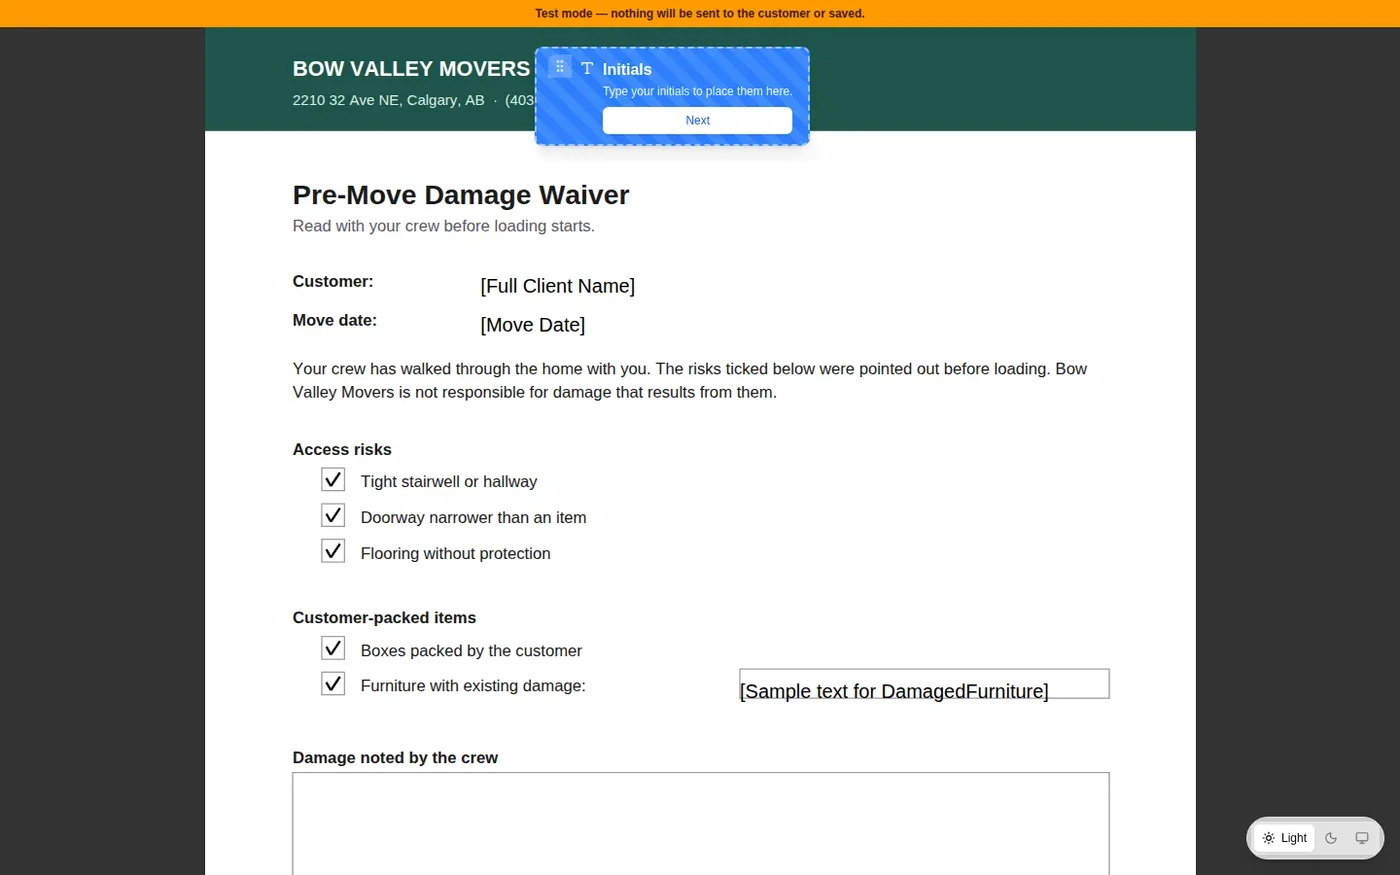
The eye button on a template’s row opens it in a new tab, the way a customer sees it. Test mode at the top means nothing is sent or saved. Click Start signing to walk through the boxes. Every option shows ticked in the preview, so you can check where each one lands.
Add photos to the waiver
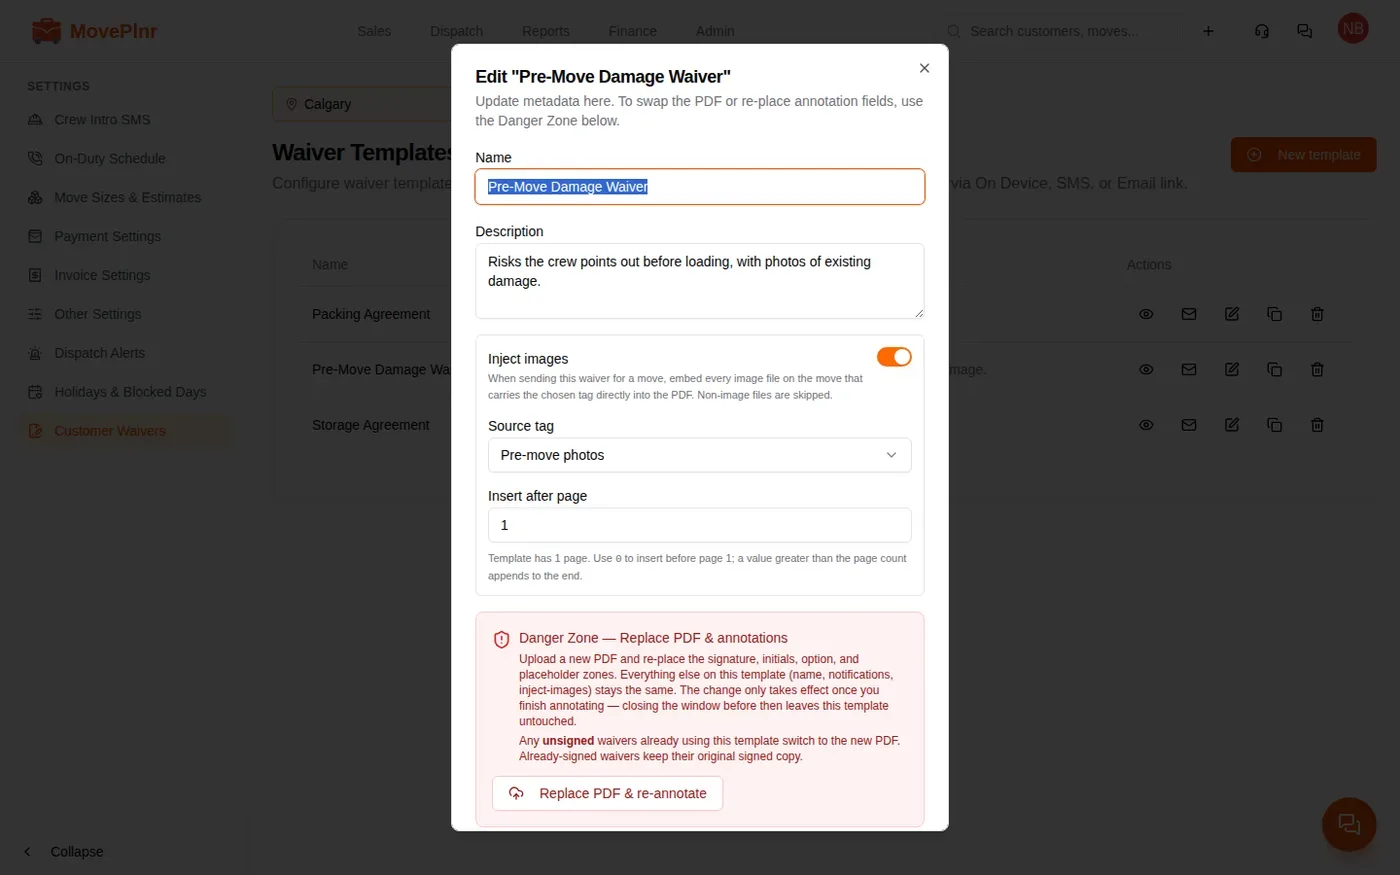
Click the edit button on a template to change its name and description, and to turn on Inject images. Pick a Source tag and a page under Insert after page. When the waiver is sent for a move, every photo on that move carrying the tag is placed into the PDF, so the customer signs next to the pictures of the scratch or the cracked leg. Use 0 to put the photos before page 1.
Copy a waiver to other locations
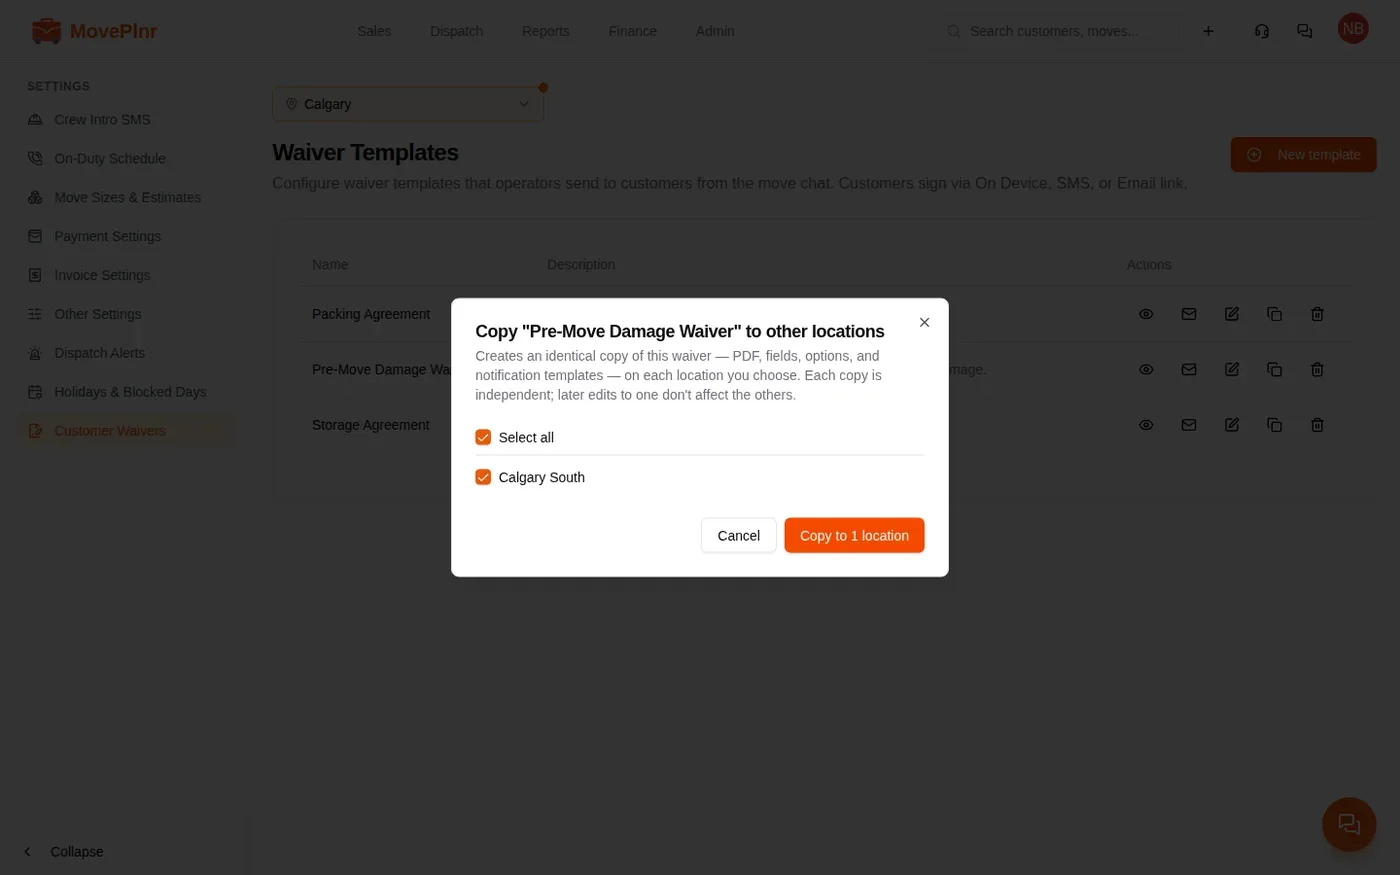
Each location has its own waivers. To use the same one at another branch, click the copy button on its row, tick the locations, and confirm. Every copy carries the PDF, the boxes, the options and the notification email, and each copy is independent: a later edit to one leaves the others alone.
Write the email and text
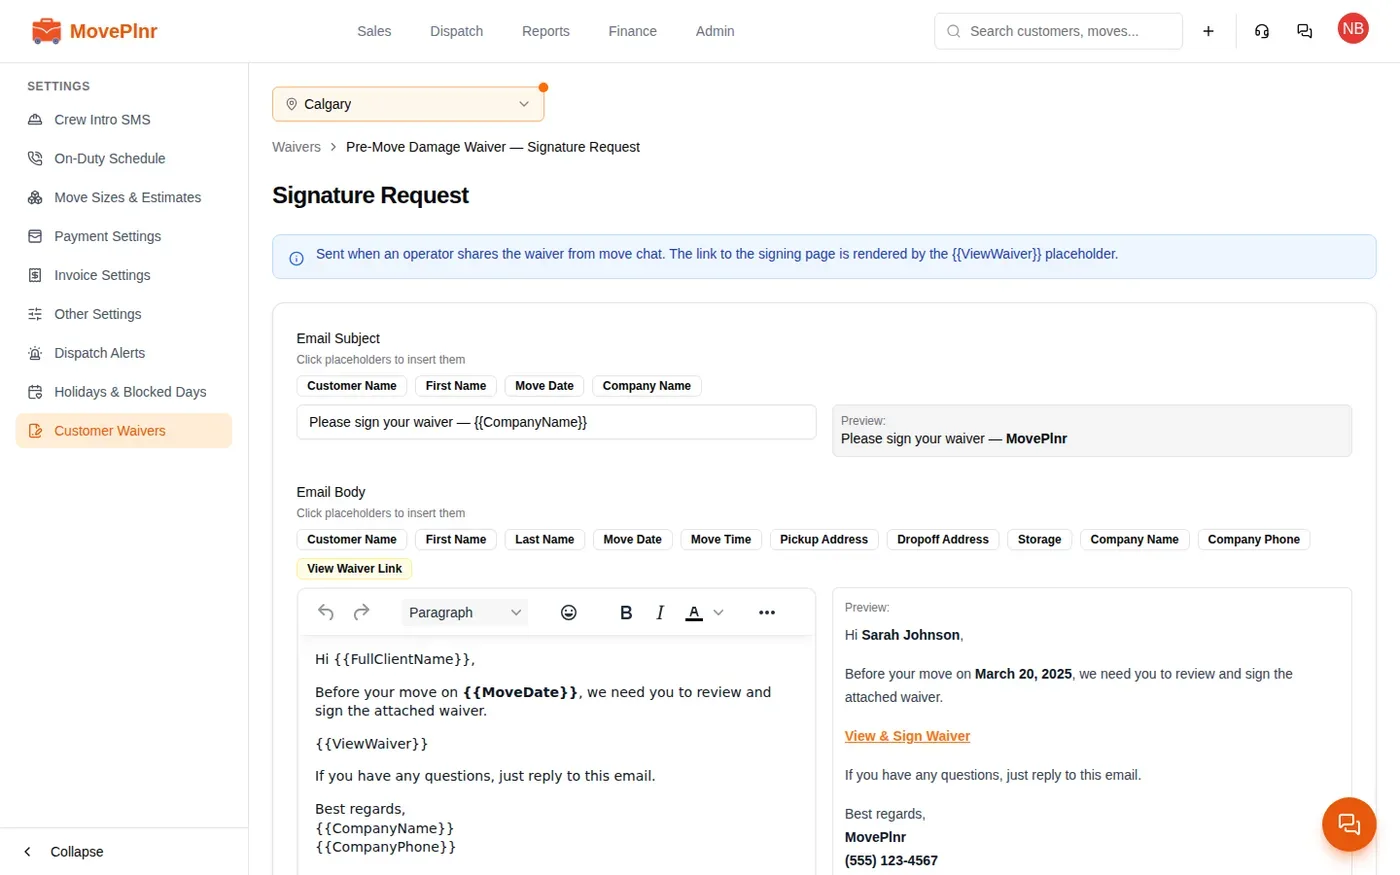
The envelope button opens the Signature Request message the customer gets. Edit the Email Subject, the Email Body and the SMS Body, and click a chip to drop in a placeholder. View Waiver Link is the link to the signing page, so keep it in both. Test sends you a sample, and Save Template saves it.
Send a waiver from the job
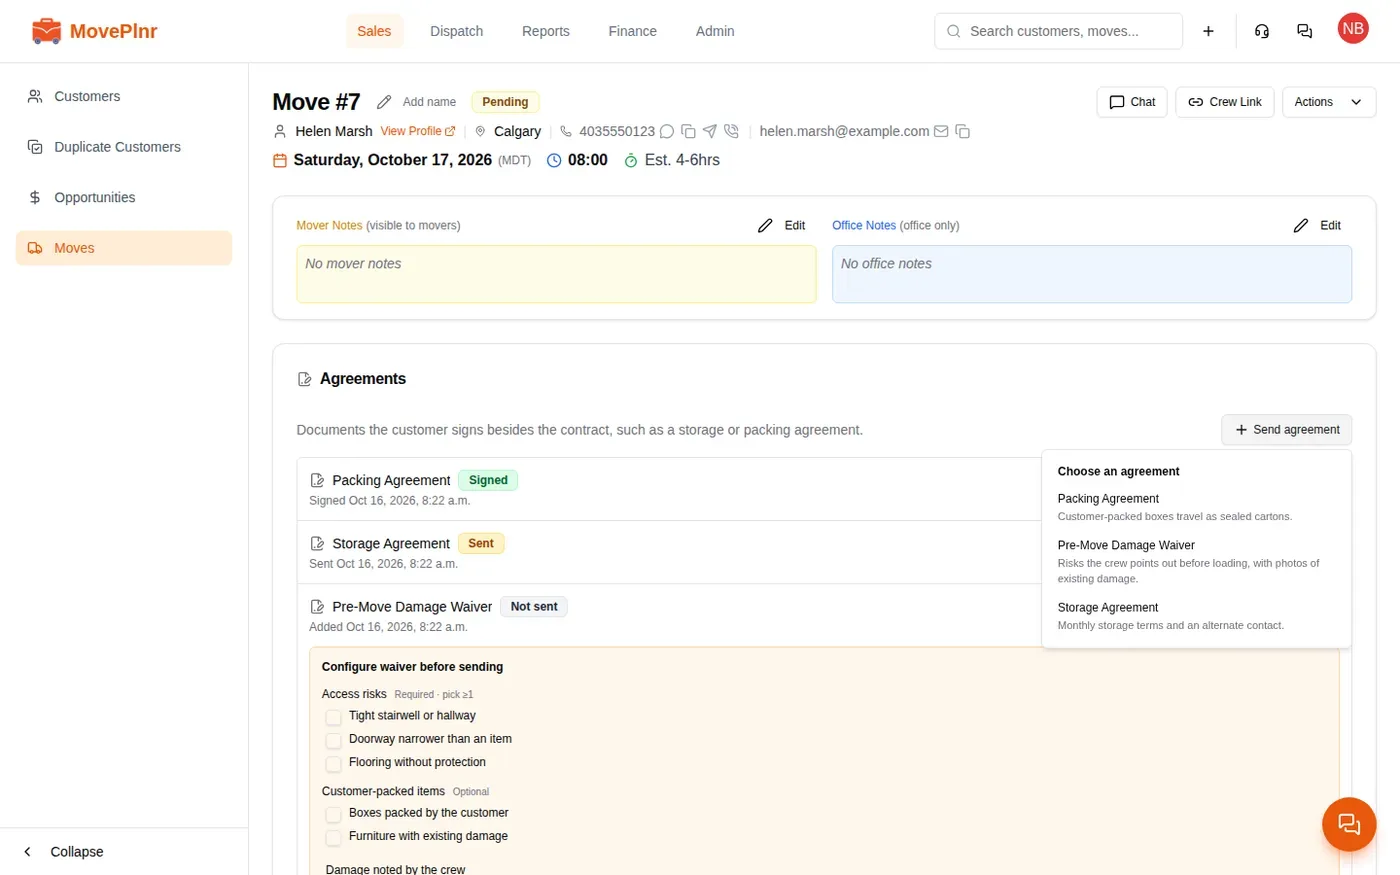
Every move has an Agreements card, and every opportunity has an Agreements step. It lists the job’s waivers, where each one stands, and the buttons to send it.
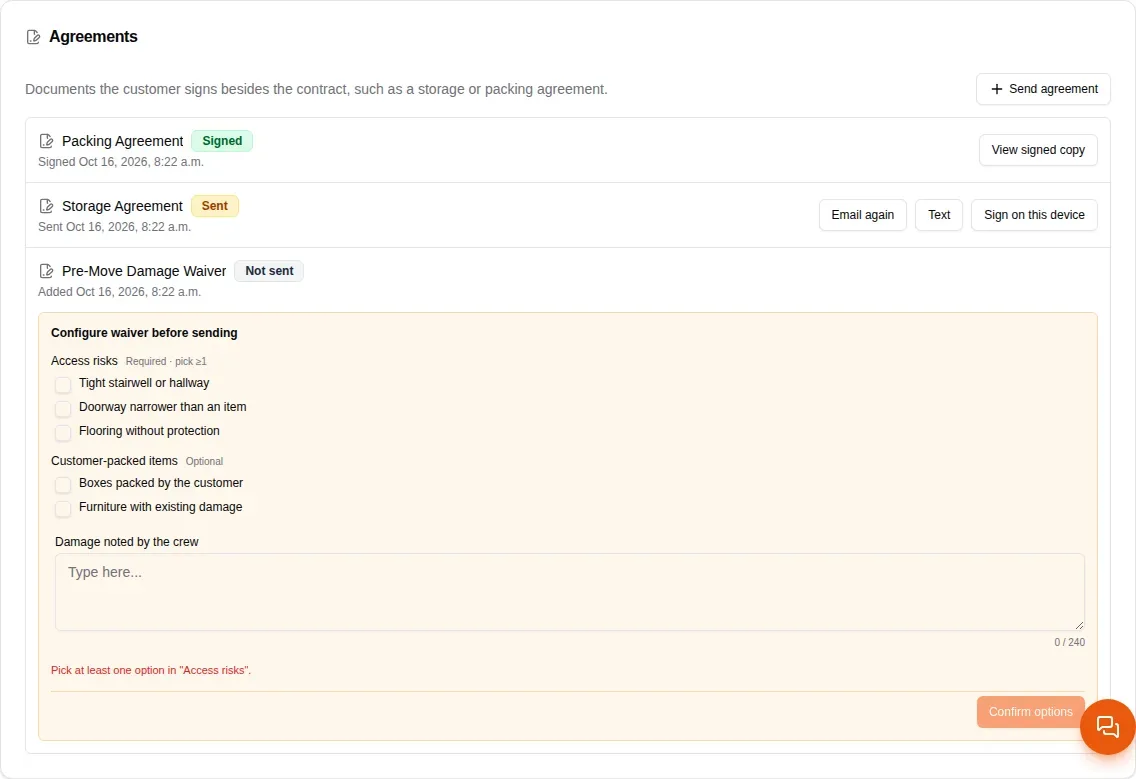
- Click Send agreement and choose a waiver. It is added to the job, and its card is posted in the move chat.
- If the waiver has options, tick them under Configure waiver before sending and click Confirm options.
- Send it with Email or Text, or hand the customer your screen with Sign on this device.
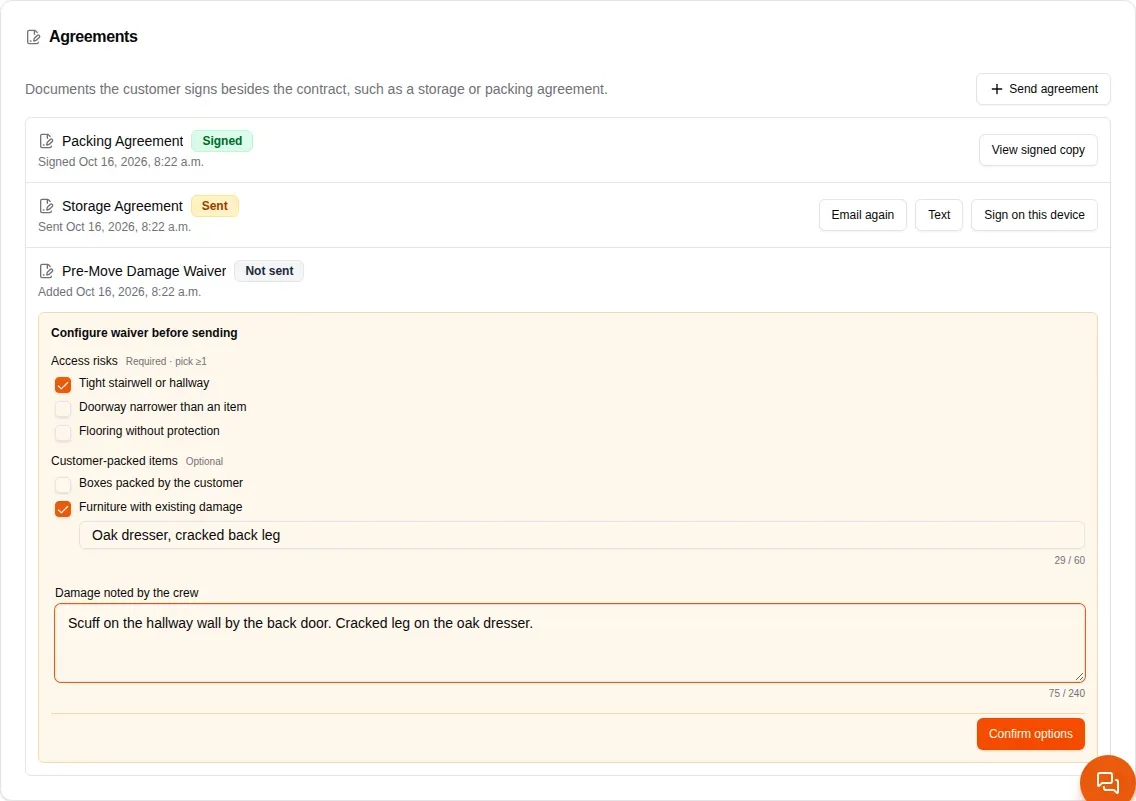
The status on each line keeps up as the customer goes: Not sent, Sent, Opened, then Signed. A sent waiver shows Email again to send the same link once more. Once signed, View signed copy opens the PDF, and the signed copy is also saved to the move’s files.
Until the first send, the options can still change: the summary under the waiver has an Edit link. After that, the options are on the customer’s link and stay as they are.
Send a waiver from the move chat
The crew usually sends a waiver at the door, from the move chat. Click Send Waiver in the chat header and pick one. Its card is posted in the chat for the whole crew to see.
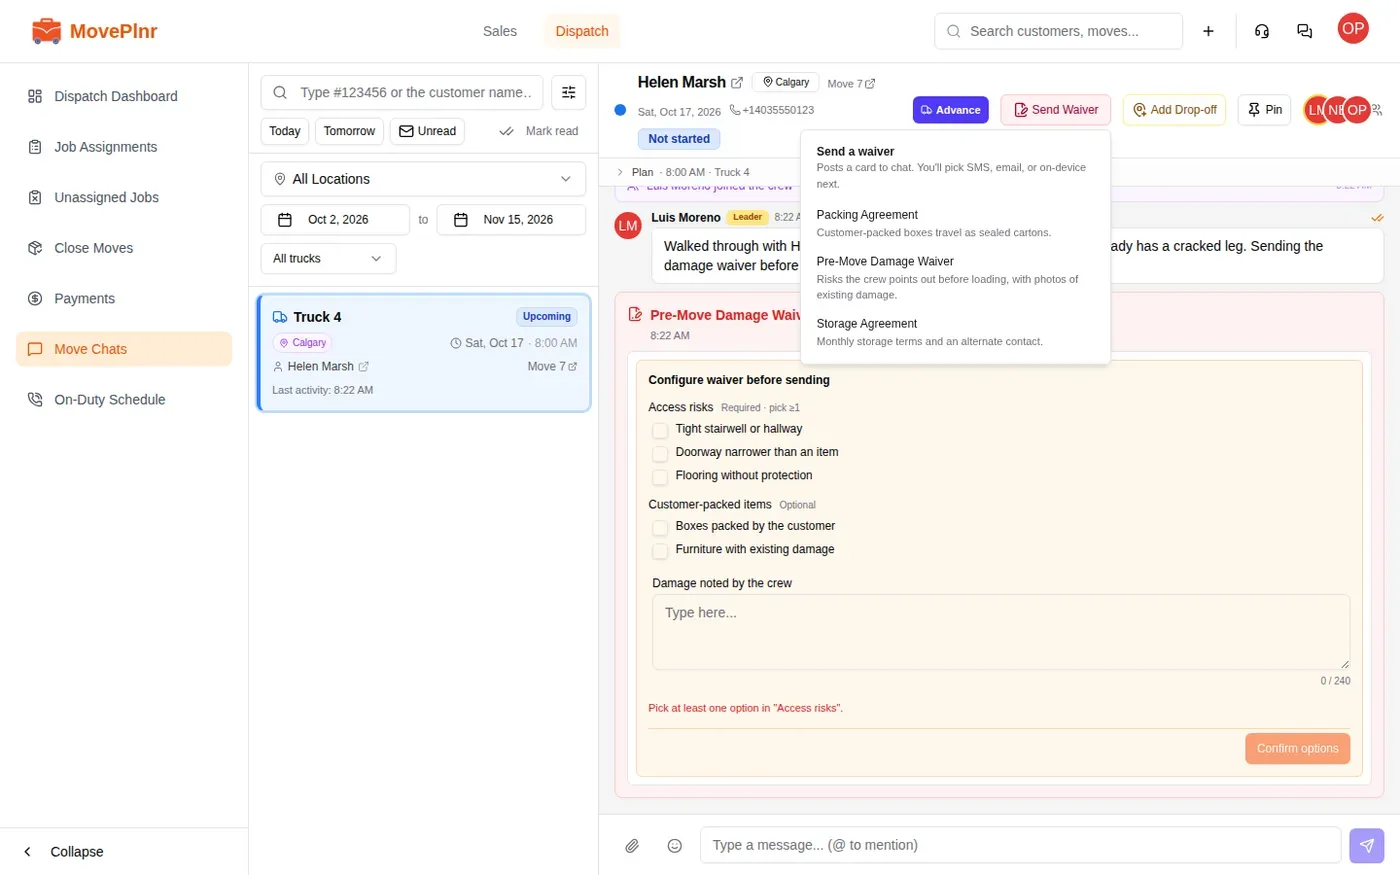
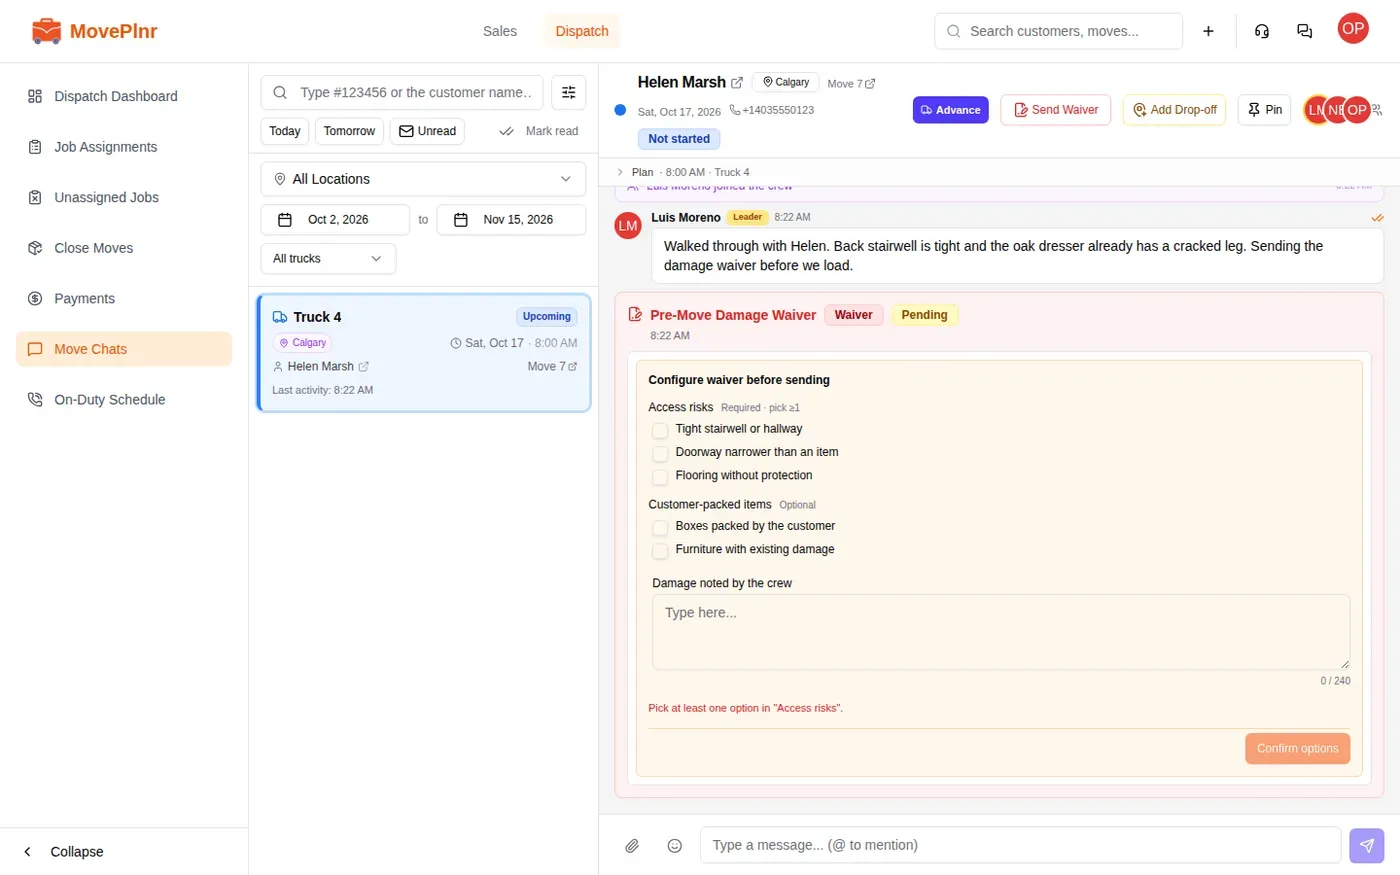
The card works like the line on the Agreements card. Tick the options under Configure waiver before sending, write the crew’s notes, and confirm. Then choose On this device, Send by email or Send by SMS. The email address and phone number start as the customer’s own, and you can change them before sending.
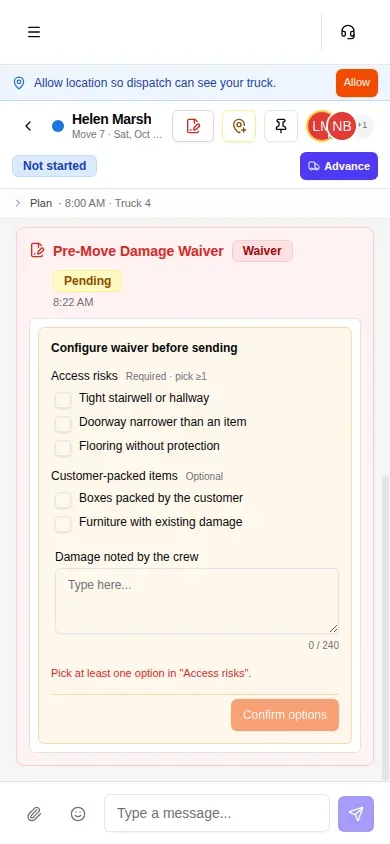
The crew sees the same card on their phone, so the crew lead can tick the risks with the customer standing there.
Resend or switch how it was sent
A sent waiver’s card says it is waiting for the customer. Click Change delivery method to send the same link again, by email, by text or on your device. The customer’s link does not change, so an earlier email still works.
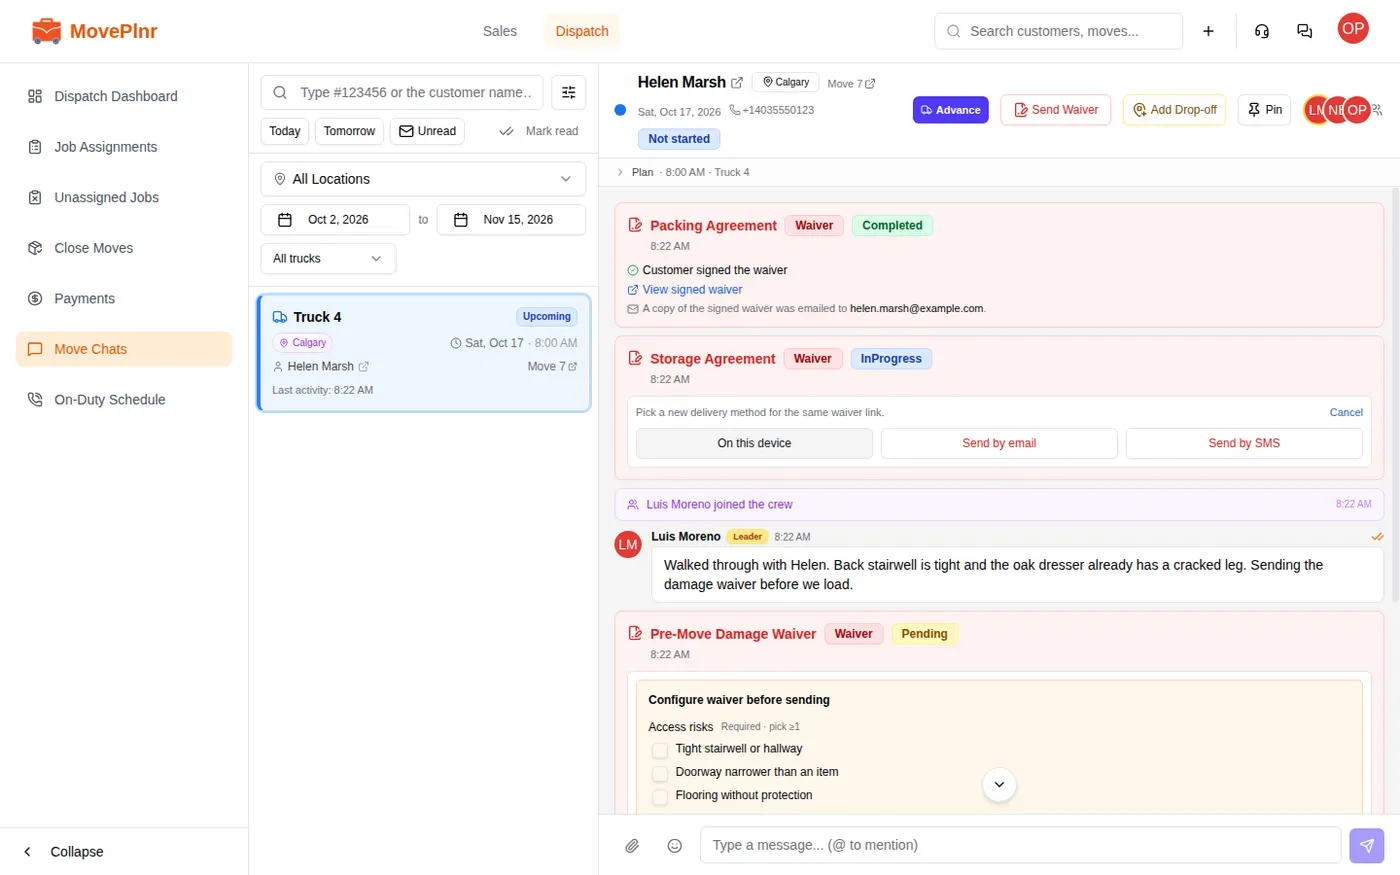
When the customer signs, the card says so, links to the signed waiver, and notes that a copy went to the customer’s email.
Waivers signed with the contract
A waiver can also go out with the contract, so the customer signs it first from the contract’s own link. That is set on the contract template. Read Build contracts and collect signatures for how.