
Before you start
- The Estimates add-on, turned on by an admin.
- The free Quote pages add-on, also turned on by an admin. It sits under Estimates on the add-ons page.
- To set up branches and journeys, you need access to Estimate settings and Contract settings. Owners have both.
Turn on quote pages
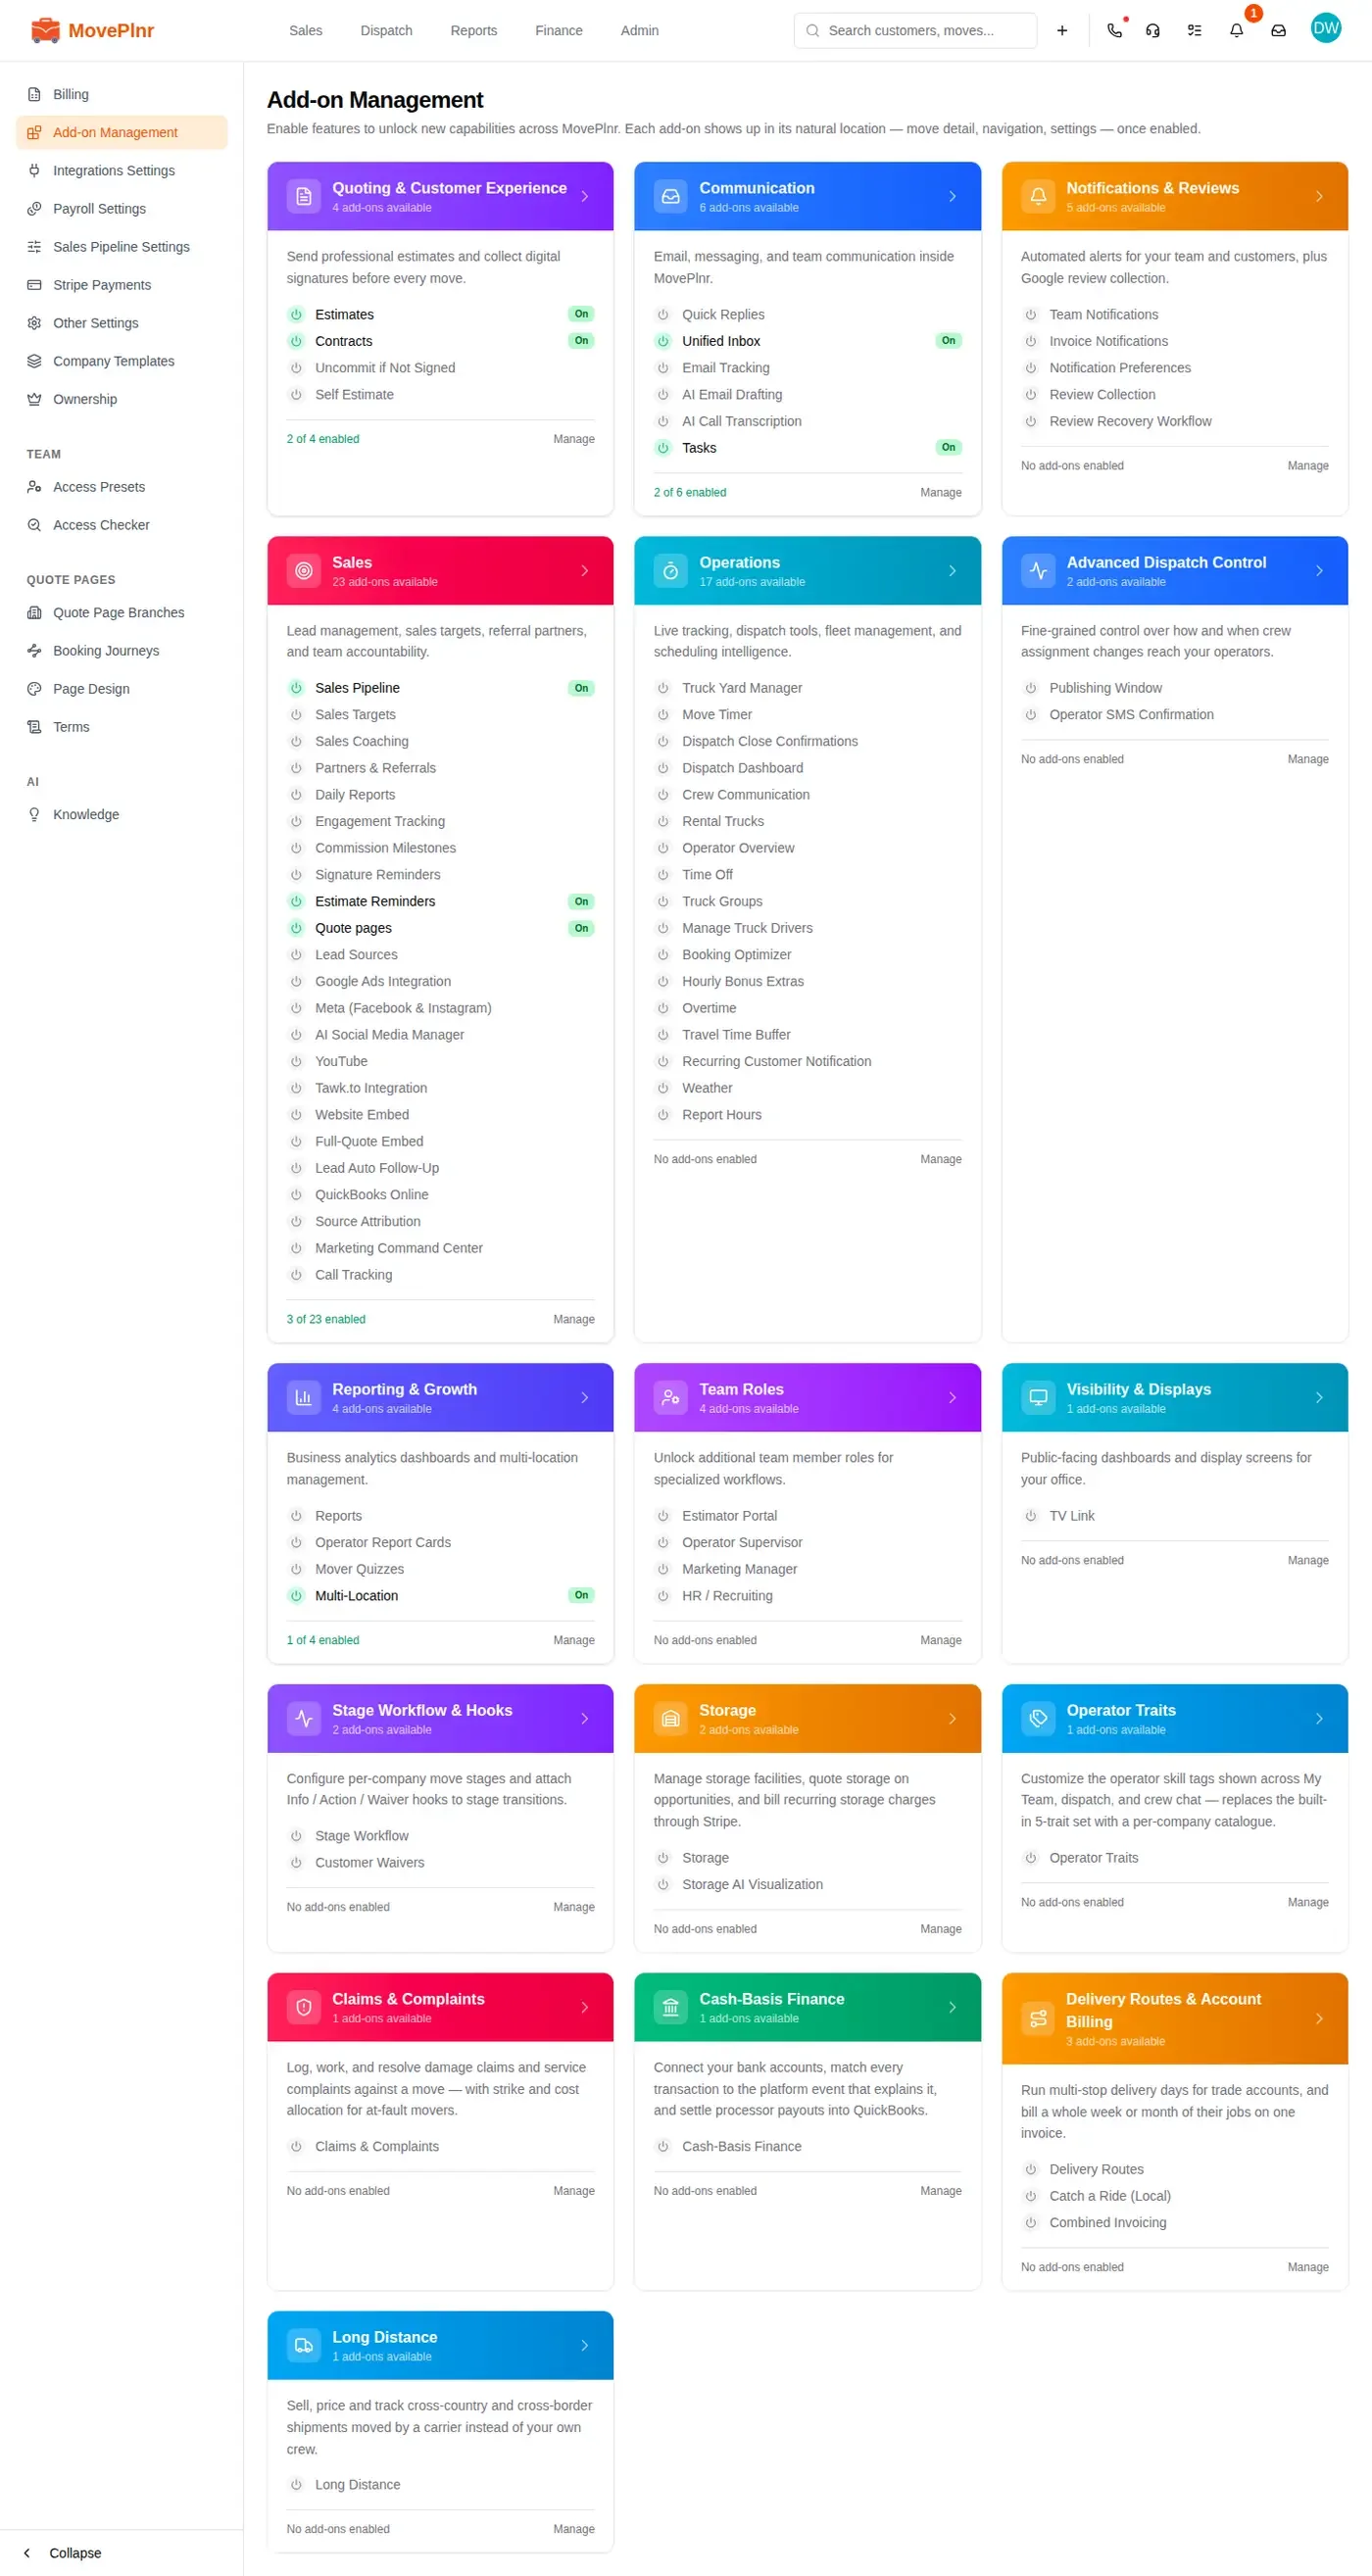
- Open Add-on Management and find Quote pages with the sales add-ons. Turn it on.
- Nothing changes for your customers yet. Every branch stays Classic and keeps sending PDF estimates until you switch it. Think of this as setup mode.
- A new QUOTE PAGES group appears in the settings menu: Quote Page Branches, Booking Journeys, Page Design and Terms.
Set up a booking journey
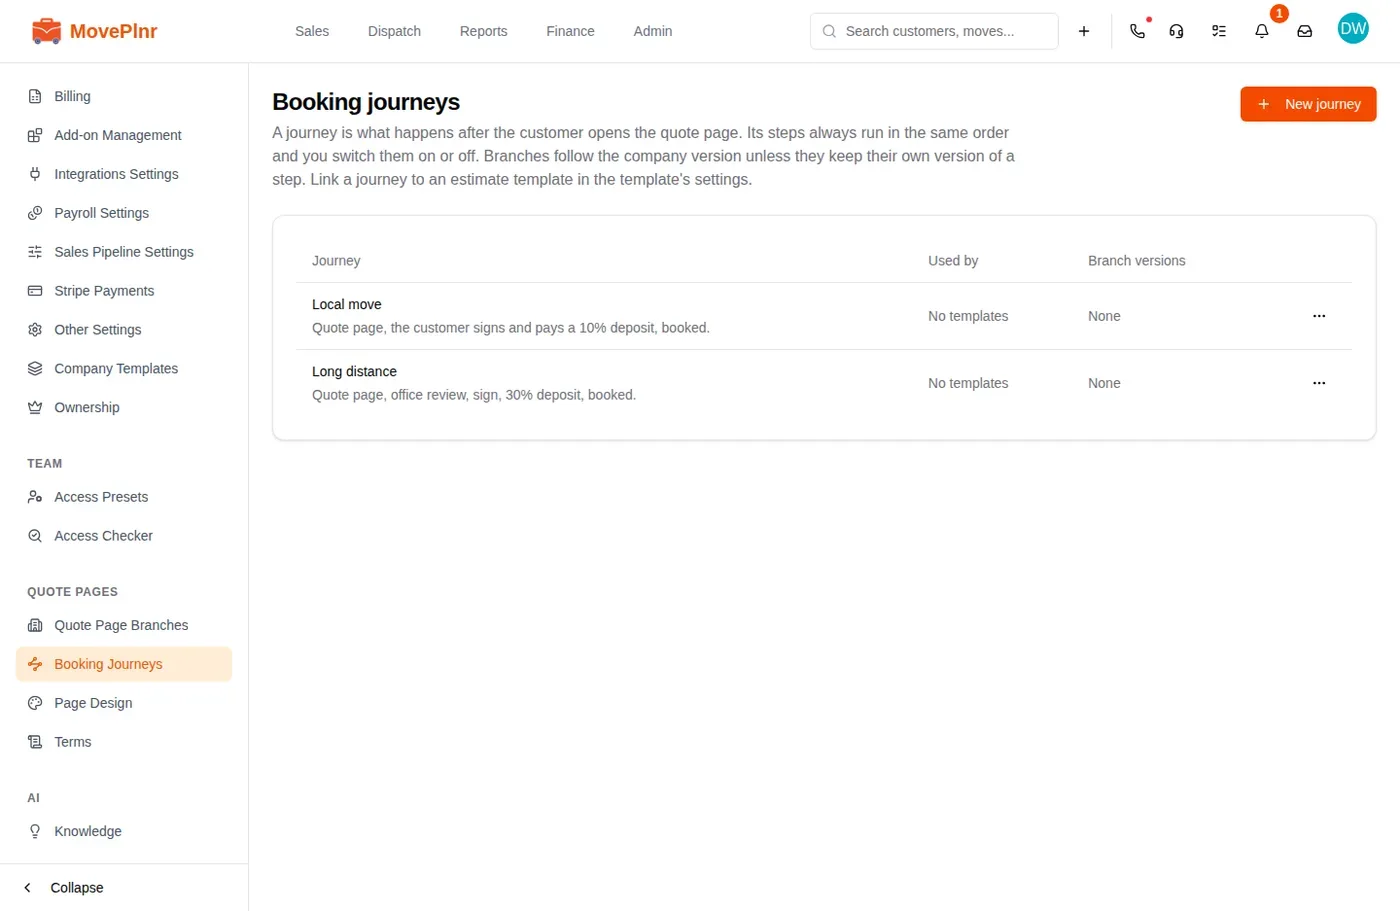
A journey is what happens after the customer opens the quote page. The steps always run in the same order, and you switch each one on or off: the quote page itself, an office review, terms and sign, a deposit, and the booked page.
- Open Booking Journeys and click New journey. Give it a name your reps recognise, like a local move or a long distance move.
- Open the journey and switch on the steps it needs. A long distance journey might add an office review before the customer signs, so someone can confirm carrier dates first.
- In each step, set what the customer is sent and when. Quote reminders and the terms follow-ups live on these steps too.
- Under Terms, write and publish the agreement the customer signs. A journey’s sign step can only use a published agreement.
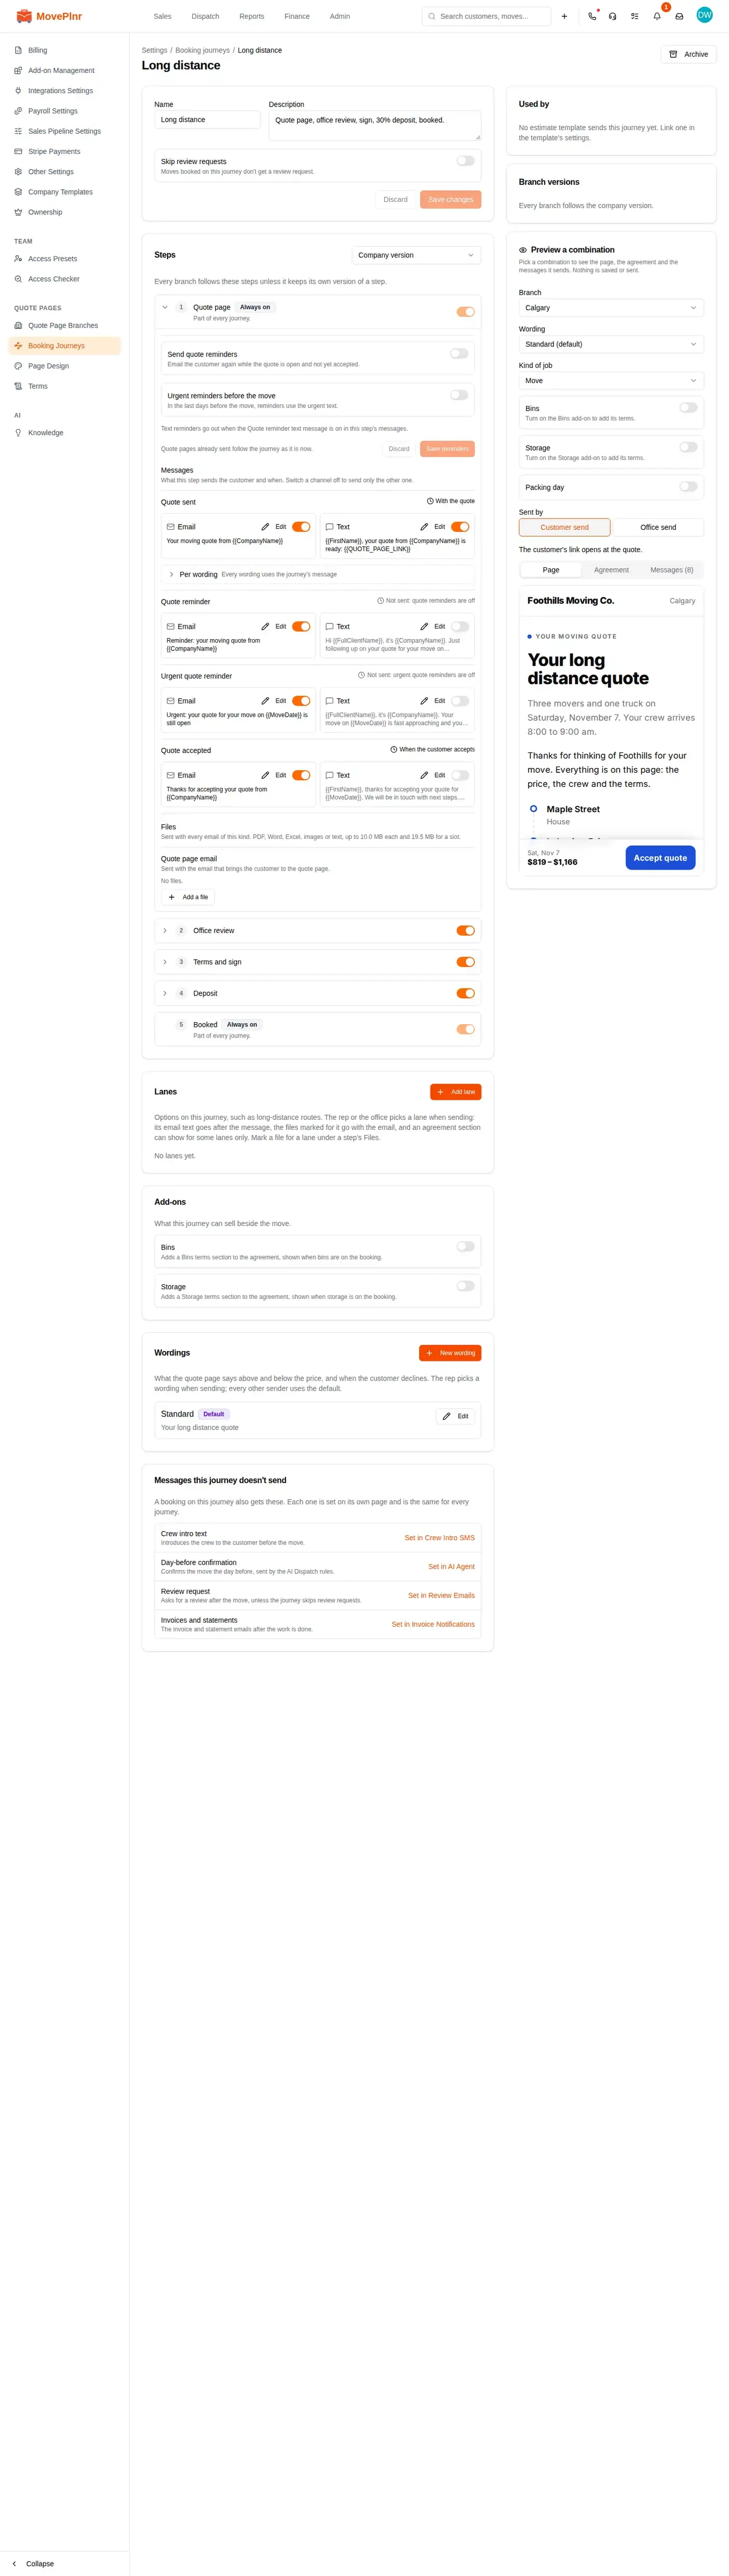
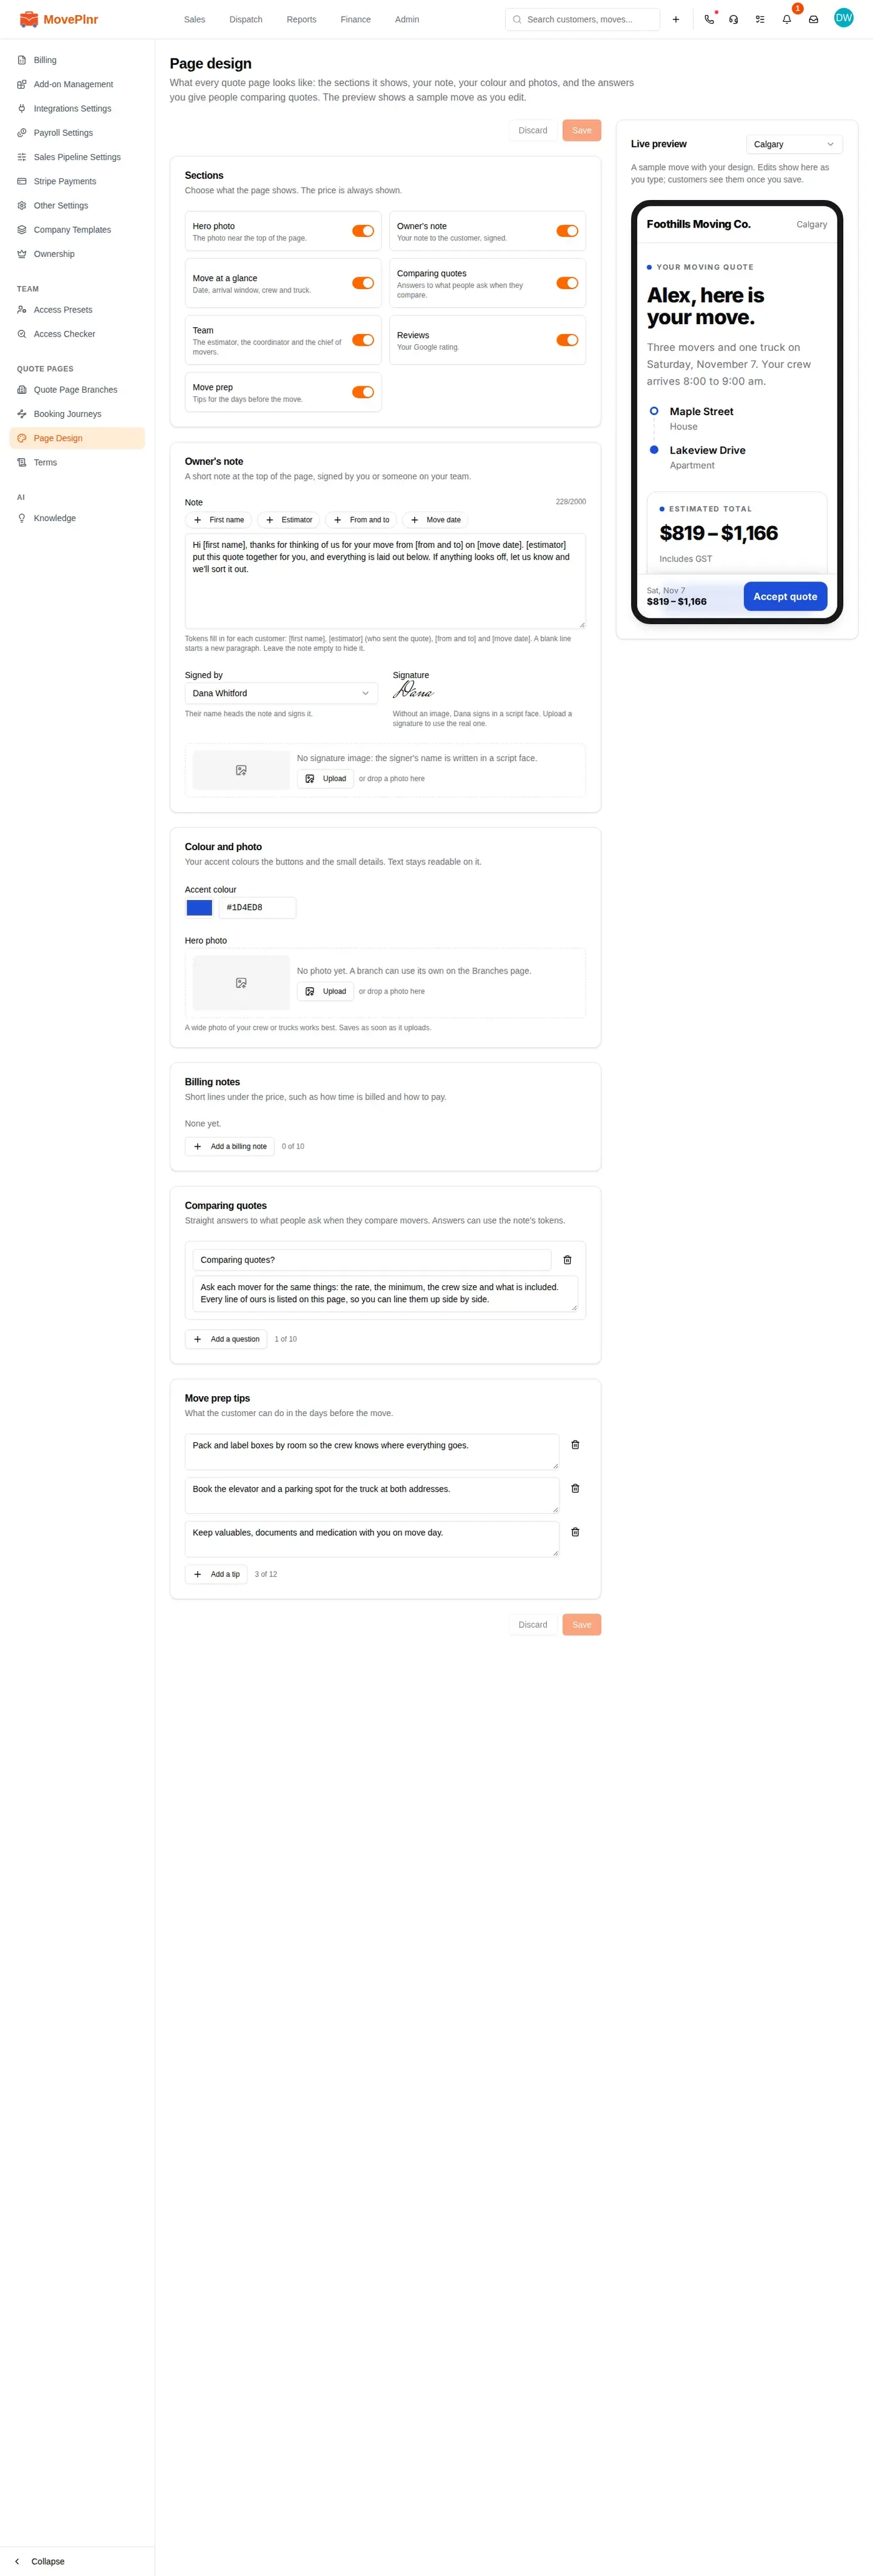
Page Design sets what every quote page looks like: the owner’s note, the accent colour, the photo, the answers to common questions and the move-day tips.
Let Compass convert your setup
On Quote page branches, the Convert my setup card asks Compass to turn your classic estimate templates into journeys, wordings, agreements and follow-ups. Compass proposes each one as a card, and nothing changes until you confirm it. New moving companies start on journeys from day one.
Get each branch ready
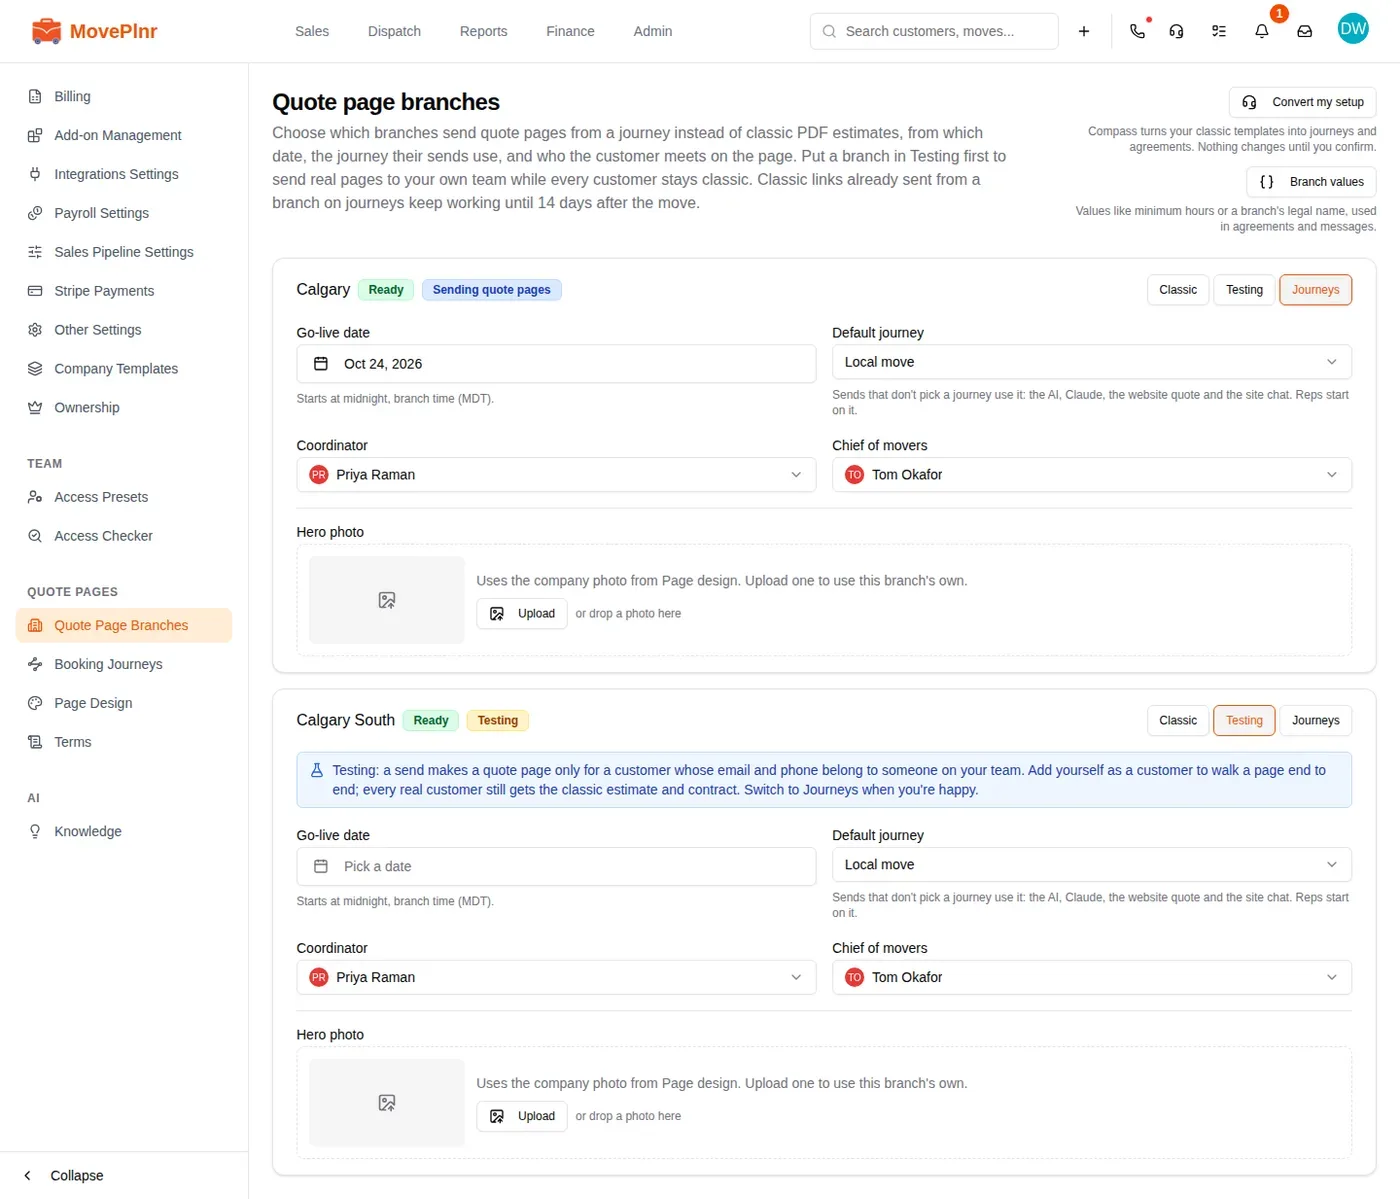
- Open Quote page branches. Each branch has a card with its switch: Classic, Testing or Journeys.
- Pick the Default journey. Sends that don’t pick one use it: the AI, the website quote and the site chat. Reps start on it too.
- Pick the Coordinator and the Chief of movers. The customer meets them on the page, with the bio from their profile.
- If the card lists missing values, fill them in. Branch values holds values like a branch’s minimum hours or legal name that agreements and messages use. The switch stays on Classic until nothing is missing.
Test with your own team
Before any customer sees a quote page, put the branch in Testing. A send from that branch makes a quote page only when every email and phone on the customer belong to someone on your team. Every real customer still gets the classic estimate.
- Switch the branch to Testing.
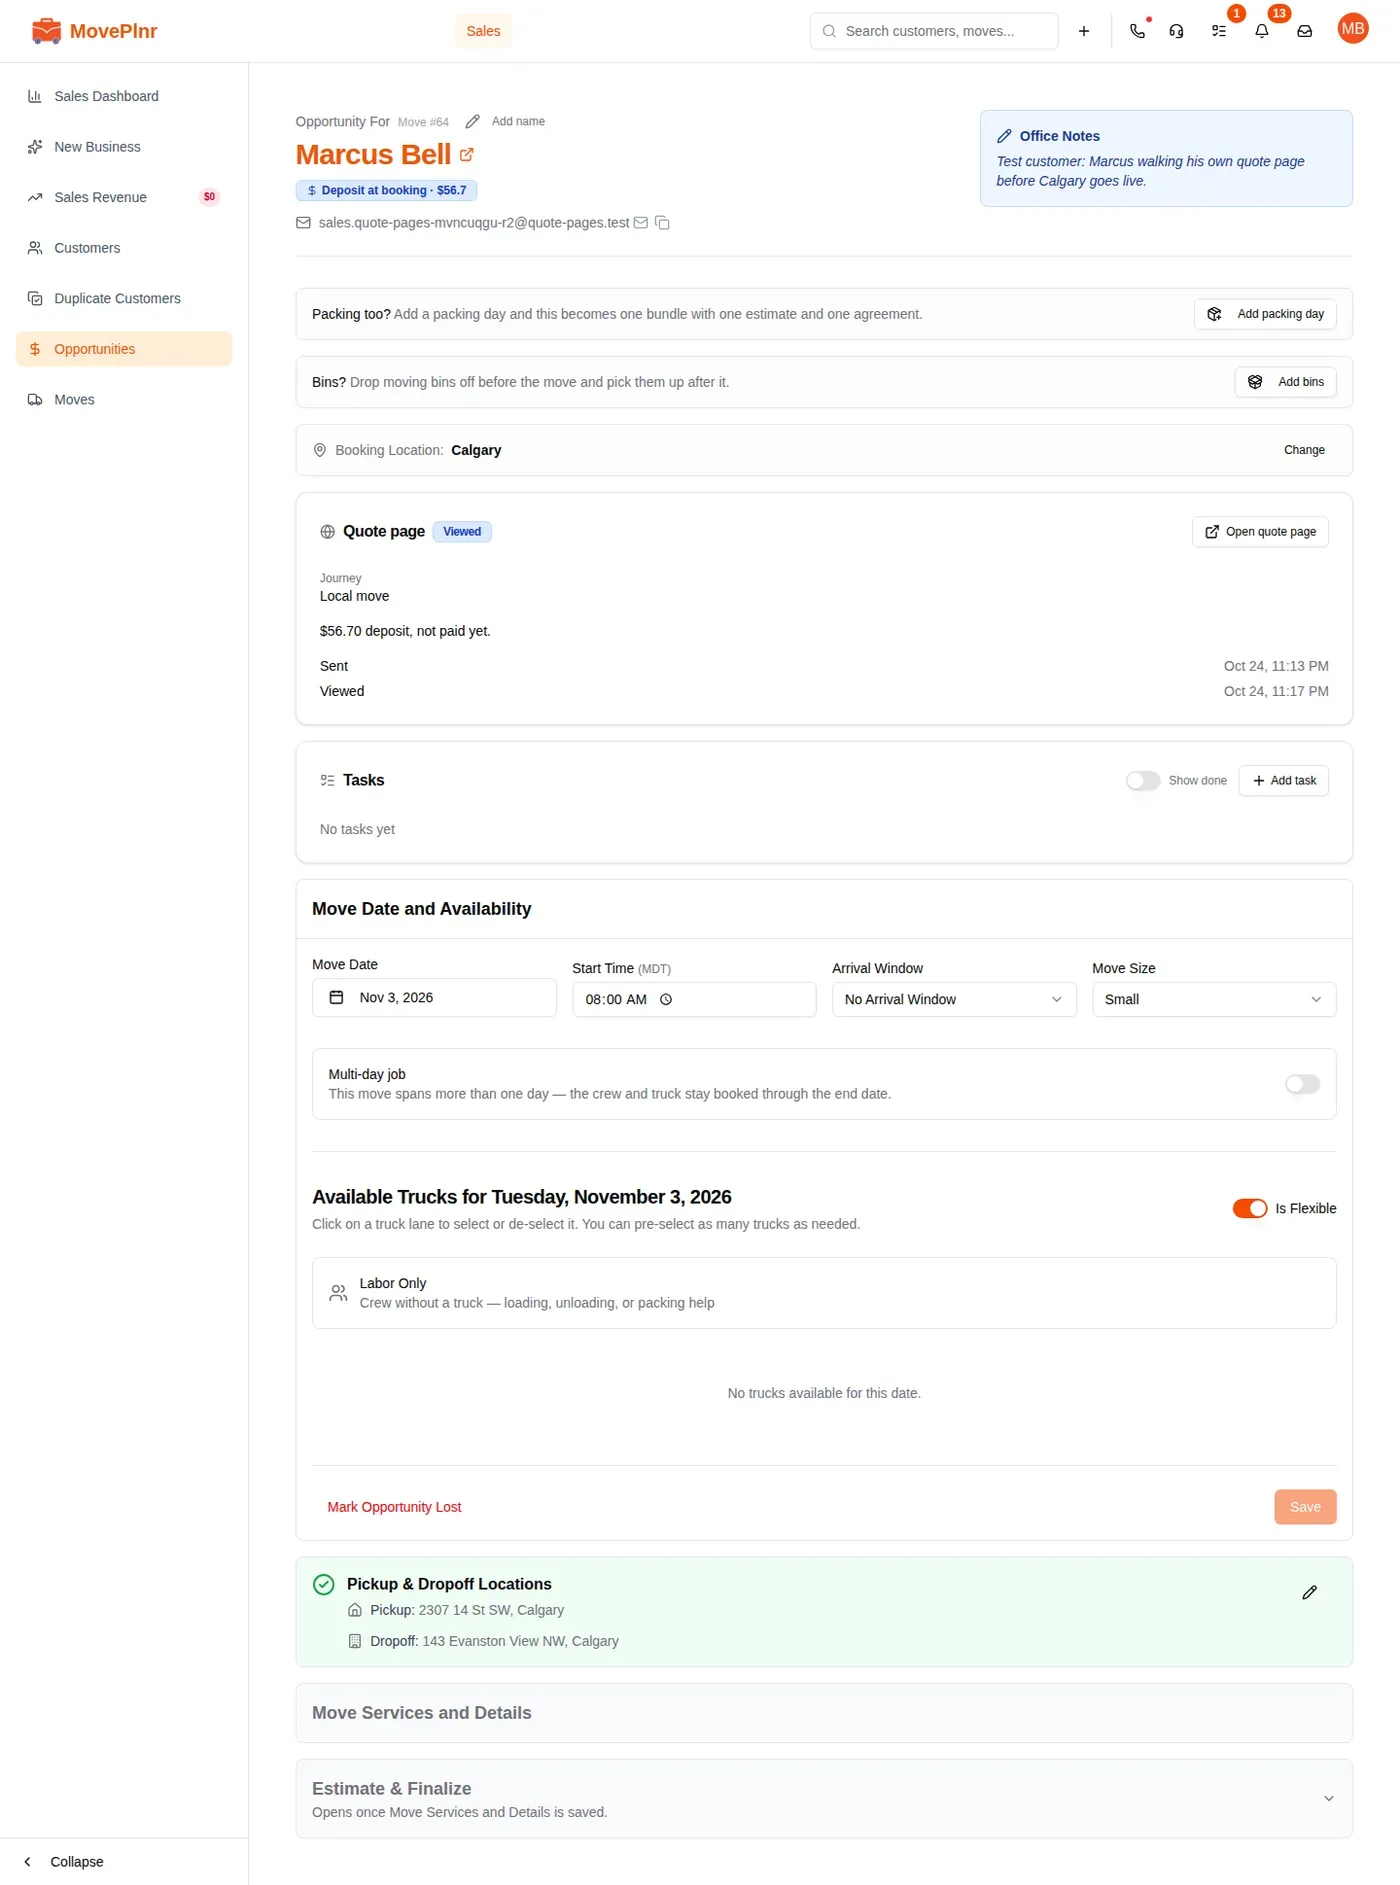
- Create a customer with your own work email, then build and send the estimate as usual. Send Estimate says it sends a test quote page.
- Open the link from your inbox and walk the page the way a customer would: review, sign and the deposit.
What your customer sees
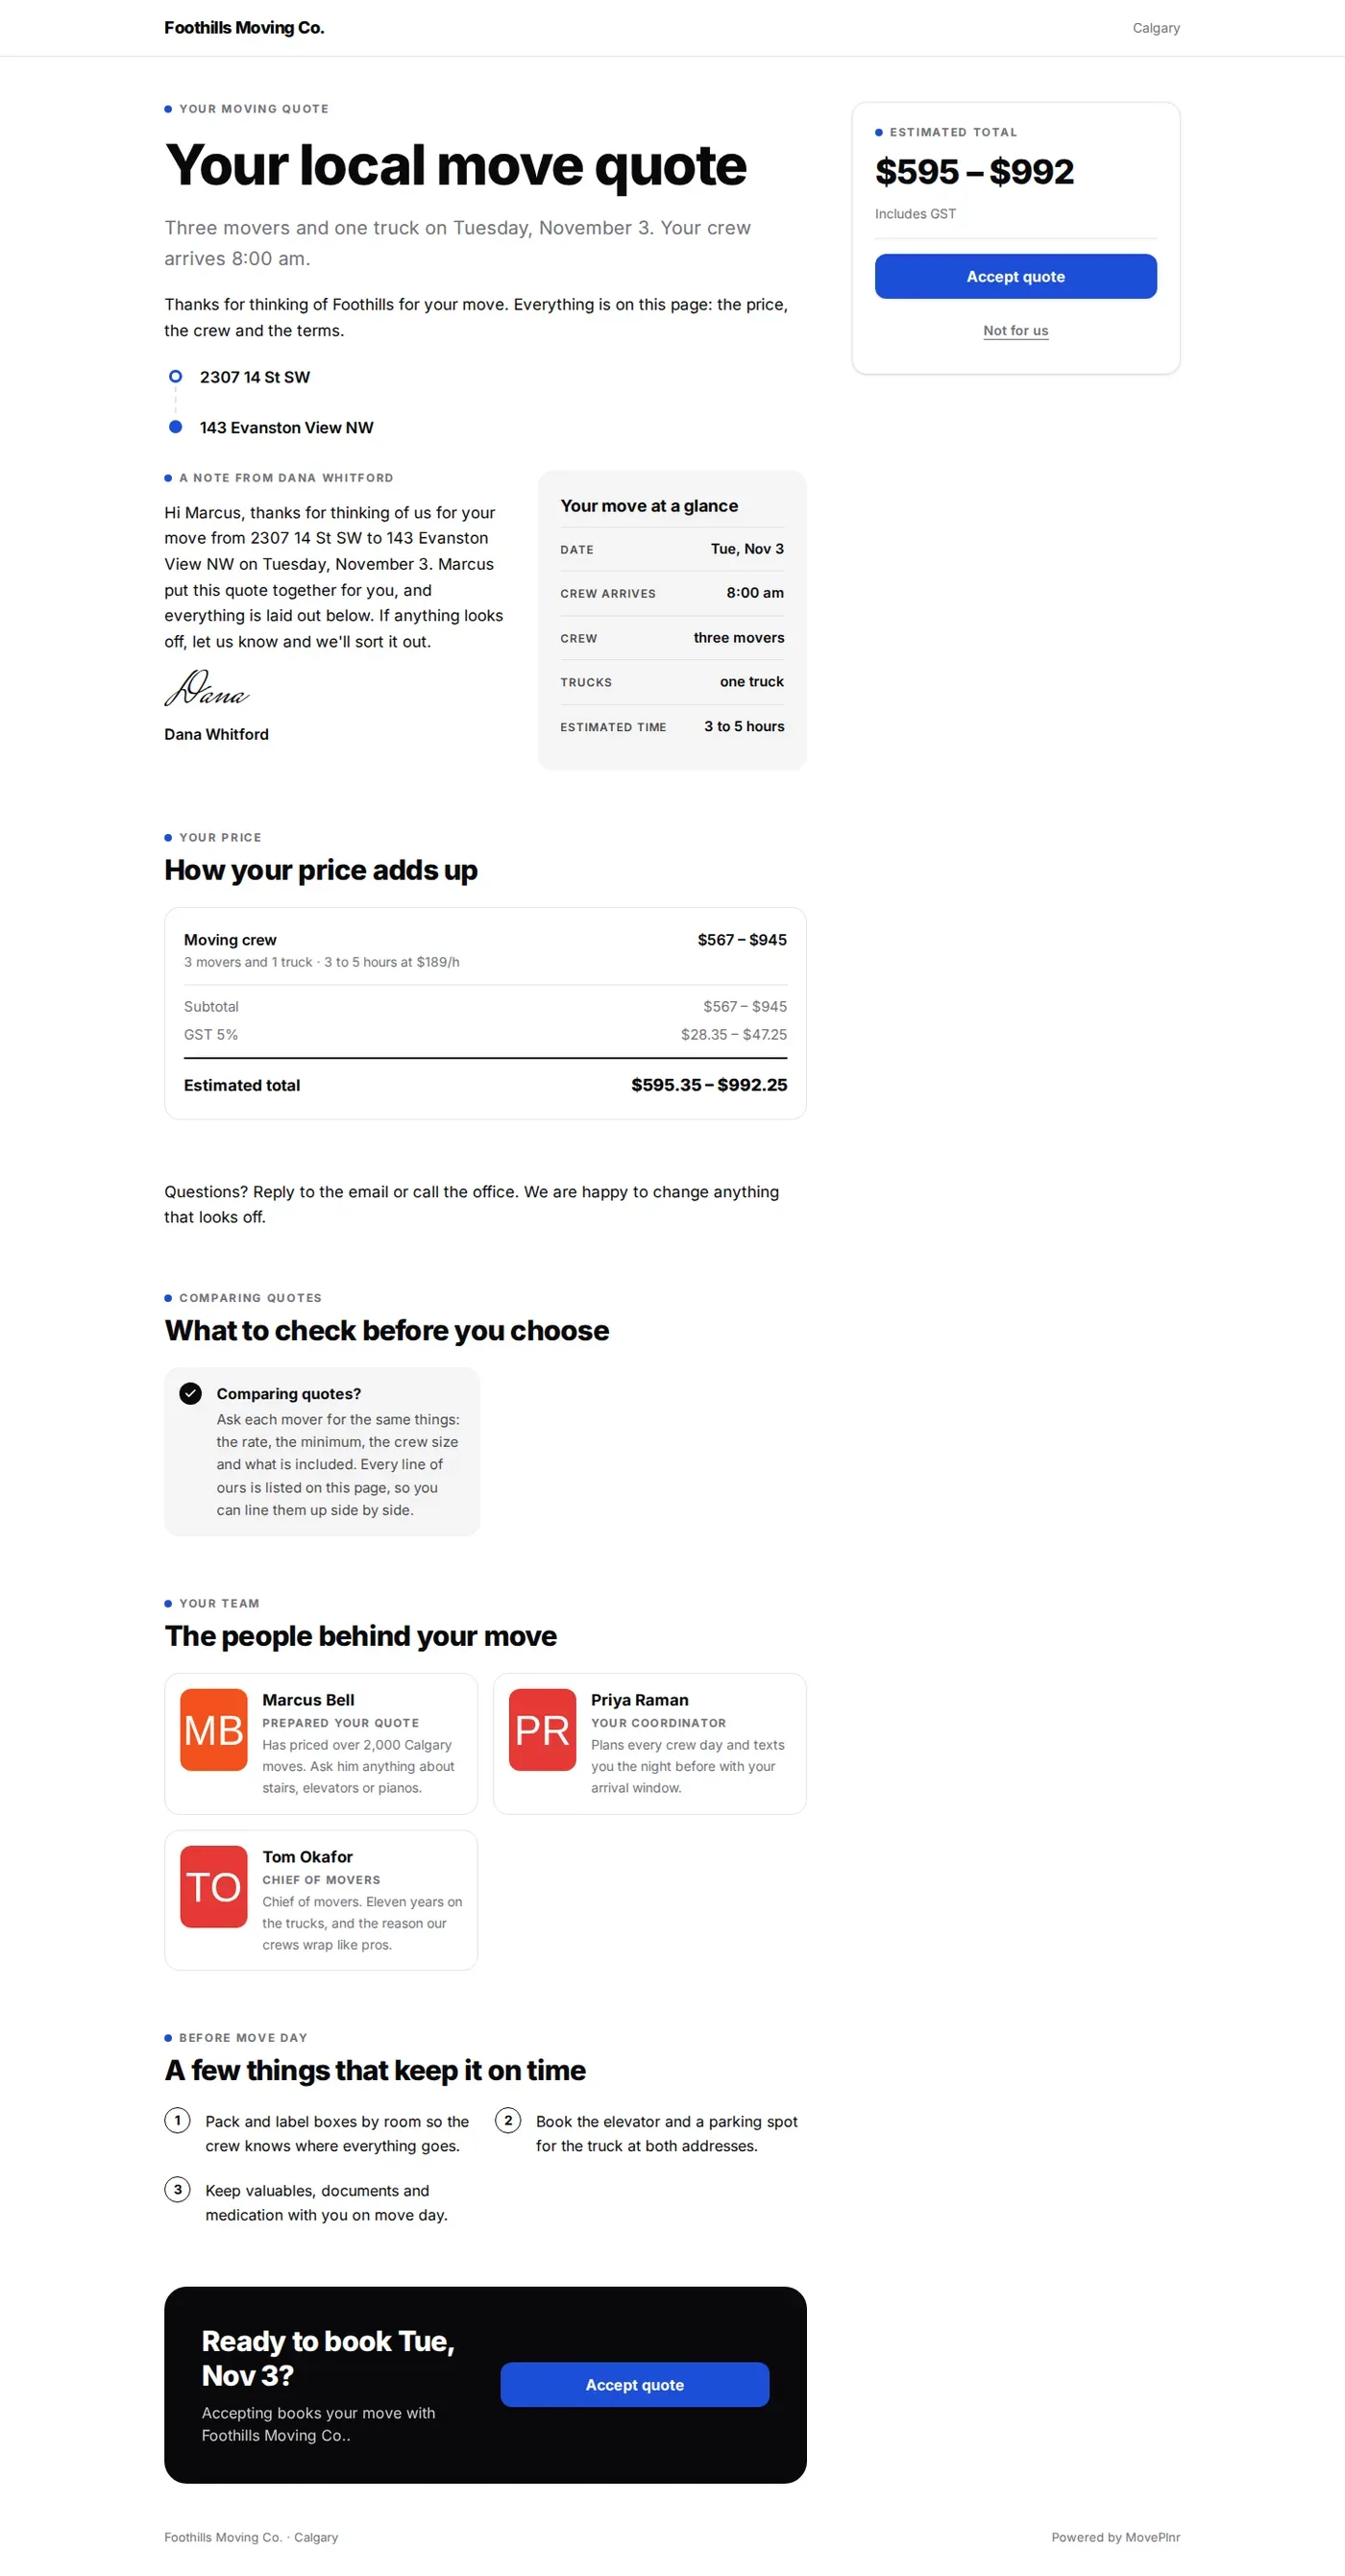
The customer gets an email with one link. The page shows the price, the move at a glance, a note from the owner, the people behind the move and a few tips for move day. They click Accept quote to book, or Not for us to say no.
Sign and pay the deposit
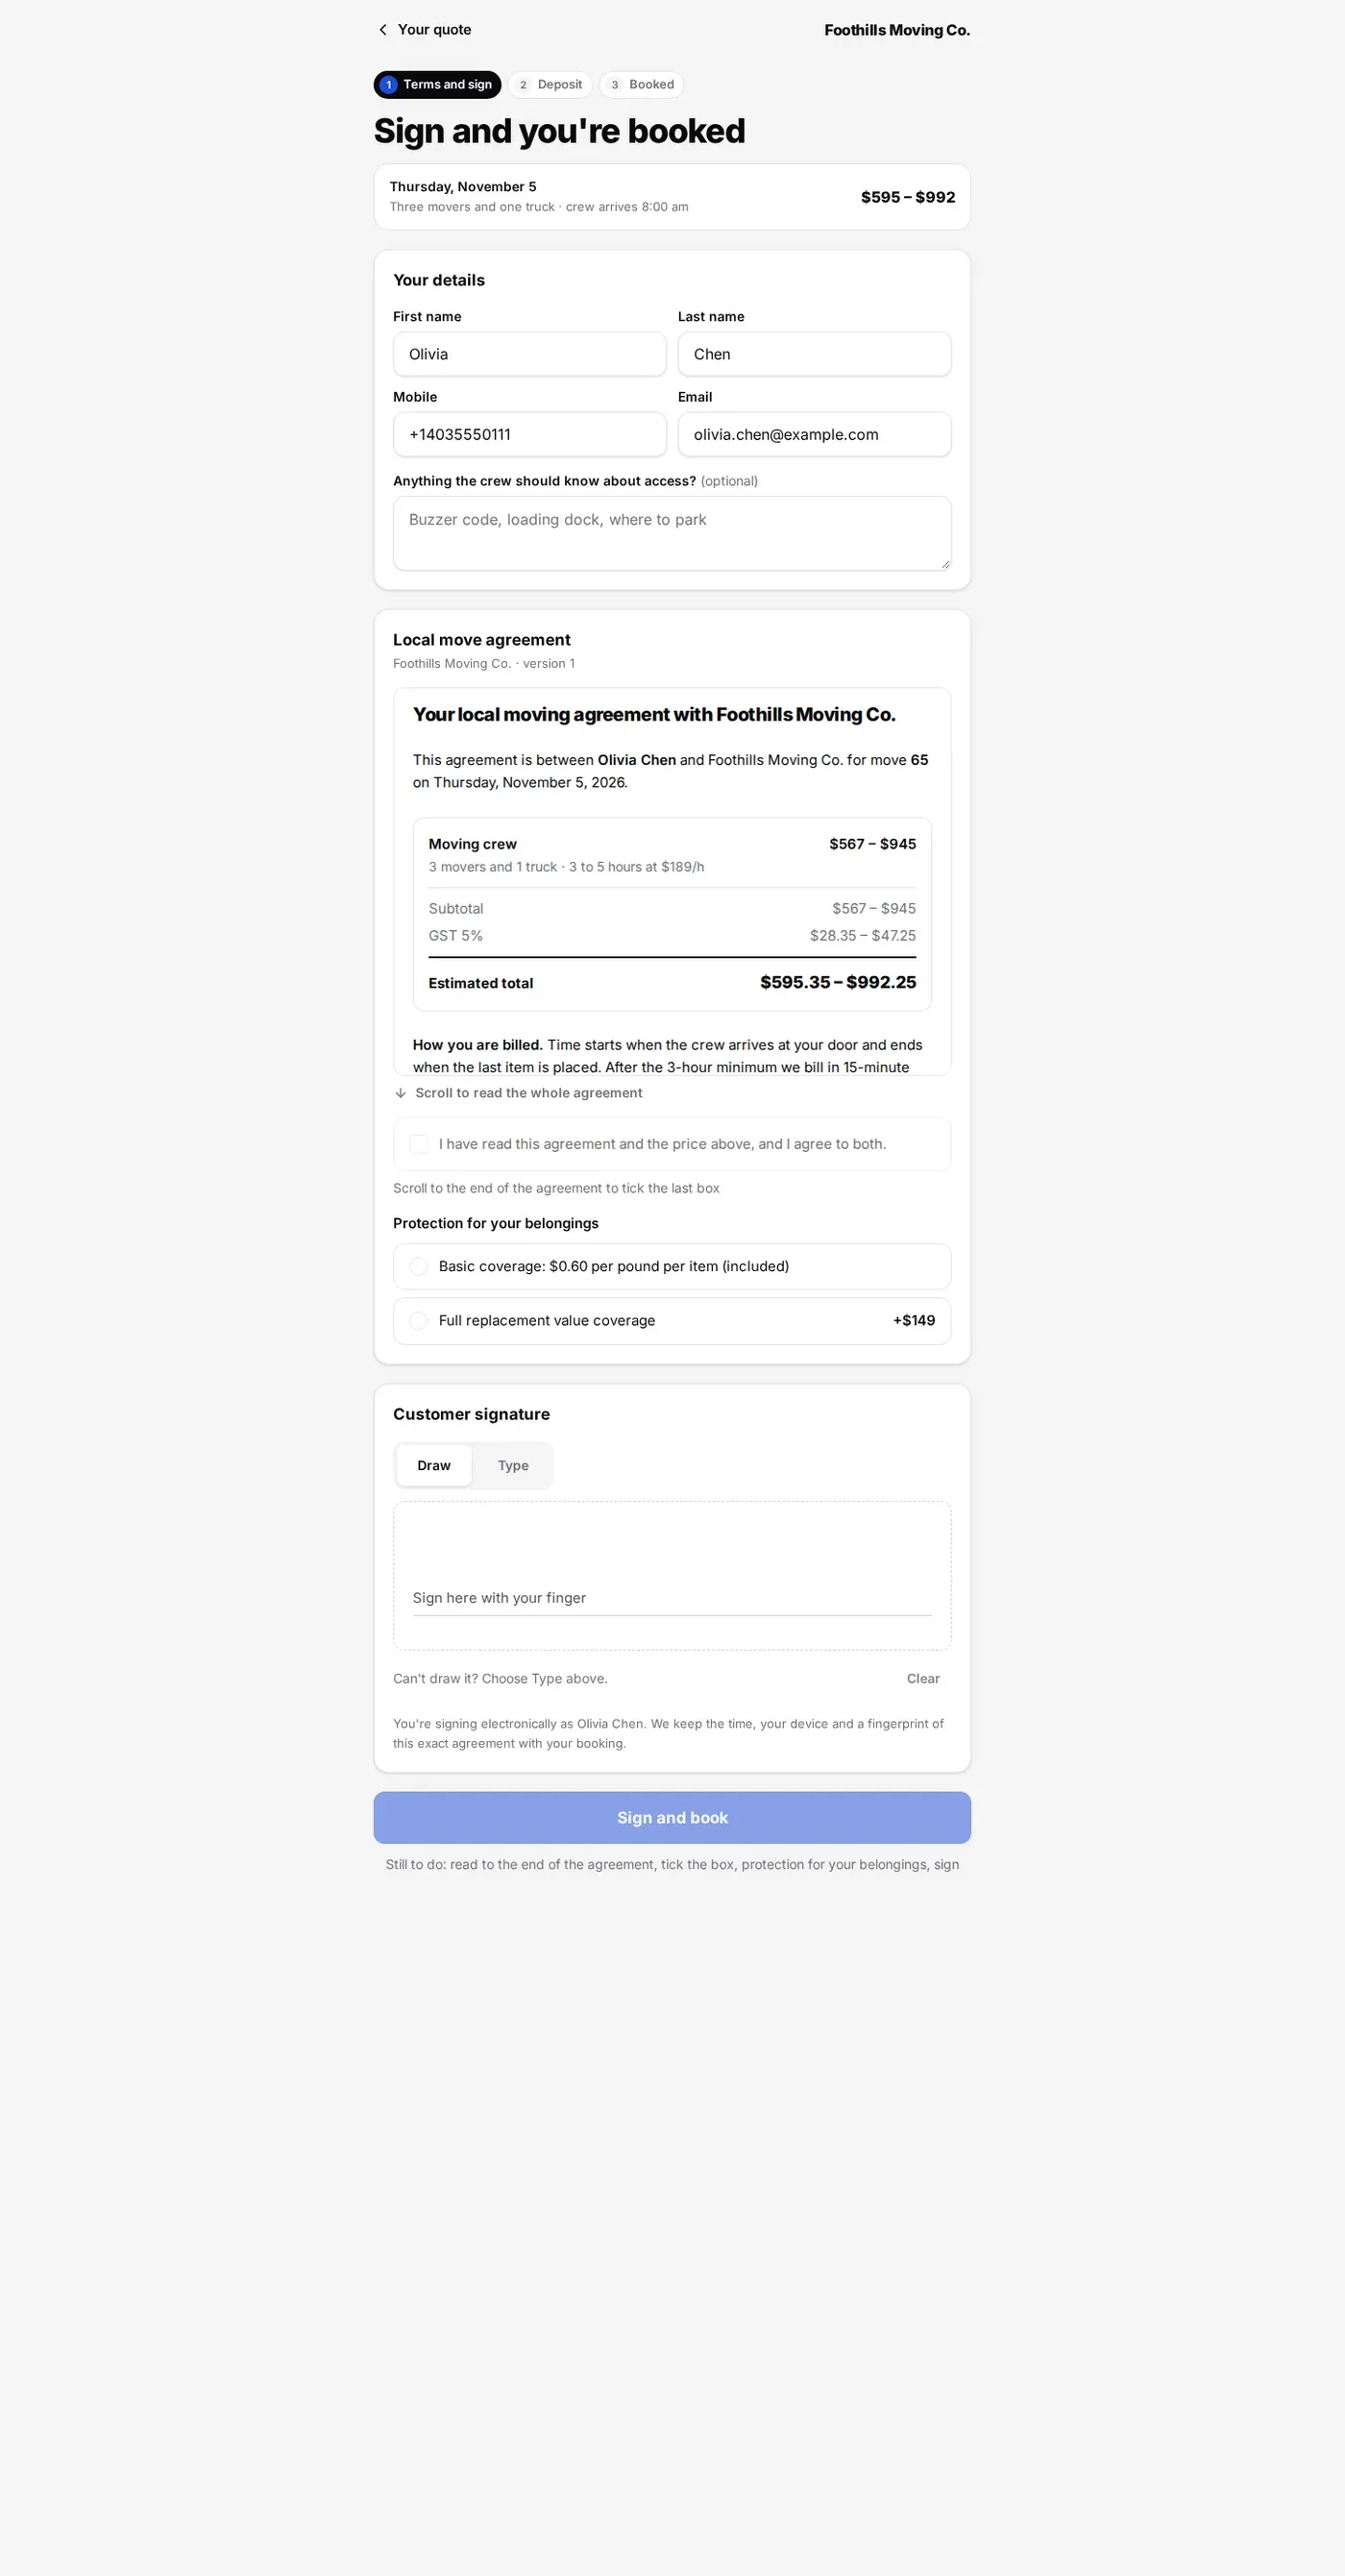
When the journey has a sign step, Accept quote opens Terms and sign. The customer checks their details, reads the agreement to the end, ticks the boxes, picks any choices you offer and signs with a finger or by typing their name. Sign and book stays greyed out until everything is done, and the line under it says what is left.
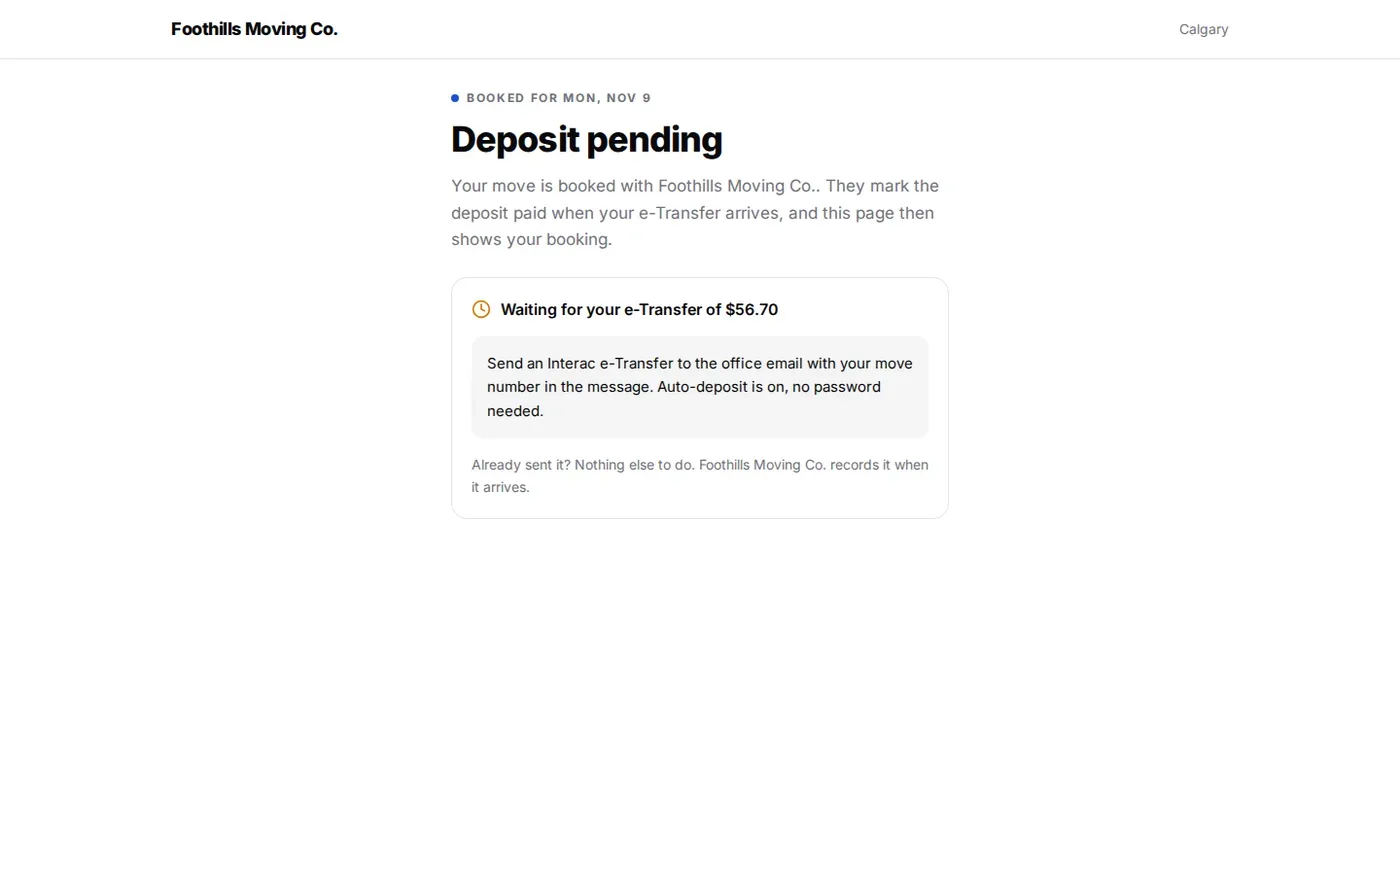
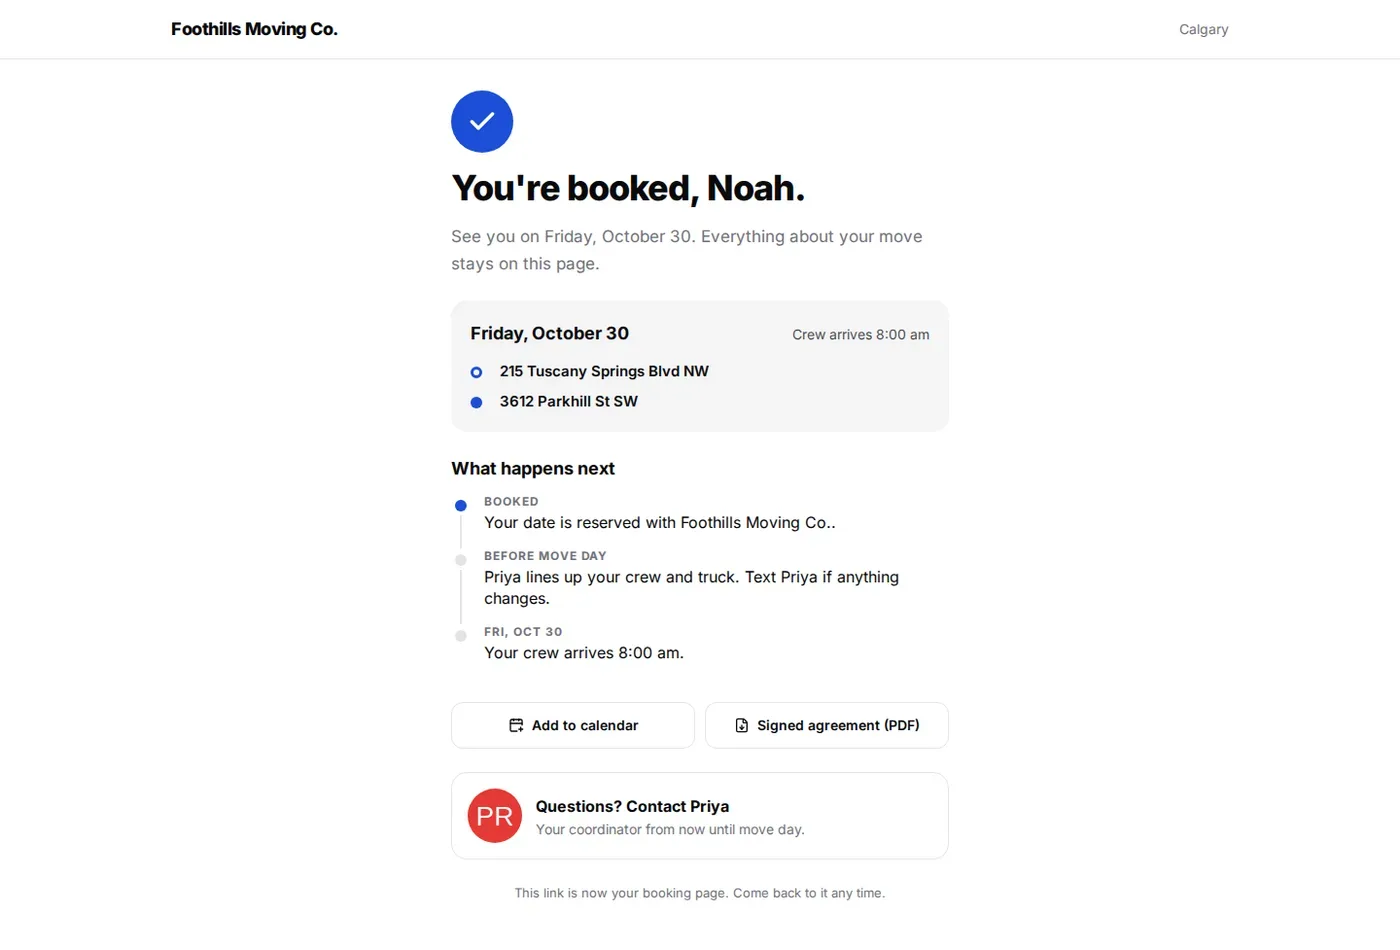
With a deposit step, the next screen takes the deposit. For an e-Transfer, the page shows your instructions and the amount, and tells the customer the office records it when it arrives. The move is booked while the deposit is pending.
Review before the customer signs
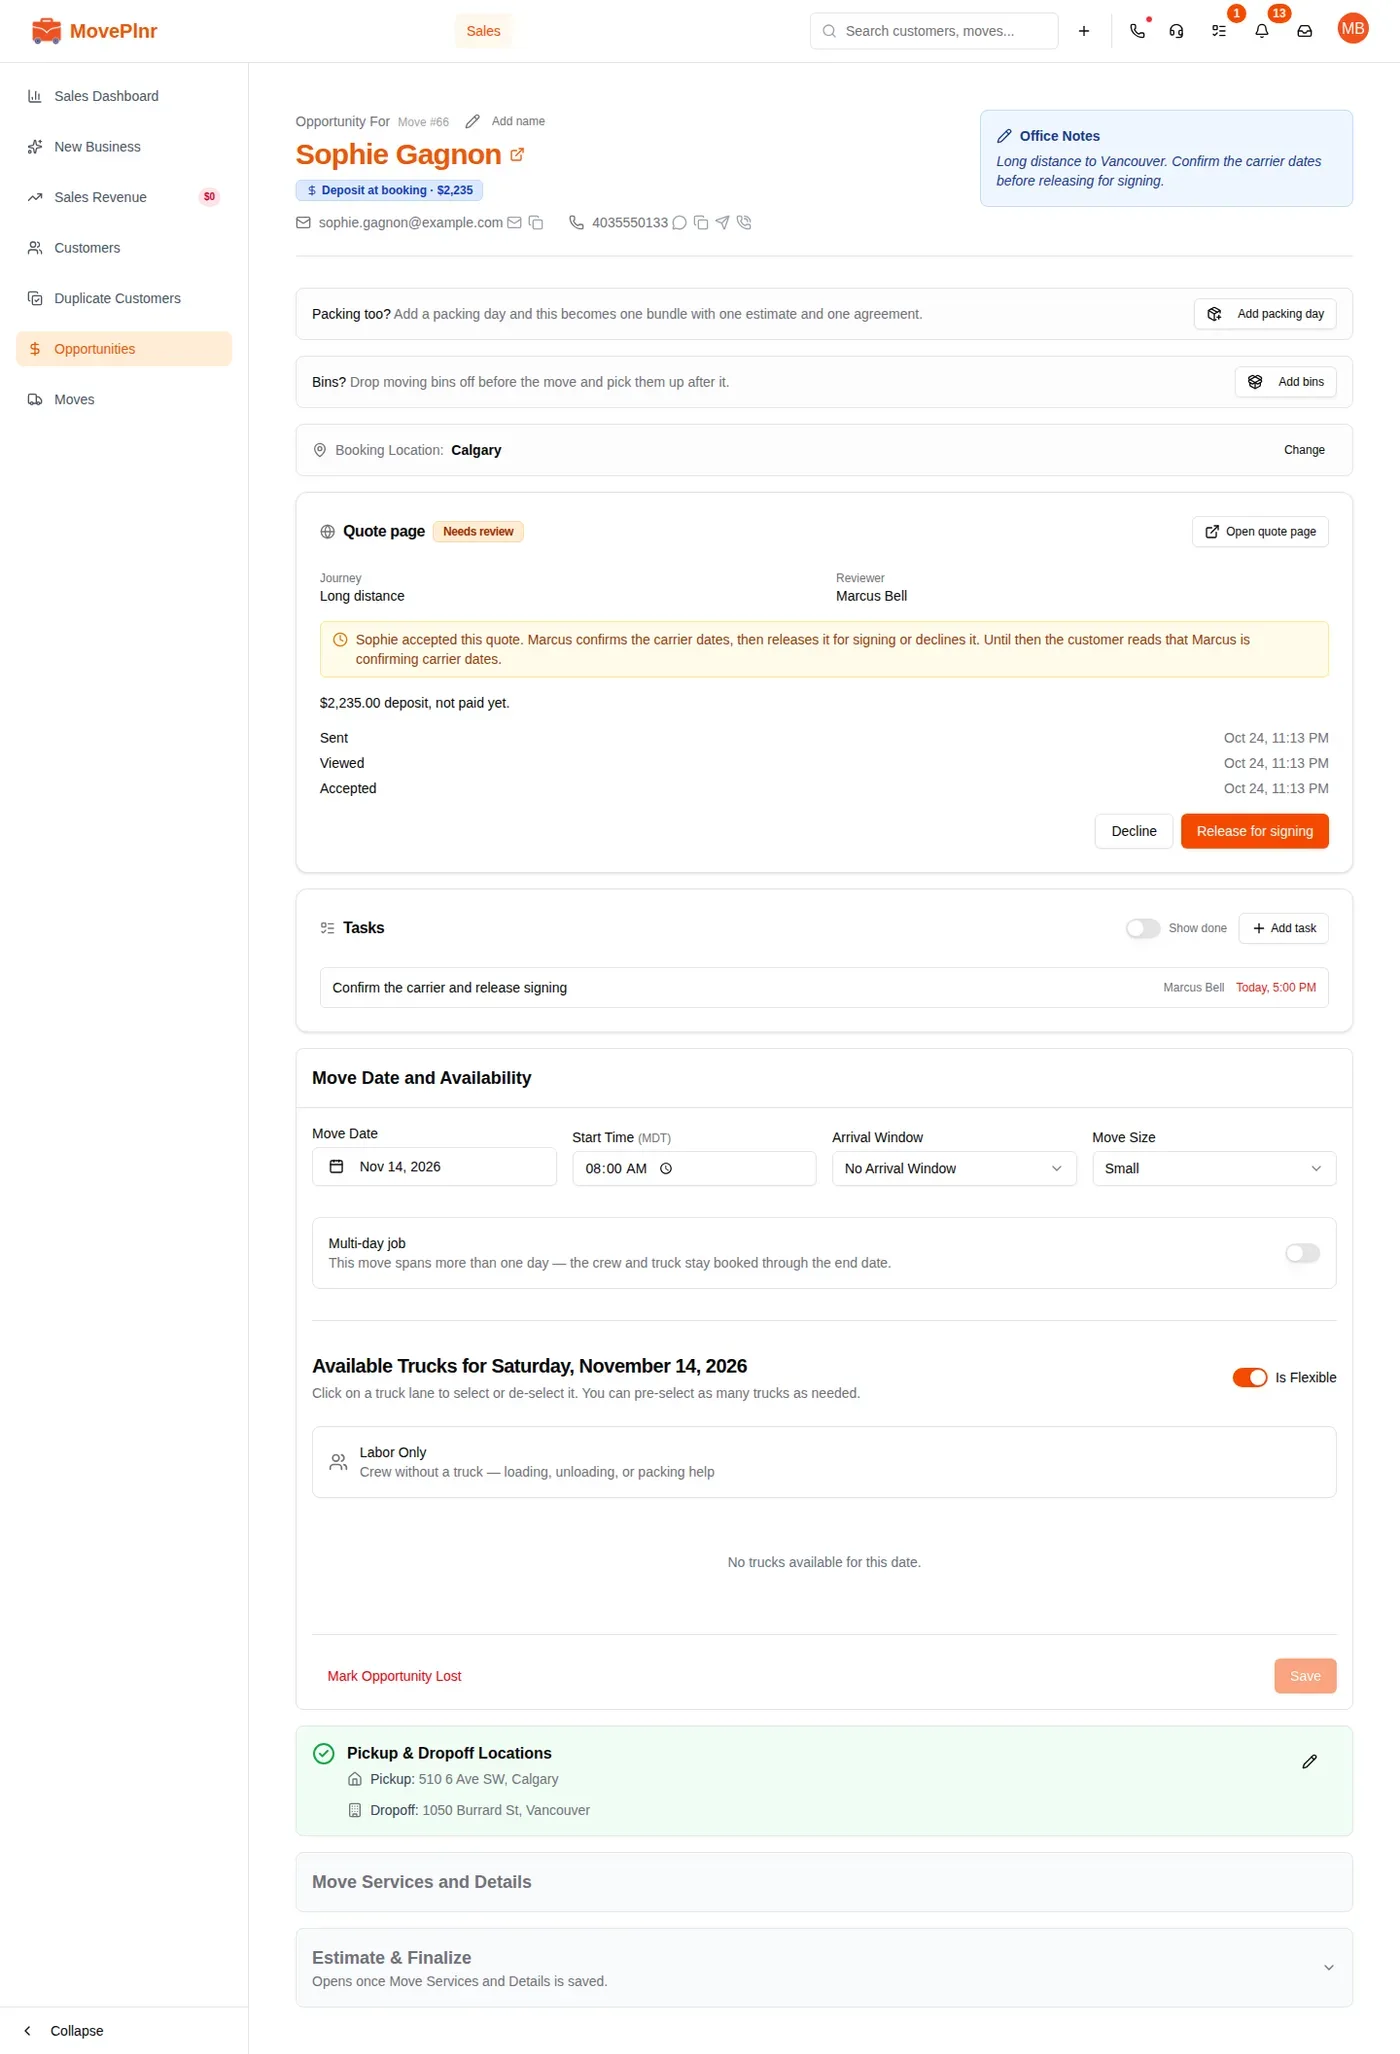
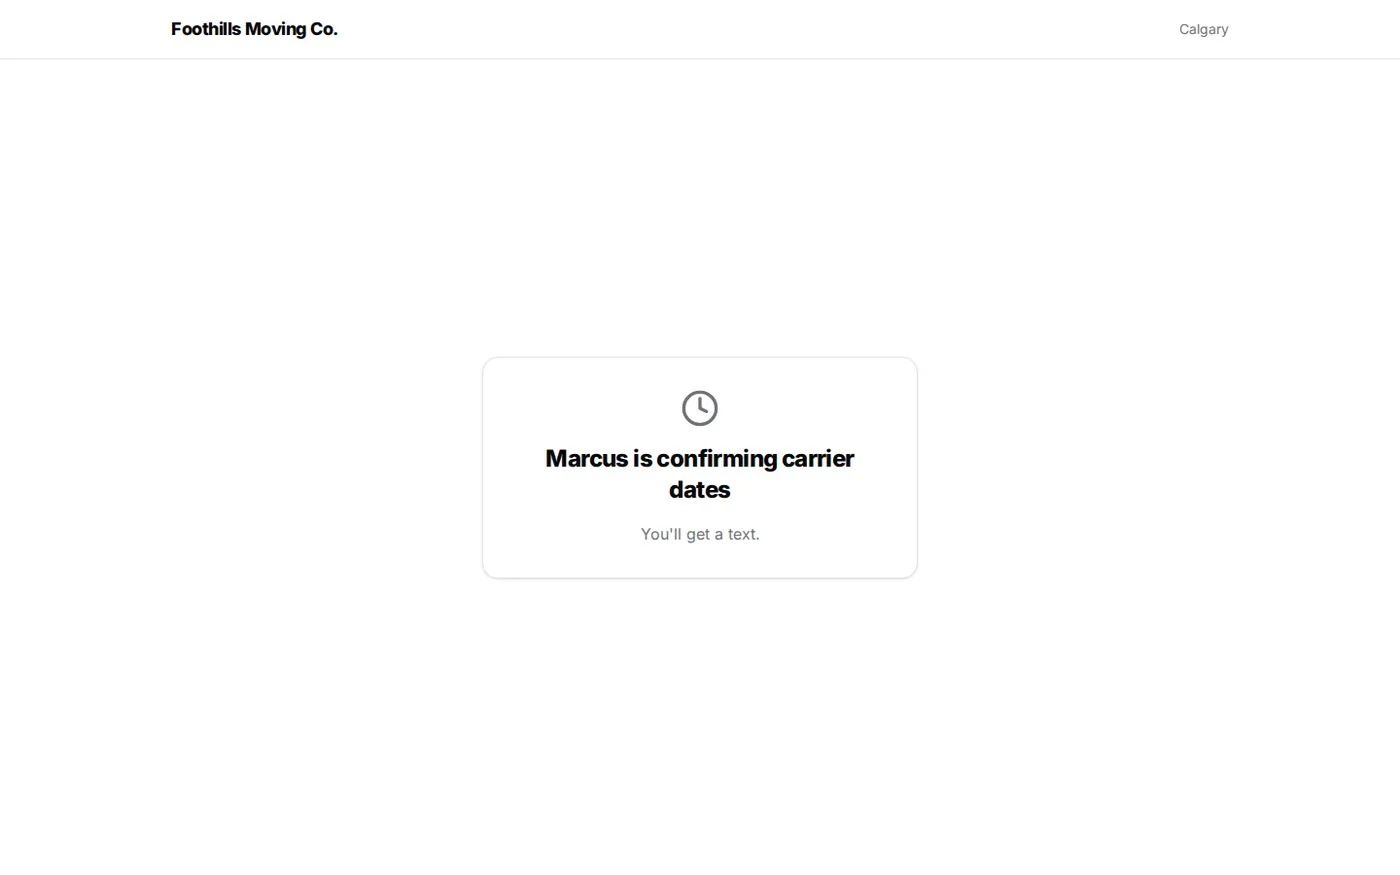
A journey with an office review step pauses after the customer accepts. The customer’s page says the office is checking the details and that they’ll get a text. The opportunity’s Quote page card shows Needs review, names the reviewer, and adds a task for them.
- Open the opportunity and check what needs checking, like carrier dates or access.
- Click Release for signing and the customer can sign. Click Decline if the move can’t go ahead as quoted.
Collect deposits that are still owed
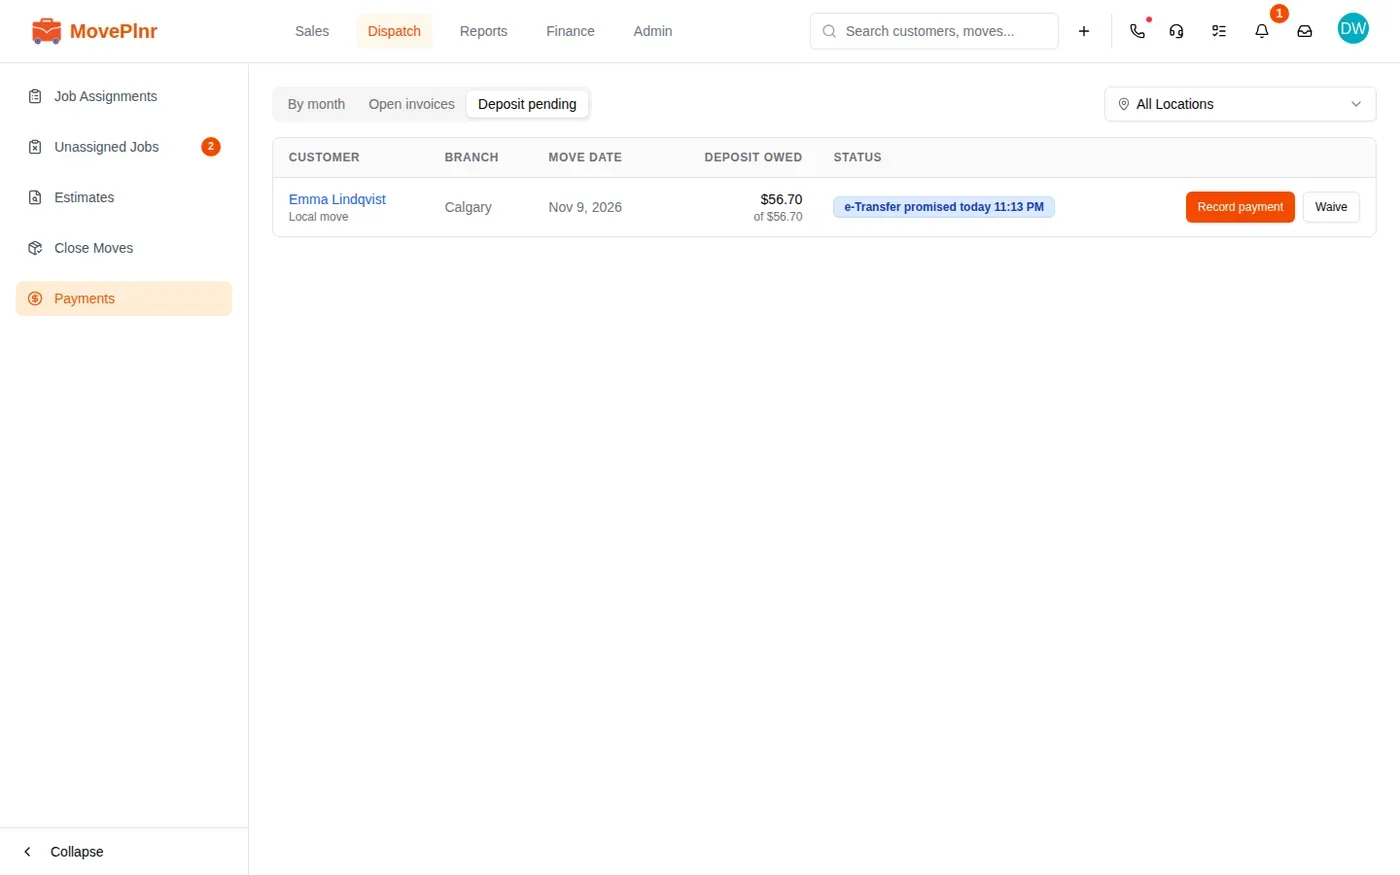
On Payments, the Deposit pending tab lists every journey booking whose deposit hasn’t come in, with the amount owed and whether the customer said their e-Transfer is on the way. The customer gets a reminder while it’s owed.
- When the money arrives, click Record payment on the row and record it as usual.
- If you agreed to skip the deposit, click Waive.
Switch a branch to journeys
When your team is happy with the test pages, set the branch to Journeys and pick its Go-live date. From that date, a send from the branch is a quote page for every customer. Send Estimate and Send Pricing send a quote page, and Confirm Booking and Request New Signature send a page that opens at Terms and sign.
- Classic links sent before the switch keep working until 14 days after the move.
- Switching back to Classic asks you once, because real customers get classic estimates again.
- A booking on a journey sets the commission split, and a booking the AI made is credited to the AI as its own seller in Sales Performance.