
Before you start
- Sign in to the MovePlnr app on your phone, or open MovePlnr in your phone’s browser. Your office adds you to the team and gives you your access.
- When the app asks to use your location, allow it. Until you do, a blue banner with Allow Location sits at the top of each page. Dispatch uses your location to show your truck on their map.
- The move chat, with its stage button, needs the Crew Communication add-on. Stages need Stage Workflow, and Time Off needs the Time Off add-on. An admin turns these on under Add-ons. If a page in this guide is missing from your menu, ask your office.
- This guide shows a crew lead. A crew lead sees the prices on the moves they lead and closes those moves. A mover on the crew sees the same move pages, without the close screen.
Your day on the dashboard
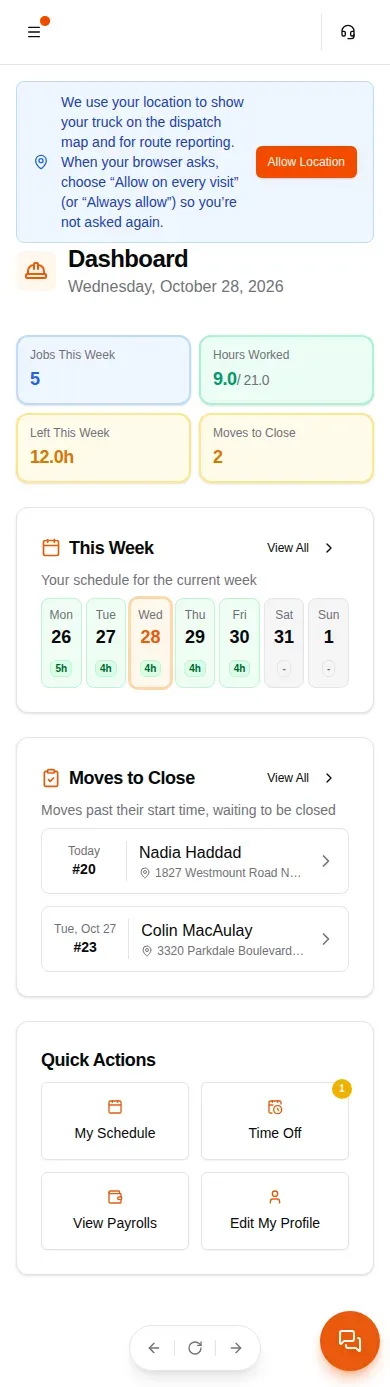
The Dashboard is the first page you see when you open the app.
- Four tiles at the top: Jobs This Week, Hours Worked, Left This Week and Moves to Close. Tap Moves to Close to open your close list.
- This Week has one box per day with the hours booked. Approved days off and requests waiting for an answer show here too. Tap View All to open your schedule.
- Moves to Close lists moves past their start time that still need closing.
- Quick Actions take you to My Schedule, Time Off, View Payrolls and Edit My Profile.
Check your schedule
- Open My Schedule from the menu or the dashboard.
- Tap a day on the month calendar to jump to its week, or tap Today to come back to this week.
- Scroll to Daily Details. Each move shows its number, arrival time, crew size, trucks, the estimated hours and the truck. Leader marks the moves you lead.
- Notes from the office show in red under the move. Tap a move to open it.

Open your move
Tap a move to open its page. From top to bottom it shows:
- The move number, its date and your badge: Crew Leader when you lead it, On Crew when you don’t.
- Important Notes from the office, in red.
- Customer Contact, with Call and Copy.
- Start time, crew size and trucks.
- Locations: each address with Copy Address and Open in Maps, the type of home, and any notes for that stop, like where to park.
- Move Details: rooms, square feet and the inventory.
- Crew Assignment: who is on which truck, who leads and who drives.
- Estimated Duration: the hours the office estimated. A red banner means the customer was not sent the estimate, so the number is for the crew only. A green banner means the customer was promised those hours. If they look wrong, tell the office rather than the customer.

Two buttons sit near the top: Open Chat, and for the leader, Close Move.
Work through the stages
The job runs from the move chat. Tap Open Chat on the move page, or open the chat from My Chats in the menu.
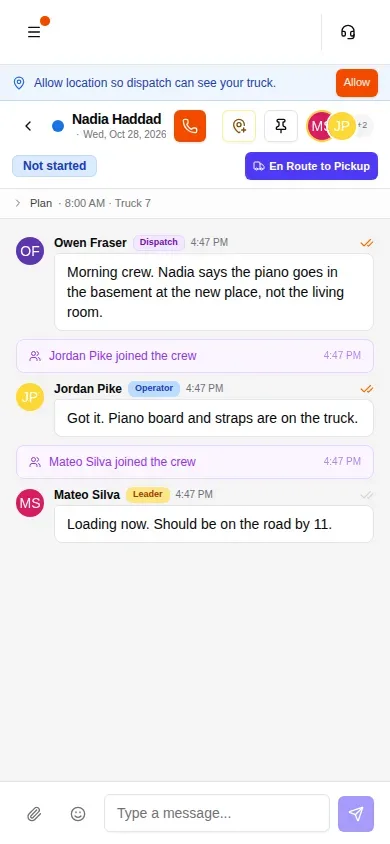
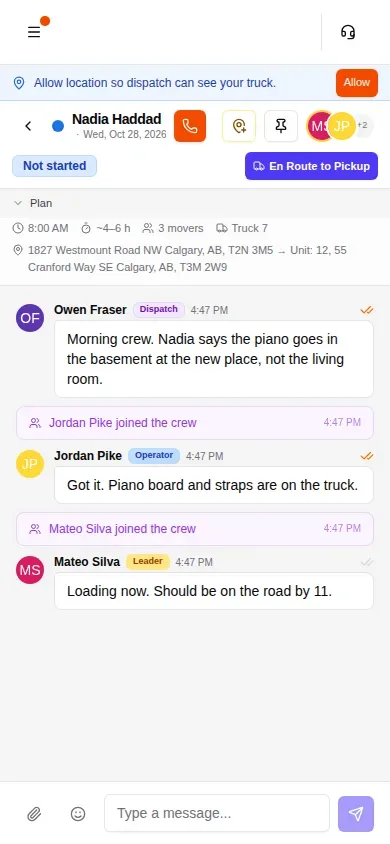
The top of the chat shows where the truck is. Before the day starts it says Not started. The blue button beside it is named after the next stage, like En Route to Pickup.
- When you reach that step of the job, tap the stage button.
- A message asks you to confirm and says which stage it marks complete. Tap the stage name again to confirm.
- The button now shows the next stage. Repeat at each step of the day, through to the end of the job.
Anyone on the crew can move the stage, not only the leader. The button is greyed out while your phone is offline. A stage can’t be undone from your phone, so call dispatch if you tapped too early. When the last stage is done, the leader is asked to close the move.
Tap Plan under the stage to see the day’s plan: the start time, estimated hours, crew size, truck and the route from pickup to drop-off.
If your office has set up steps for a stage, like calling the customer or a photo of the loaded truck, they arrive in the chat as cards when you reach that stage. What the crew sees in the office’s stages guide shows each one.
Photos and the crew chat
The move chat is where the crew, dispatch and the office talk about this one job. Everyone on the crew sees every message.
- Type in the message box at the bottom and send.
- To send photos, tap the paper clip next to the message box and pick one or more photos. Add a caption if you like. The office sees the caption without opening the photo.
- Tap a message to react to it, reply to it, or edit your own.
The crew’s side of the dispatch chat guide shows the same chat from the office.
Close the move
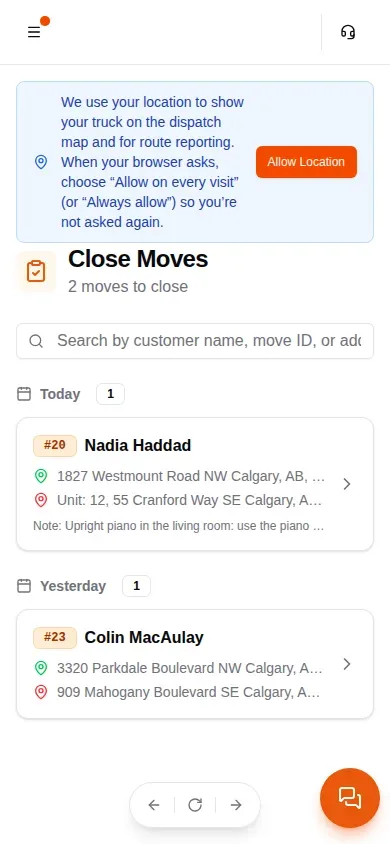
When the job is done, the crew leader closes it. Open Moves to Close from the dashboard or the menu, or tap Close Move on the move page or in the chat.
- Under Hours Worked, check the Total move time (hours) and the hours for each person, yourself included. If your company uses the Move Timer, the hours start from the timer. Tap Add unscheduled operator for someone who helped but wasn’t on the schedule.
- Under Move Files, tap Upload File to add photos or paperwork, like a signed form.
- Check the Invoice. Tap Add Item for supplies, extra services, a tip or a payment the customer made.
- Under Closing Review, set the Housing status and add any Closing notes for the office.
- Tap Confirm close, then confirm.

If your company hides prices from the crew, you see the payment status instead of the invoice, and the office finishes the money side. If your office checks closes first, the button asks dispatch to verify your close. You get a notification once they have, then you finish the close.
Your pay and paystubs
Your pay for each period shows on My Paystubs. Open it with View Payrolls on the dashboard, or My Payroll in the menu.
- Pick a pay period at the top. Each one says whether it is paid.
- Pay Summary shows your hours, pay rate, wages, extras like tips, and any deductions.
- Payout Details lists each move in the period with your hours, wages and your share of the tip.
- Tap Print for a copy.

Your hours come from the closes. A move shows on your paystub once it is closed and the office has run payroll for that period. If something looks wrong, ask your office before the period is paid.
Ask for time off
- Open Time Off from the menu or the dashboard.
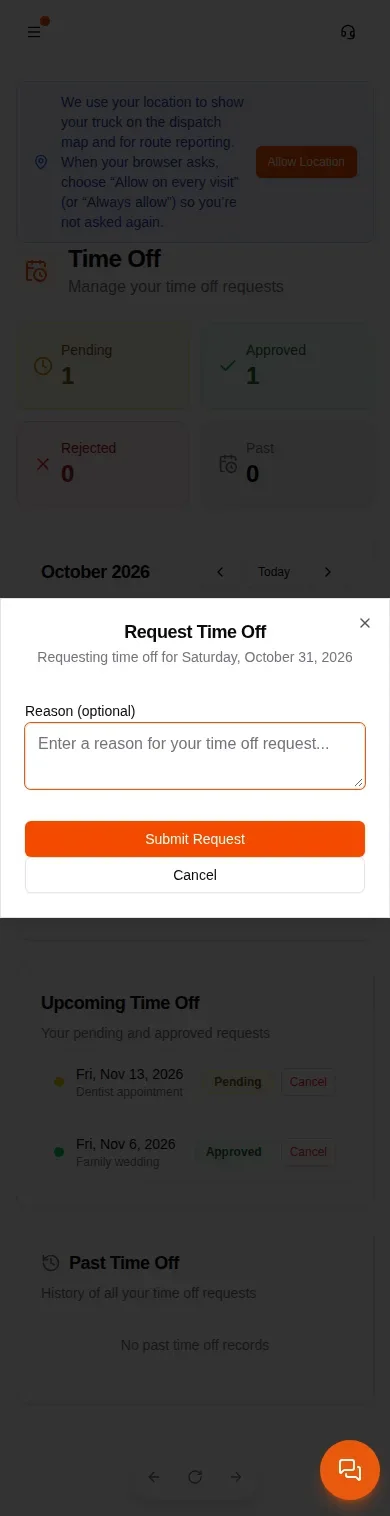
- Tap a future date on the calendar.
- In Request Time Off, add a reason if you like under Reason (optional), then tap Submit Request.
If your office doesn’t need to approve time off, the day is marked off as soon as you tap it.
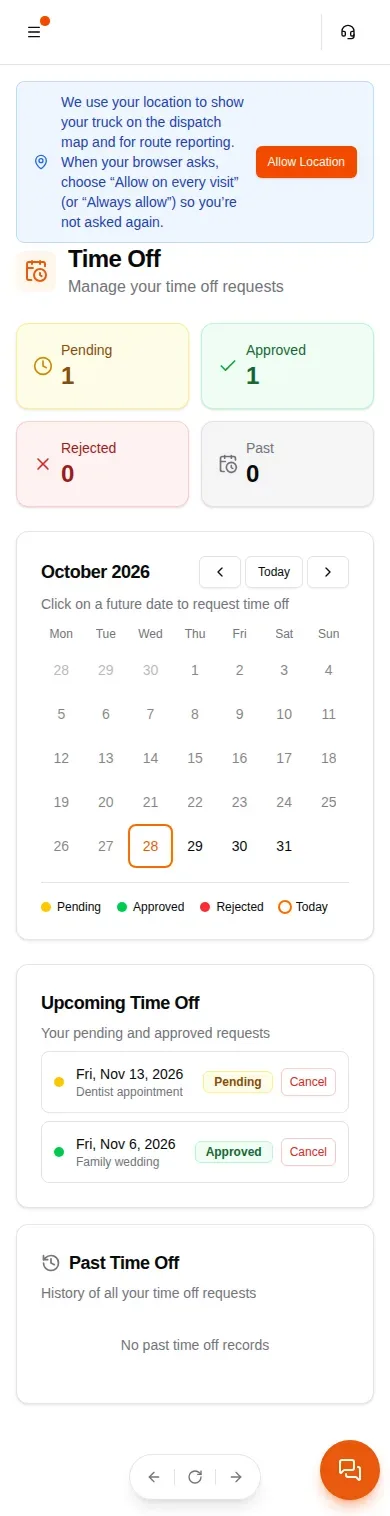
Upcoming Time Off lists your requests. A request waits as Pending until the office answers, then shows as Approved or Rejected. To take a request back, tap Cancel beside it and confirm. A rejected day can’t be requested again from the app, so talk to dispatch.